Can You Create a PowerPoint on an iPad? Here’s How!
Creating a PowerPoint on an iPad is simple! All you need is to download the PowerPoint app from the App Store, sign in with your Microsoft account, and you can start creating your presentation right away. It’s an efficient way to work on your slides whether you’re on the go or don’t have access to a computer.
After you complete your PowerPoint, you can easily present it directly from your iPad, share it with others, or transfer it to your computer for further editing.

Introduction
In the world of presentations, PowerPoint has been a long-standing favorite. Its user-friendly interface and robust features make it the go-to choice for professionals, educators, and students alike. But what if you don’t have access to a computer? Can you still whip up a compelling presentation? Absolutely! Thanks to the technological advancements of tablets like the iPad, creating a PowerPoint presentation is not only possible but also incredibly convenient.
The iPad, with its portability and intuitive touch screen, offers a unique way to create and edit presentations. This is particularly relevant for those who are always on the move or simply prefer the tactile interaction that tablets provide. In this article, we’ll explore how to create a PowerPoint presentation on an iPad, why it’s a useful skill, and who stands to benefit from this knowledge. Whether you’re a student preparing for a class project, a business professional crafting a pitch, or a teacher planning your next lesson, mastering PowerPoint on the iPad will elevate your presentation game.
Step by Step Tutorial: Creating a PowerPoint on an iPad
Before we dive into the steps, let’s clarify what we’ll achieve. By following these instructions, you’ll be able to create a fully-functional PowerPoint presentation on your iPad, complete with text, images, and various slide designs.
Step 1: Download the PowerPoint App
First things first, download the PowerPoint app from the App Store.
Once you’ve downloaded and installed the PowerPoint app, you’re ready to get started. The app is free, but for full functionality, you might need an Office 365 subscription.
Step 2: Sign in to Your Microsoft Account
Open the app and sign in with your Microsoft account.
Signing in allows you to access your saved presentations and utilize the full range of PowerPoint’s features. If you don’t have an account, you can create one easily within the app.
Step 3: Create a New Presentation
Select ‘New Presentation’ to start creating your slides.
Here, you’ll choose from a variety of templates or start with a blank slide. Templates can give you a head start with pre-designed layouts and color schemes.
Step 4: Add Content to Your Slides
Tap on the slide to add text, insert images, or create shapes.
Using the toolbar at the top, you can customize your fonts, add bullet points, and more. Playing around with these features will help you create a more visually engaging presentation.
Step 5: Save and Share Your Presentation
Once you’re satisfied, save your presentation and share it as needed.
You can save your presentation to the iPad, to OneDrive, or to another cloud service. Sharing options include email, a link, or exporting it in a format like PDF.
Additional Information
Creating a PowerPoint on an iPad is a breeze once you get the hang of it. But there are a couple of tips that can make your experience even smoother. For instance, pairing your iPad with a keyboard can speed up your typing and make editing text less fiddly. Also, practicing with different gestures can help you discover shortcuts for a more efficient workflow.
Remember, while the iPad version of PowerPoint is robust, it might not have every single feature that the desktop version has. But for most users, the convenience and mobility it offers can outweigh those minor limitations. And guess what? If you’re presenting directly from your iPad, you can also use your device as a remote control, swiping through slides with a mere touch or click. This can be a game-changer for a seamless presentation experience.
- Download the PowerPoint app from the App Store.
- Sign in with your Microsoft account.
- Create a new presentation.
- Add content to your slides.
- Save and share your presentation.
Frequently Asked Questions
Can i edit a powerpoint on an ipad.
Yes, you can edit PowerPoint presentations on an iPad using the PowerPoint app.
Do I need a Microsoft subscription to use PowerPoint on an iPad?
You can use the PowerPoint app for free, but for full functionality, a subscription might be necessary.
Can I print my PowerPoint from an iPad?
Absolutely, as long as you have a compatible printer.
Will my PowerPoint look the same on an iPad as on a computer?
Mostly yes, although there may be some minor differences due to the app’s features.
Can I use Presenter View on an iPad?
Yes, Presenter View is available on the PowerPoint iPad app.
A PowerPoint presentation can make or break your pitch, project, or lesson. And being able to create one on an iPad not only adds convenience to your process but also ensures you’re never caught off guard without your slides at hand. With just a few taps and swipes, you can craft a professional and engaging presentation from wherever you are.
So next time you’re away from your computer but need to prep for that big meeting or class, remember that your iPad is more than up to the task. Happy presenting!

Matthew Burleigh has been writing tech tutorials since 2008. His writing has appeared on dozens of different websites and been read over 50 million times.
After receiving his Bachelor’s and Master’s degrees in Computer Science he spent several years working in IT management for small businesses. However, he now works full time writing content online and creating websites.
His main writing topics include iPhones, Microsoft Office, Google Apps, Android, and Photoshop, but he has also written about many other tech topics as well.
Read his full bio here.
Share this:
Join our free newsletter.
Featured guides and deals
You may opt out at any time. Read our Privacy Policy
Related posts:
- Can I Convert My Powerpoint to Google Slides?
- How to Save Powerpoint as PDF with Notes
- How to Make a Powerpoint Slide Vertical in Powerpoint 2013
- How to Set Time for Slides in Powerpoint
- How to Insert Slides from Another Presentation in Powerpoint 2010
- What Are Benefits of PowerPoint? A Comprehensive Guide
- How to Check Word Count on Powerpoint 2010
- How to Change Hyperlink Color in Powerpoint 2010 (An Easy 5 Step Guide)
- How to Loop a Slideshow on Powerpoint 2013
- How to Unhide a Slide in Powerpoint 2013
- How to Convert a PowerPoint to Word and Edit with Ease
- How to: Effortlessly Create PowerPoint Looping Presentations
- How to Change the Font on All Slides in Google Slides
- How to Copy a PowerPoint to a New PowerPoint: A Step-by-Step Guide
- How to Delete Email Account on iPhone
- How to Start PowerPoint: A Step-by-Step Guide for Beginners
- How to Change Line Spacing in Powerpoint for Every Slide at Once
- How to Download a Google Slides Presentation as a Powerpoint File
- How to Show Speaker Notes in Google Slides
- How to Insert Check Mark in Powerpoint for Office 365
📒 FREE FOCUS ASSESSMENT : All-New → Get Started!
Capture Your Ideas : Learn Ulysses → Brand New Course!
💌 NEW: Calm Inbox : Less Email, More Focus → Get Access
📒 NEW: 2023 Digital Planner : Made for iPad → Yes, Please!
FREE! Plan Your Ideal Week : Bonus Workshop + Planner → Get the Workshop
NEW! All the Things : Productivity Course → Check it Out
Productivity Workshop : The 4-Part Flywheel → GET ACCESS!
Bundle Up and Save : 25% discount on all app courses → Learn More
Simplify Your Time Management : New Course → Finally!
🧠 To Obsidian and Beyond : All-New Course → GET ACCESS

A Beginner’s Guide to PowerPoint on the iPad
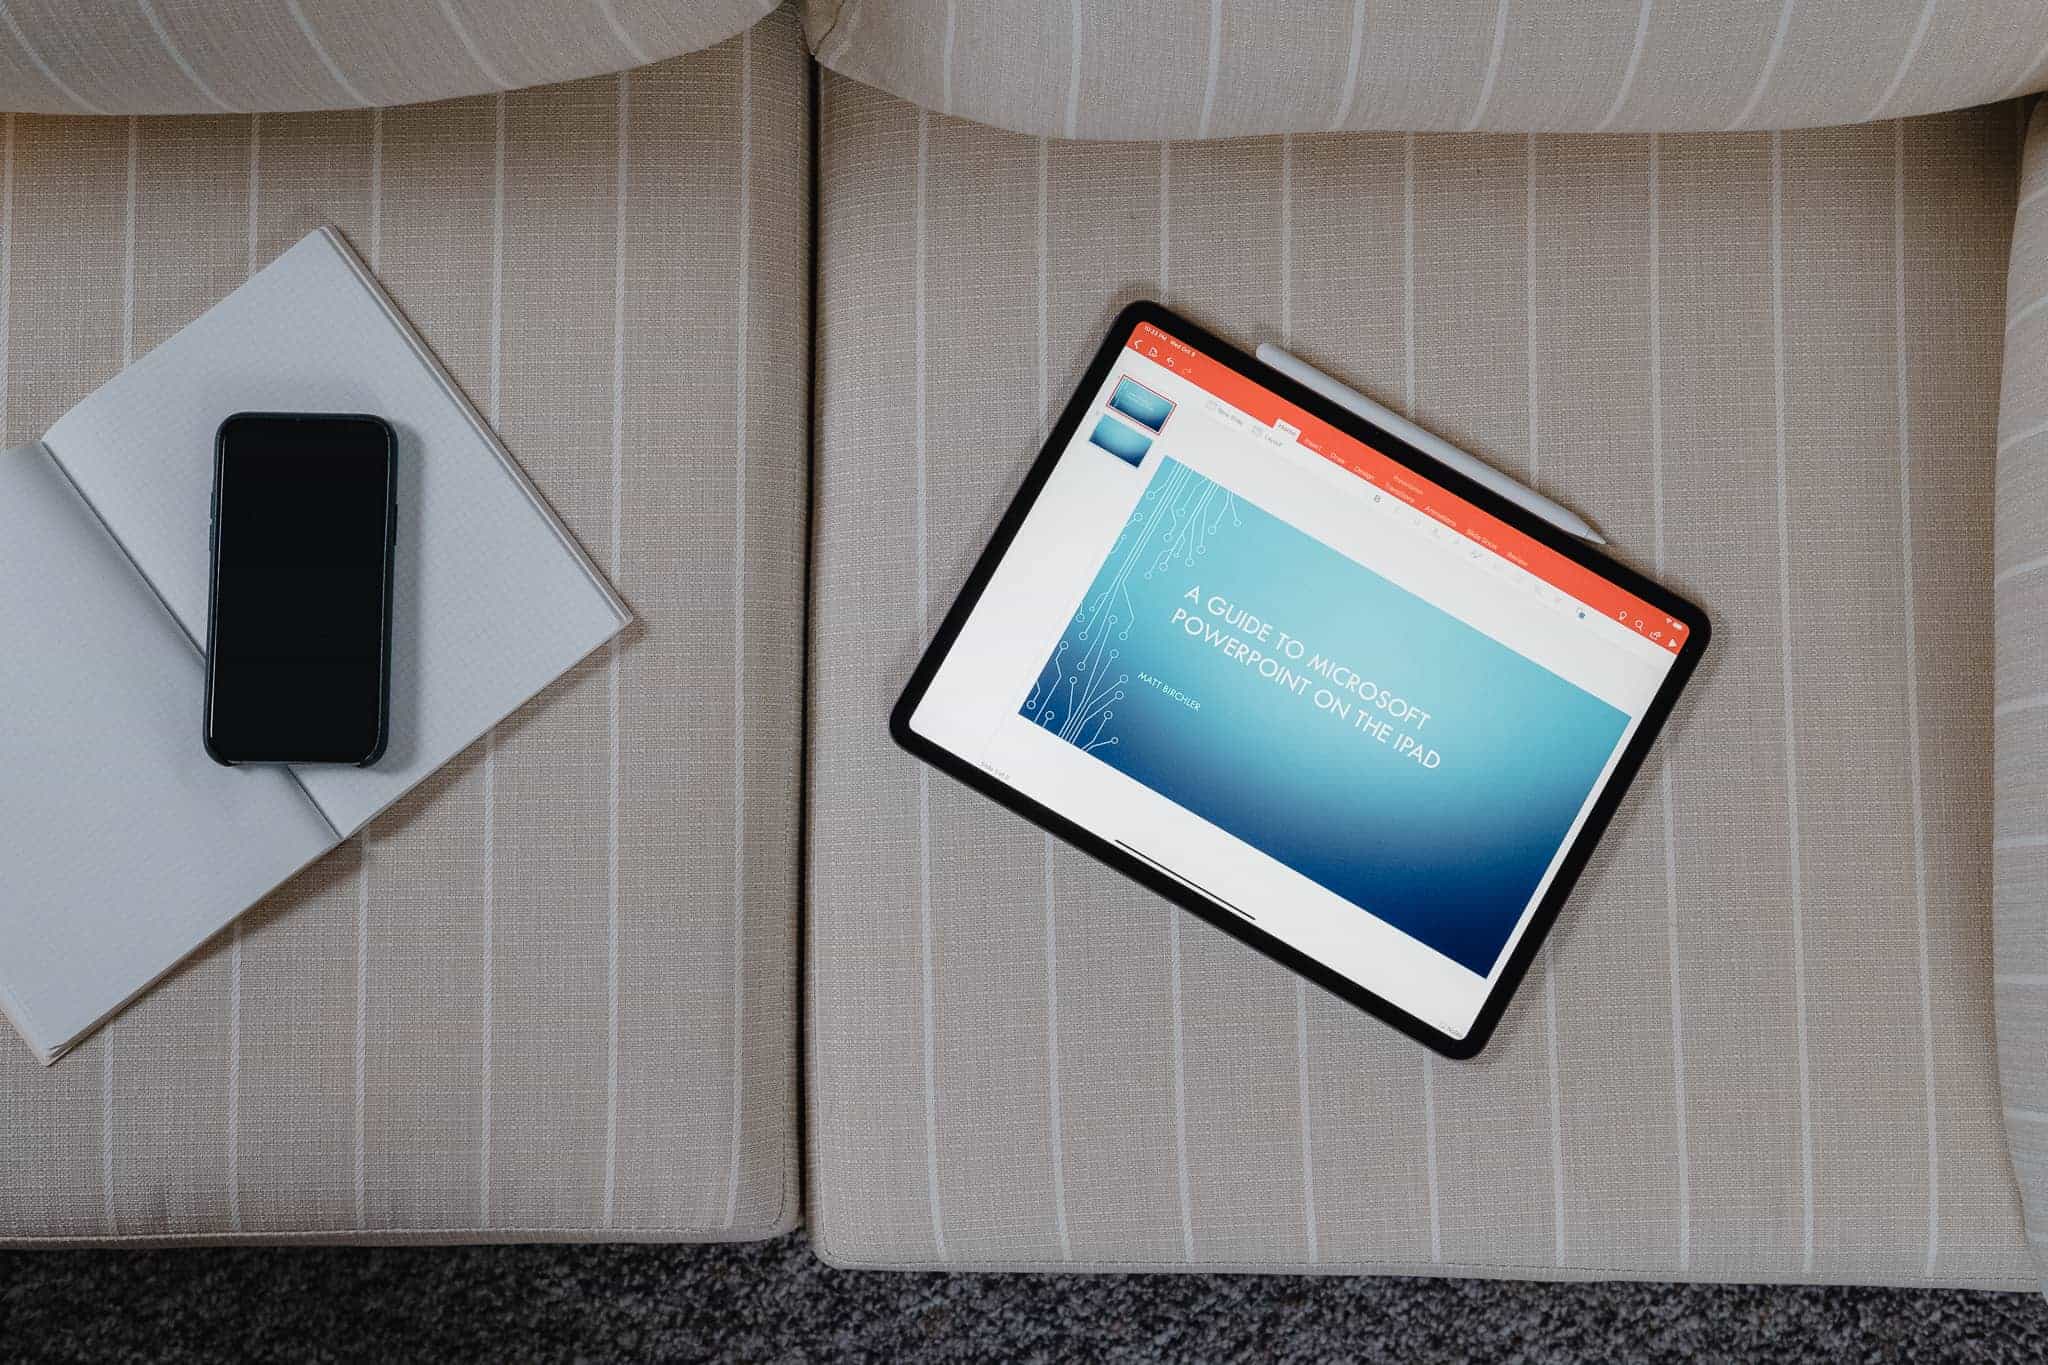
This is the third in our series of articles about Microsoft Office for the iPad, and the results so far have been decidedly mixed. We found Word to be surprisingly powerful and a good alternative to the desktop version for all but the most hardcore word processors out there. Excel was more of a let down with lots more functionality missing, including many elements that would be notable to even light spreadsheet users. We’re happy to report that PowerPoint is much closer to Word than Excel, and even more than either of those apps, you could use PowerPoint perfectly well on your iPad and never touch the desktop version. In fact, some of the design decisions Microsoft have made might even make you put together better presentations than if you had the complete desktop app at your disposal.
Our Must-Have, Most Used Productivity Apps
We spend an inordinate amount of time sorting through hundreds of apps to find the very best. We put together a short list of our must-have, most-used apps for increasing productivity.
PowerPoint for iOS is free from the App Store and allows you to view PowerPoint files from anywhere. If you want to edit or create presentations from the iPad though, you’re going to need to subscribe to Office 365 , which runs $6.99/month or $70/year for individuals on up to 5 devices. An Office 365 subscription comes with the full Microsoft Office suite of apps as well was 1TB of OneDrive storage, so there is quite a bit of value there.
Whether this is a fair price is a matter we can only leave to you, but the software package on offer, and especially the 1TB of cloud storage that works across iOS, Android, macOS, Windows, and Linux, makes this a pretty compelling subscription in our eyes.
Of note, Microsoft only requires iPads over 10.1” to pay up to get editing functionality. If you have a 9.7” iPad, iPad Mini, or even an iPhone, then you can use the full version of PowerPoint (and all other Office apps) without an Office 365 subscription. Apparently productivity starts at 10.1” in Microsoft’s world — not that we’re complaining.
Out of the Box Experience
If you start with PowerPoint on the iPad and want to begin building presentations from scratch, the iPad version gives you everything you need to start creating right away.
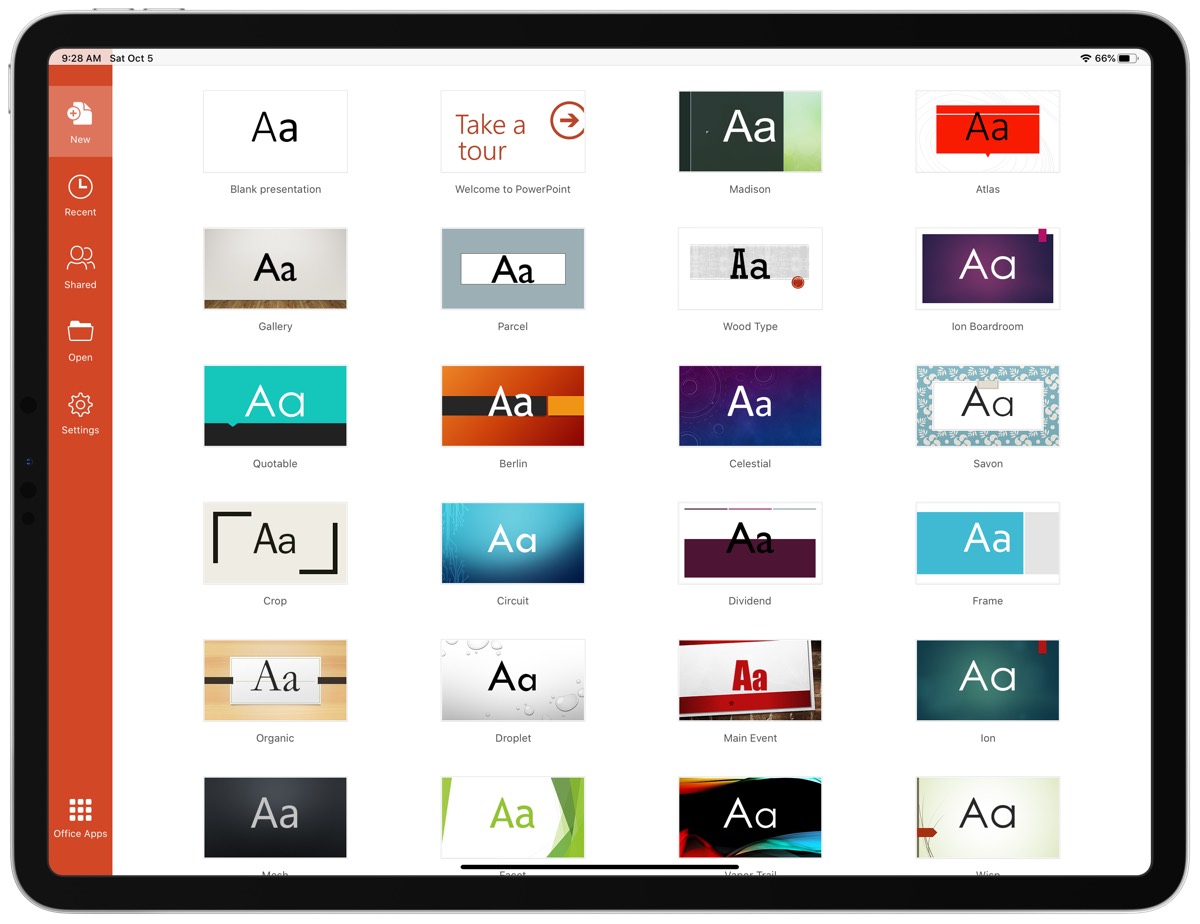
There are 25 built-in templates you can start with. While not all of them are great, ones like Parcel, Celestial, Ion, and Mesh are all really nice templates that you can use to create professional-looking presentations. Some of them are more fun and offer a more distinct look, but for many people, simplicity is king and the options here are more than capable of making you look good at your next speaking gig.
As you would expect, each of these 25 templates have an assortment of slide types so you can move between titles, lists, and giant images with a consistent experience for your audience.
And if you were worried about getting your content into these slides, fear not because PowerPoint for iPad has tons of tools around adding animations to elements on your slides, transitions between slides, drawing on and marking up content, and adding things like tables, images, icons, and videos into your slides.
Basically, if you work entirely from the iPad, you’ll have more than enough control over everything to put together a presentation that you can be proud of.
Adding Some Flair
PowerPoint has quite a few tools for customizing the feel of your presentations, and while I’d contend that adding too many effects and transitions to a slide deck can be detrimental, these can of course be used well and the fact that so much is here should allow most people to create exactly what they want.
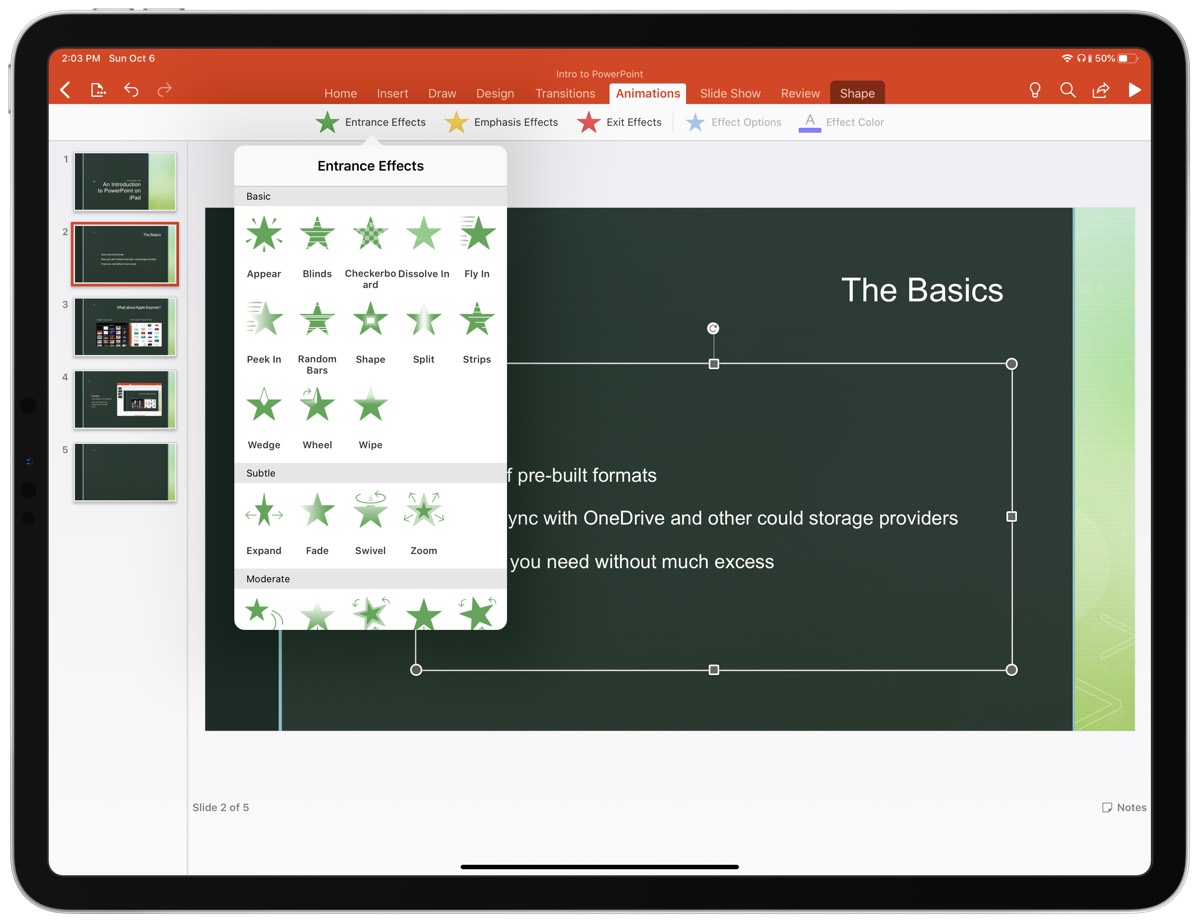
There are 35 ways you can have items on a slide appear or disappear and 17 different ways you can emphasize specific elements on a slide. And if you like transitions, there are a sweeping 49 options for how you move from one slide to another. Should you use all of these? God no. Does this level of flexibility enable a bunch of cool one-off effects? Oh yes!
And then there are a bunch of different drawing tools you can use to add a little panache. Similar to most markup apps you know and love , there are several drawing tools like pencils, markers, and highlighters, as well as a cool cosmic pen that is just fun. You can make this animate into the slide so you can have custom-looking animations that call out something specific on your slides.
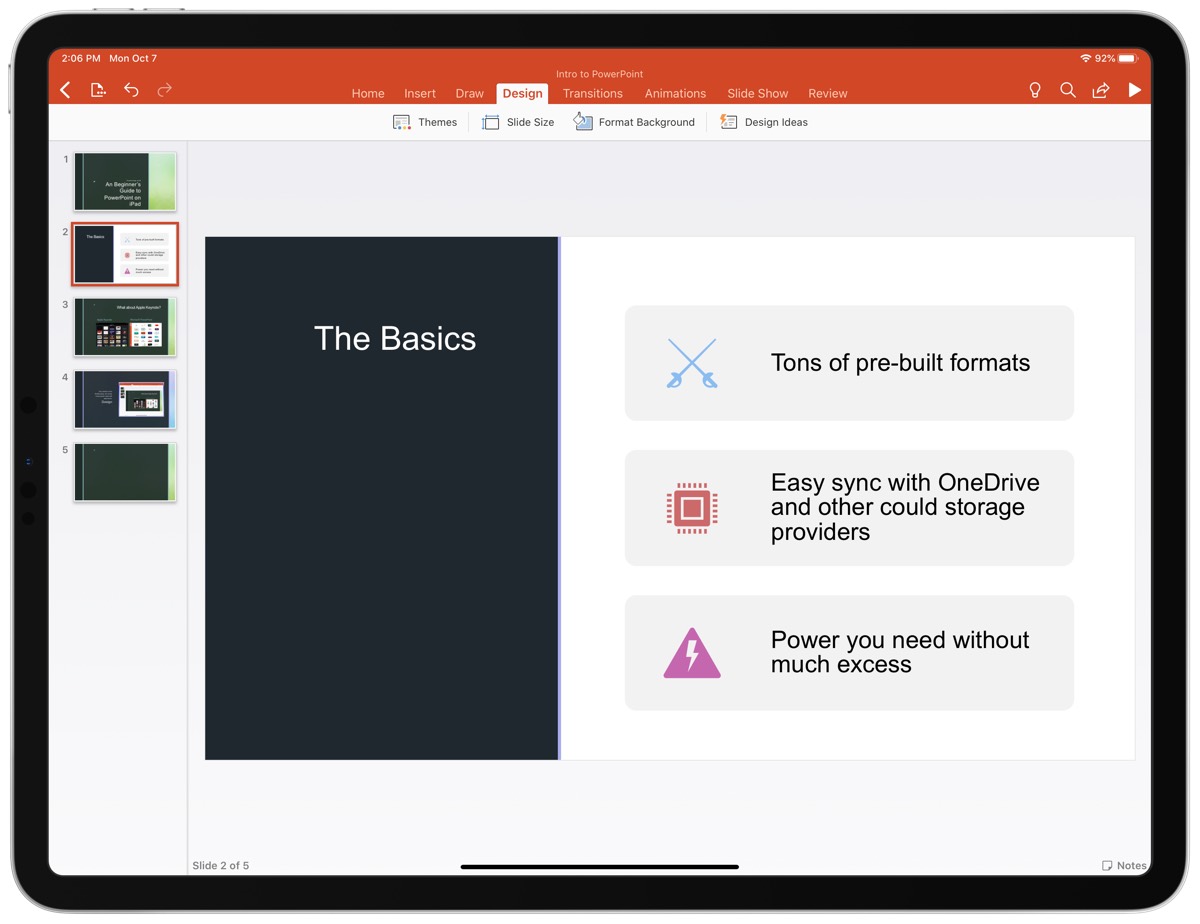
Another thing I really like is a feature called Design Ideas. This is found under the Design tab and you can use it on any slide in your presentation. PowerPoint will look at the content of the slide and give you a few suggestions for alternative styling. For example, I had a basic bulleted list and it suggested this nicer layout for a short list:
One of the things I love about how this is set up in the PowerPoint UI is that none of these effects are visible from the main tabs you’ll use when creating your slides. This breaks up the workflow between content and style. You’ll likely find yourself putting together all your content together across however many slides you need and then going back through it all to add whatever animations and transitions you think you need. Again, since the content of a slide deck is far more important than the flair on top of it, this behavioral encouragement is spot on.
Collaboration
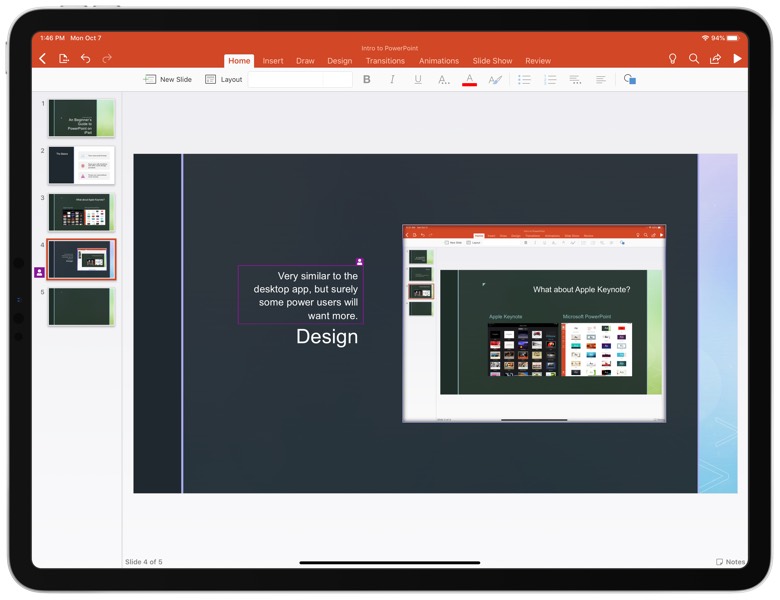
As with Microsoft’s other Office apps, the collaboration features from the desktop and web versions are here and they work great. You can work in real time with anyone else whom you’ve shared the document. You can see their edits in real time and they’ll see yours, no matter the platform they are on.
Comments are supported as well, and you or others can leave comments on certain points of the presentation, and there is even version control so you can go back to potentially dozens of versions of the presentation and restore them (or save them as a new copy).
Giving Your Presentation
The presentation itself is the whole reason for making a slide deck — that experience is rock solid — but might be limited compared to what you have on the desktop.
First off, you can present a presentation you created on the iPad on any device that runs PowerPoint, but if you want to present from an iPad, the easiest way to do so is to plug into the screen you are going to be using via a DisplayPort/HDMI/DVI cable that uses Lightning or USB-C (depending on your iPad). After you’re connected to an external display, you’ll see your slides in all their glory on the external display and the presenter view will appear on the iPad itself.
If you happen to be somewhere that has an AirPlay compatible screen (most likely through an Apple TV), then you can also mirror your screen to the AirPlay device and you’ll get the same effect where the slides show on the AirPlay receiver and the presenter view shows on the iPad.
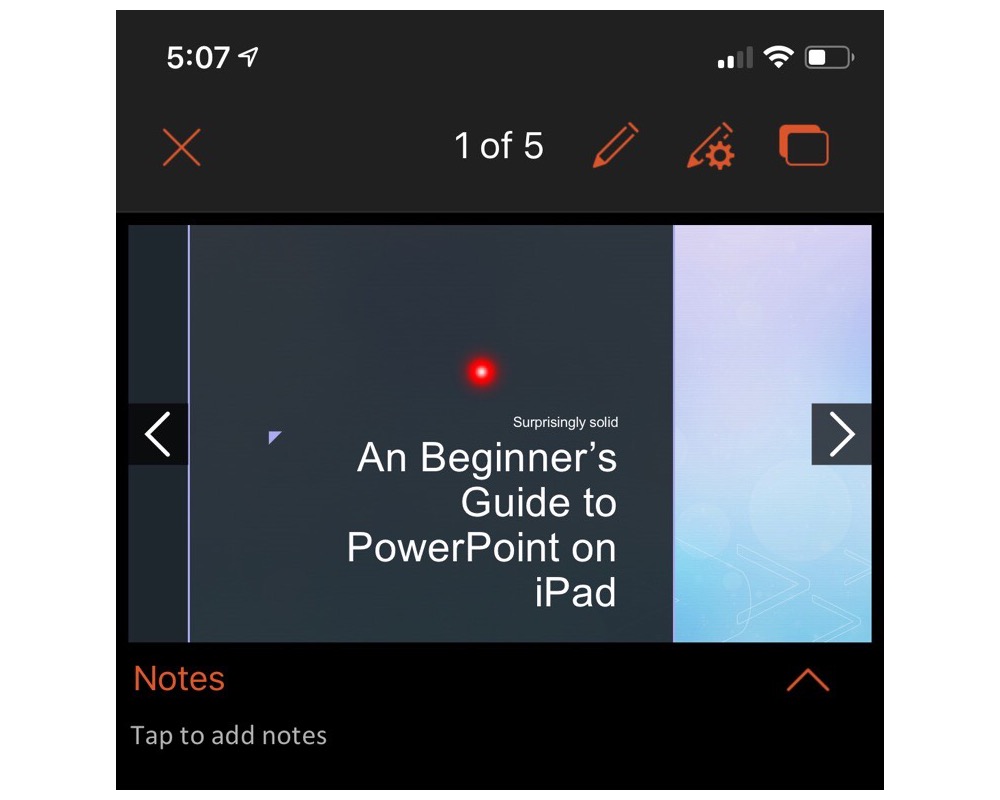
Whether using wired or wireless connections for the presentation, you can always tap and hold on your iPad screen to bring up a virtual laser pointer to point out whatever you want to highlight on a particular slide. It’s actually pretty slick and more useful than I expected it to be.
PowerPoint as a Good iOS Citizen
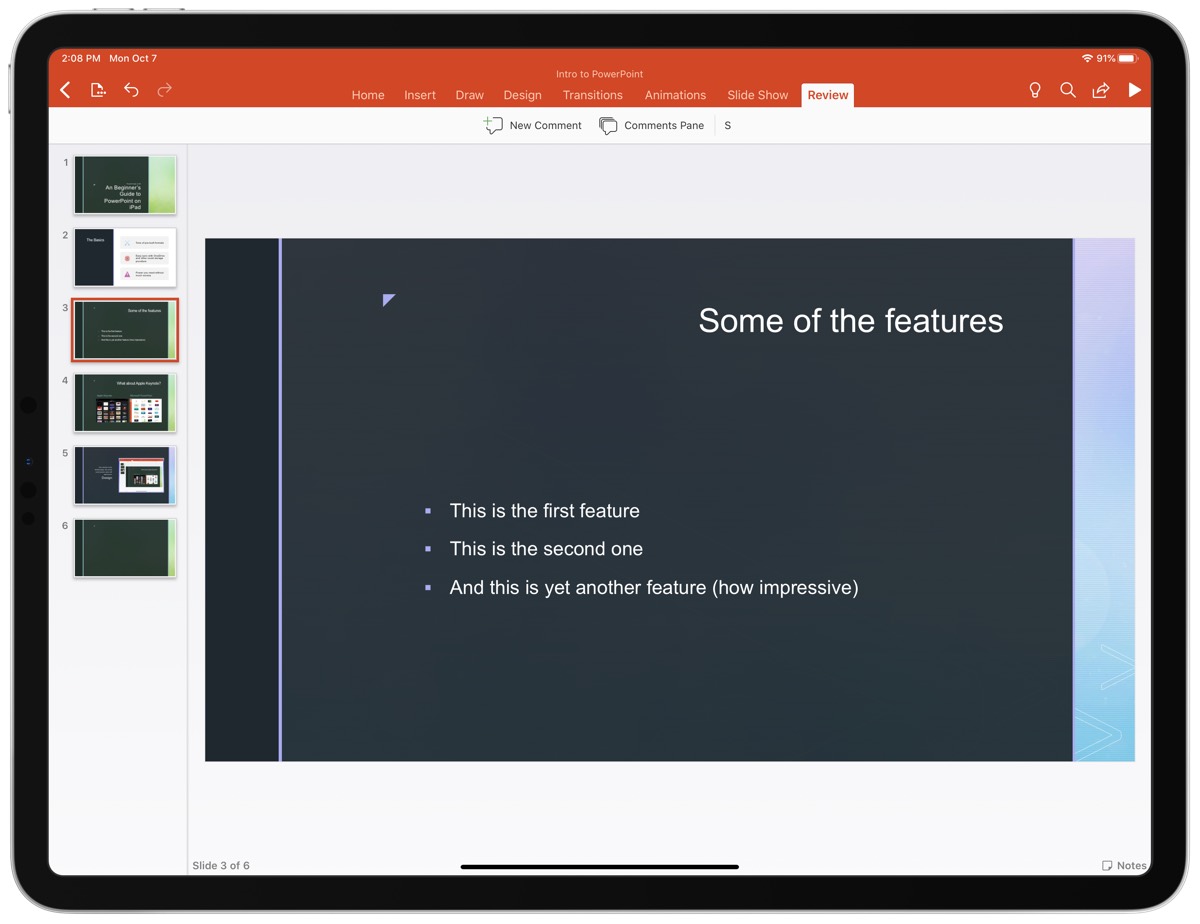
Unlike some other companies who take forever to support iOS’s latest and greatest features, Microsoft has done a pretty decent job of keeping up with the times. Using PowerPoint in late 2019 feels like using an app built to use most of iOS’s (and iPadOS’s) latest features.
Pretty much all the main contenders are here: drag and drop works well and lets you drag in your own media straight from things like Files, Photos, or even Safari and drop them into your slides with ease. The UI for this is rather limited, and you don’t quite know what will happen when you drop something like a photo onto a slide, but you can of course resize and reorient objects once they’re on the slide.
PowerPoint also supports split screen, which is very useful for this sort of app as it allows you to have your research on one side of the iPad and your presentation on the other. I constantly find myself bouncing back and forth when putting together a PowerPoint presentation, and this would be a near deal-breaker for me personally.
The one major iPadOS feature this doesn’t currently support is multi-window. iPadOS 13 enabled apps to have multiple documents open at once and PowerPoint does not support this at all. This is a less egregious omission since most people tend to work on one presentation at a time, but sometimes you might want to reference another presentation that you’ve created or are comparing your slides to ones someone else made.
Overall, PowerPoint strikes a good balance of being unmistakably Microsoft without feeling like a Windows app on the iPad.
Apple Keynote and Google Slides
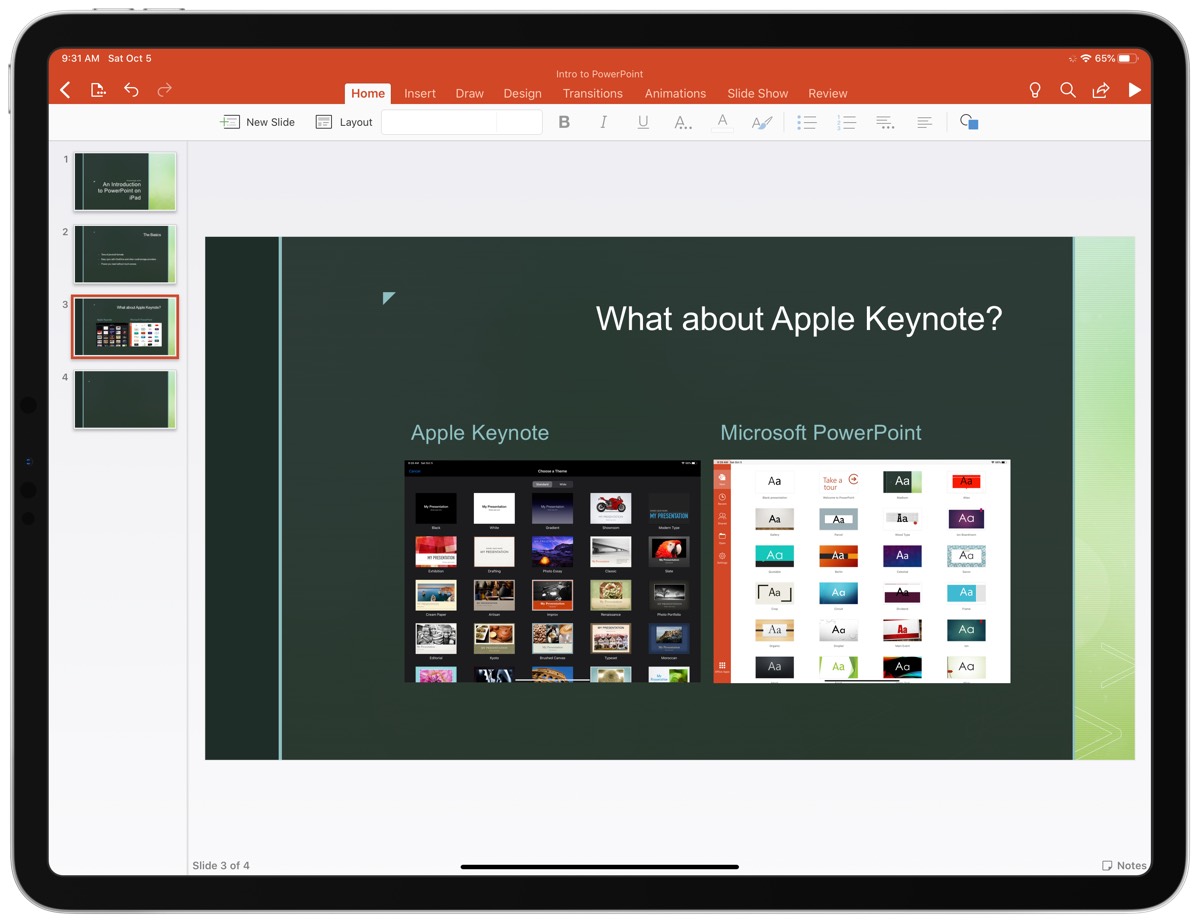
While PowerPoint is the undisputed standard for presentations, the options from Apple and Google are also compelling and have the distinct advantage of each being completely free. Without getting too much into the weeds here, the short overviews of each of these competitors are:
Apple Keynote lets you more easily create great-looking slides with modern, elegant templates. The app also feels more finely tuned to iPadOS’s UI is a very smooth experience from start to finish. Collaboration is a big issue though if you are not working with others on iPads or Macs. And even if you are, the collaborative editing capabilities are far less robust than what Microsoft has in PowerPoint.
Google Slides is a very minimal presentation tool, but it gets the job done. If your needs are very basic and you value a cloud-based solution with great real-time collaborate editing, then Slides can serve your needs very well. But if you want to have a little more style in your deck, then you’re going to be left wanting here. It’s not the end of the world, but it’s certainly not the best in class.
In short, if you value compatibility and collaboration, PowerPoint is the clear winner. If you value great design in your slides and a delightful iPadOS experience, Keynote is king. And if you just want what is on the web and included in your Google account, then Slides will be okay for you, but you’re probably not going to fall in love with it.
Ultimately, many of us don’t have a choice in the apps we use to give presentations. These usually happen at work and the company has some standard in place for creating presentations, so the choice has been made for you already. If you have any say at all in what presentation software to use, then we think PowerPoint is a great way to make them on the iPad.

With a rich set of tools to make everything from basic to wild and flashy presentations possible, it’s bolstered by a robust set of collaboration features as well as the simple fact that it’s the de-facto standard across most of the business world. You’ll probably have little-to-no friction in making this work for you and your business.
If you are working solo or there really isn’t any need to use one app or another, then Keynote is a very compelling alternative, and is the feather in iWork’s cap. it’s an excellent app that makes is dead simple to create professional-looking presentations with very little effort. Oh yeah, and it’s completely free! Not everyone will love this, but it’s definitely something to consider using if you’re not totally sold on PowerPoint.

Can I do a PowerPoint presentation using an iPad?
By: Author Shrot Katewa
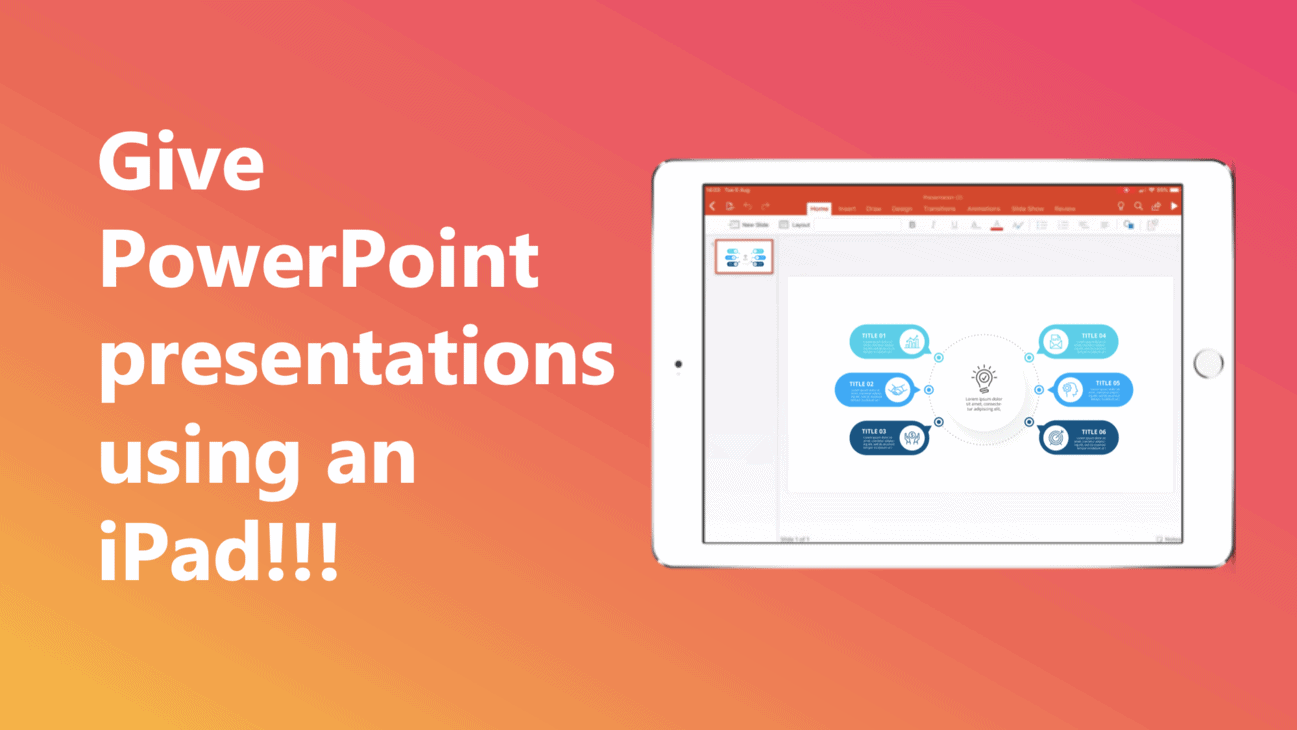
I love my iPad, and If you are like me, you would want to carry it wherever you go. It is compact, light and allows me to get things done that can’t be done using my phone due to its small size! In fact, it is so convenient that it makes me wonder if I could replace my laptop with an iPad even for my client meetings?
But, can I create a PowerPoint presentation using an iPad? Yes, you can create a PowerPoint presentation using an iPad. In fact, iPad has a bunch of different apps that allow you to run PowerPoint presentations on it. iPad’s built-in Keynote presentation software also allows you to view the PPT files. You can also install Microsoft PowerPoint to run, edit and create a PowerPoint presentations from scratch on iPad just as you run it on a laptop!
Running a PowerPoint presentation on your iPad is actually a lot easier than you think. There are, however, a few things you should be aware of. Let’s get into the details of the workings of a PowerPoint presentation on an iPad.
How to put a PowerPoint presentation on an iPad?
Sometimes, you may already have a PPT file that was shared by your colleague or a client. However, many a times, it is you who has to create a PowerPoint presentation that dazzles your audience! Creating a presentation that holds our audiences’ attention is hard. We wrote a post that covers the steps that you should be taking while creating a PowerPoint presentation. We’ve broken it down to a step-by-step process that is designed to help you with creating a presentation. (Link – www.owlscape.in/what-are-the-steps-to-create-a-powerpoint-presentation )
If you have already created a presentation using a laptop or any other computer, you’ll first need to transfer it to your iPad. There are multiple ways you could do this. I would like to share my top 3 favourite method as they are free, doesn’t take too much time, and are easy to carry out as it doesn’t require any technical expertise.
1. Transfer the PPT file to your iPad using your email
This is probably the easiest of all the three options. In all likelihood, you may already have received a PPT file from your colleagues through an email. In this case, all you need to do is simply open your email account on your iPad, click on the email that contains the PowerPoint file, and download it.
2. Transfer the PPT file to your iPad using a cloud storage service
Another quick and easy option is using a cloud storage services. There are plenty of cloud storage services such as Google Drive, Dropbox, and even iCloud. Most of these services offer at least a few GBs of free data storage. Simply upload your PPT file from your computer. Then, login to your cloud storage service on your iPad and download the PPT file on your iPad.
3. Transfer the PPT file to your iPad using WhatsApp
https://www.youtube.com/watch?v=kHShrP6cR88
Video on how to login to WhatsApp on your iPad
Another great way to download the file directly to your iPad is by using WhatsApp. While WhatsApp is a great way to stay in touch with you friends, it is also great to share files. You can ask your colleague to send the file to you over WhatsApp. All you need to do is simply log in to your WhatsApp account on your iPad, open your colleague’s chat message, and download the file.
What is the best app for PowerPoint presentation on iPad?
In our experience, Microsoft PowerPoint is by far one of the best apps to work with PPT presentations on iPad. You can easily download and use, and if you have an Office365 subscription, it allows you access to additional functionalities which come in handy especially if you plan to edit files on-the-go on your iPad. PowerPoint presentation has been the brainchild of Microsoft, and it has been the leader by a long stretch when it comes to the presentation software.
With Microsoft PowerPoint, not only do you resolve the compatibility issues of the PPT files with software, you also get an interface you are familiar with. You can be absolutely sure that PPT file will look exactly as it is intended to when using Microsoft PowerPoint on iPad.
You can download the Microsoft PowerPoint app for your iPad from the App Store.
Is Microsoft PowerPoint app FREE for iPad?
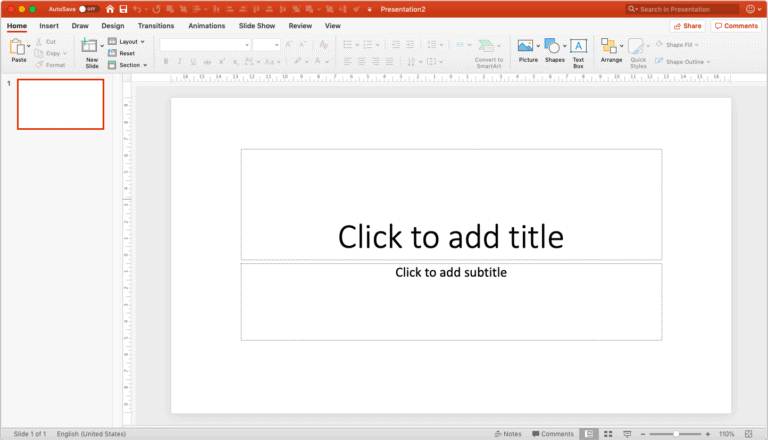
Microsoft PowerPoint app is FREE to download and use on an iPad. Microsoft realise that the future of technology is more towards smartphones and tablets. Thus, they have a strong focus on providing access to user files on-the-go. Although you can edit PowerPoint presentations on-the-go, if you wish to get advanced functionalities, you may want to get an Office365 subscription. Having said that, most of your basic editing needs are covered in the base version of the app.
Are there any other apps for PowerPoint presentation on iPad?
Absolutely! There are several other applications that you can use to open and edit a PowerPoint presentation on iPad. All the other applications have their pros and cons. We have listed down the top 3 alternatives to Microsoft PowerPoint on iPad. They are in no order to preference.
Keynote is the native software that offers an office suite on Mac and iOS devices including iPad. It has been built from the ground up for iPad and iPhone devices. Needless to say, it is one of the most powerful software when working with presentations.
While Keynote allows you to view, open and edit a PowerPoint file, the overall functionalities are different. We’ve also seen that the look and feel of the PPT file does change when using it on Keynote. However, the changes are not major and if you are only planning to view the major contents of the PPT file on your iPad, Keynote is effective.
2. Google Slides
The best part about Google Slides is that it allows real-time collaboration on projects with its online office suite. This is great especially when your team is not based in the same location as you are.
Google Slides is also compatible with PPT files. It allows you or open, view and edit PowerPoint files on your iPad. Google Slides is FREE . All you need is a Google account to start using it.
3. WPS Office
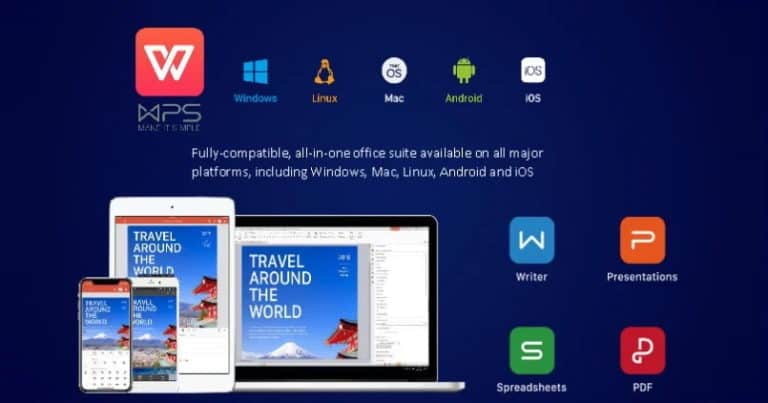
Image credit – Mr. Phone
WPS stands for Writer (W), Presentation (P), Spreadsheets (S). It is our favourite alternative to Microsoft Office suite. It has been designed with Microsoft Office users in mind. Thus, the look and feel of WPS Office has striking similarities to that of MIcrosoft Office. For all the Microsoft Office users, WPS Office makes you surprisingly feel just at home.
If you are looking to a cheaper/free alternative to Microsoft Office suite that looks and feels just like MS Office, in our experience WPS Office by far the best option for you. It was designed with Microsoft Office users in mind. It was originally launched for Windows, however, WPS Office suite 2019 version has been expanded to both Linux and Mac users as well.
WPS Office is now also available for Mac and iOS users. You can download WPS Office directly from the App Store or visit the download section on their website . WPS Office is FREE to use although simply signing up for an account with them gives you access to premium feature for 1 year.
What equipment will I need to do a PowerPoint presentation using an iPad?
What makes the iPad really powerful is that it allows you to connect to a projector and project the presentation on a bigger screen. This comes in really handy as this negates the need to carry any laptop. Alternatively, if you consider laptop to be your first choice, instead of carrying an additional spare laptop, you can keep an iPad device as a backup just in case your laptop fails to work.
https://www.youtube.com/watch?v=y0Z6VGNlxbc
Video on how you can connect your iPad to a projector
There are multiple ways to connect your iPad to a Projector. Two of the most common ways are –
- HDMI connection
- VGA connection
For both the connections, you will need to buy an additional connector cable that allows you to connect the two devices.
Our personal preference is to use the VGA connector. Main reason for this is the fact that a VGA connector allows the sound to be played from the iPad itself as opposed to a HDMI connector. In an HDMI connection for an iPad, the sound is played through your projector. Another reason for preference of a VGA connector over an HDMI connector is that it is more widely available as a default connection option to the projector in most corporate offices. However, connector preference comes down to a personal choice.
So, is it worth it???
We started this article wondering whether we could do a PowerPoint presentation using an iPad, and whether we could carry an iPad to our meetings instead of a laptop. With the availability of Microsoft PowerPoint application for iPad and several other alternatives to open a PPT file on iPad, as well as the possibility to connect the iPad to a projector, we can safely conclude that an iPad can be used as a replacement to a laptop while meeting clients!
Psst… please share!
If you enjoyed reading the article, please leave us a comment below and share this with you network. This acts as a great motivation for us to keep creating useful content for your folks!
- Apple Watch
- Accessories
- Digital Magazine – Subscribe
- Digital Magazine – Info
- Smart Answers
- Let Loose iPad event
- New iPad Pro
- New iPad Air
- Best Mac antivirus
- Best Mac VPN
When you purchase through links in our articles, we may earn a small commission. This doesn't affect our editorial independence .
Presenting with the iPad

Get it together
Apple’s $10 Keynote for iOS ( ) can import presentations made in Microsoft PowerPoint ( ) or in Keynote for OS X ( ), but in both cases you’re likely to lose a great deal during the import process. Say goodbye to some fonts, transitions, and builds that aren’t available on the iPad, plus audio and more. (Presenter notes are supported, however, whether created on the iPad or imported from a PowerPoint or Keynote for Mac presentation.) Therefore, when feasible, create your presentation directly on the iPad.
If you do use Keynote on a Mac, be sure to read Apple’s Best practices for creating a presentation on a Mac for use on an iPad , which guides you in selecting compatible templates, fonts, and other features. Once you’ve created your presentation, you need to move it to your iPad. Although the iOS version of Keynote supports iCloud’s Documents in the Cloud feature, which automatically syncs documents on all your iOS devices with Apple’s servers, the Mac version of Keynote still lacks integrated support for this feature. ( OS X 10.8 Mountain Lion will have access to iCloud’s Documents in the Cloud.)
Instead, you must log in to your iCloud account in a Web browser at www.icloud.com , click the iWork icon, click Keynote, and then drag your Keynote document into the browser window. After it uploads, the document will appear automatically in Keynote on your iOS device—but keep in mind that this process doesn’t eliminate the compatibility issues I mentioned a moment ago.
If you don’t use iCloud, another way to move the presentation onto your iPad is to open iTunes, select your iPad, click on the Apps tab, and select Keynote. Drag your presentation to the Keynote Documents list. Then open Keynote on your iPad, go to the Document Manager (if it’s not already visible), tap the folder icon in the upper-right corner, and then tap your presentation. Or, if you want the convenience of cloud-based syncing without iCloud, a service called DropDAV ($5 per month) enables Keynote users to connect to Dropbox ( ) via WebDAV.
One note: If you’ve already created a presentation in PowerPoint, also take a look at SlideShark , a free iPad app for viewing and displaying PowerPoint presentations. It’s not perfect, but it does a better job supporting PowerPoint documents than any other iPad app I’ve seen.
Use an external display
If your audience is very small—perhaps you’re showing your portfolio to a potential client or giving your boss a quick demo—you could show your presentation on the iPad itself, albeit without the presenter notes. But you’re more likely to prefer using a projector or other display.
Plug it in One way to do this is to plug a video adapter into your iPad’s Dock connector, and then connect that to your display. You’ll get the best results (and the highest resolution) using a display or projector with either the $39 Apple Digital AV Adapter (for displays with HDMI inputs) or the $29 Apple VGA Adapter (for displays with VGA inputs).
If you’re connecting to a television with neither HDMI nor VGA inputs, you can instead use the $39 Apple Component AV Cable or the $39 Apple Composite AV Cable , as appropriate, although both offer lower resolution than the Digital AV and VGA adapters. Although this wired approach works just fine, it’s difficult to hold your iPad while giving a presentation without the video cable falling out—I speak from personal experience.
Mirror a newer iPad With an iPad 2 or later, either the Digital AV or VGA adapter lets your iPad mirror everything from its internal screen onto the external display, which may be useful if you want your presentation to include demonstrations of other iPad apps or content that’s not within Keynote itself. However, note that on the original iPad, where mirroring is unavailable, Keynote itself produces no external video signal until you tap the Play button (which is probably what you want anyway).
If you prefer to roam across the stage holding your iPad while you speak, you can beam your presentation’s audio and video wirelessly using AirPlay mirroring—provided you have an iPad 2 or later running at least iOS 5. To pull off this trick, you’ll need an AirPlay receiver connected to the projector or display and on the same Wi-Fi network as your iPad. Apple’s $99 Apple TV ( ) can serve this purpose, if you happen to have one handy. Alternatively, assuming a Mac or PC is available, you can install either of two similar utilities: AirServer (Mac version, $15; Windows version, $8) or Squirrels’ Reflection (Mac only, $15). Either of these apps can turn a computer into an AirPlay receiver, no Apple TV required. They even support displaying screens from multiple iOS devices at the same time. Note that the PC version of AirServer currently lacks audio support, but the developer says it’s “coming soon.”
Once your AirPlay receiver is set up, you can mirror your iPad’s display by double-pressing the Home button, swiping the multitasking bar toward the right, and tapping the AirPlay button. Tap the name of the device you want to use for mirroring and then set the Mirroring switch to On.

Control the presentation
Once you tap Play, you can use your iPad to control the presentation as well as provide presenter notes for yourself (a cheat sheet, if you will) that the audience won’t see. To change what’s on the iPad’s screen when using an external display, tap the Layouts icon and then one of the follow buttons: Current (the current build of the slide as shown on the external display), Next (the next build, which may or may not be the next slide), Current and Next (current and next builds side by side), or Current and Notes (current build and any accompanying presenter notes). This final layout is the only one to display presenter notes, but you can supplement it by tapping the button in the upper left corner to display a list of slide thumbnails, which can aid in navigation (tap a thumbnail to jump directly to that slide).

To advance to the next build or slide, tap once anywhere, or swipe toward the left. To go back, swipe toward the right. A nice extra in Keynote for the iPad is a “laser pointer”: Touch and hold on the iPad’s screen to show a red dot, which moves with your finger on the main display. Lift your finger and the dot disappears. This is useful when you want to call attention to a particular area of a slide. To end the presentation (and turn off Keynote’s video output), tap the Close icon.

If your iPad is physically connected to your display—or if you want to be able to move around during your presentation without carrying the iPad with you—you can download Apple’s Keynote Remote app ($1) on your iPhone or iPod touch. Follow the instructions to pair Keynote Remote with your iPad using Wi-Fi or Bluetooth, and then your iPhone or iPod touch becomes a remote control for Keynote on your iPad, complete with previews of your slides.
Senior contributor Joe Kissell is the senior editor of TidBits and the author of the ebook Take Control of Working with Your iPad .
[Editor’s note: This story has been updated to include information about iCloud, AirPlay, and the third-generation iPad.]
iPad 2 family
Our Recommendations
- Best Small Business Loans for 2024
- Businessloans.com Review
- Biz2Credit Review
- SBG Funding Review
- Rapid Finance Review
- 26 Great Business Ideas for Entrepreneurs
- Startup Costs: How Much Cash Will You Need?
- How to Get a Bank Loan for Your Small Business
- Articles of Incorporation: What New Business Owners Should Know
- How to Choose the Best Legal Structure for Your Business
Small Business Resources
- Business Ideas
- Business Plans
- Startup Basics
- Startup Funding
- Franchising
- Success Stories
- Entrepreneurs
- The Best Credit Card Processors of 2024
- Clover Credit Card Processing Review
- Merchant One Review
- Stax Review
- How to Conduct a Market Analysis for Your Business
- Local Marketing Strategies for Success
- Tips for Hiring a Marketing Company
- Benefits of CRM Systems
- 10 Employee Recruitment Strategies for Success
- Sales & Marketing
- Social Media
- Best Business Phone Systems of 2024
- The Best PEOs of 2024
- RingCentral Review
- Nextiva Review
- Ooma Review
- Guide to Developing a Training Program for New Employees
- How Does 401(k) Matching Work for Employers?
- Why You Need to Create a Fantastic Workplace Culture
- 16 Cool Job Perks That Keep Employees Happy
- 7 Project Management Styles
- Women in Business
- Personal Growth
- Best Accounting Software and Invoice Generators of 2024
- Best Payroll Services for 2024
- Best POS Systems for 2024
- Best CRM Software of 2024
- Best Call Centers and Answering Services for Busineses for 2024
- Salesforce vs. HubSpot: Which CRM Is Right for Your Business?
- Rippling vs Gusto: An In-Depth Comparison
- RingCentral vs. Ooma Comparison
- Choosing a Business Phone System: A Buyer’s Guide
- Equipment Leasing: A Guide for Business Owners
- HR Solutions
- Financial Solutions
- Marketing Solutions
- Security Solutions
- Retail Solutions
- SMB Solutions
How to Set Up a Presentation Using Your iPhone or iPad

Table of Contents
These days, we’re more reliant than ever on mobile devices for productivity and connectivity, even in work scenarios like conferences and seminars. It’s easy and convenient to power your presentations with an iPhone or iPad, but you might not know how to connect to an external display.
We’ll explain how to mirror a small screen to a more prominent display such as a smart TV, projector or monitor, whether you’re prepping for a presentation in a smart office or streaming content at home.
How to give presentations from your iPhone or iPad
Bring your mobile presentation to life by connecting your iOS device to an external display. Several technologies can power mobile presentations on a larger screen, including AirPlay, which allows streaming and screen mirroring.
We’ll explain how sending your presentation to an external display works for the most common devices you’ll encounter.
1. Send an iOS presentation to an Apple TV.
Mirroring your presentation from an iPad or iPhone to an Apple TV is straightforward. Here’s how it works:
- Power on your Apple TV. Make sure it’s on the same Wi-Fi network as your iOS device.
- On your iOS device, load the presentation or content you want to share to the Apple TV.
- Tap the AirPlay icon . (It looks like a rectangular screen with a triangle at the bottom.)
- Choose your Apple TV .
- Your content will begin. To stop streaming, tap the AirPlay icon in the app you’re streaming from.
2. Send an iOS presentation to a smart TV.
If you have an internet-enabled smart TV, you have a few options, depending on your TV model.
AirPlay 2-compatible smart TVs
If you have an AirPlay 2-compatible smart TV, such as select Samsung models, LG TVs and Roku TVs, the process is nearly the same as using AirPlay with an Apple TV:
- On your AirPlay 2-compatible smart TV, go to Settings > General > Apple AirPlay Settings and enable AirPlay .
- Tap the AirPlay icon .
- Select your AirPlay 2-compatible smart TV.
- Play your presentation or content.
Smart TVs that aren’t AirPlay 2-compatible
If your internet-connected smart TV isn’t AirPlay compatible, consider a third-party mirroring app like AllCast. AllCast is an iOS app that wirelessly streams your phone’s content to an external monitor. Here’s how it works:
- Download AllCast from the App Store on your iOS device.
- Launch AllCast and tap the broadcast icon . It will find compatible devices on your network.
- Select your smart TV.
AllCast is also compatible with Roku devices, Amazon Fire TV devices, Apple TV, Microsoft Xbox consoles, and smart TVs from Samsung, Sony, Panasonic and more. While AllCast is free to download and use, in-app purchases allow you to remove ads and unlock features.
3. Send an iOS presentation to a Mac.
If you want to send your iOS presentation to a larger Mac, the process is simple.
- Make sure your iOS device and Mac are on the same Wi-Fi network.
- On your iOS device, open the Control Center.
- Tap Screen Mirroring .
- Select your Mac.
- You may see an AirPlay passcode on your Mac screen. If so, enter the code on your iOS device.
4. Send an iOS presentation to a non-smart TV or projector.
Working with an old-school TV or a projector that doesn’t connect to the internet? Not a problem. Use a connector or adapter to achieve the same effect as mirroring.
Connect to a monitor with an adapter.
If you have access to a monitor and you don’t want to connect wirelessly, opt for an old-fashioned cable adapter. Apple sells a Lightning digital AV adapter with an additional power port (so you can charge your iPhone or iPad while you present from it).
At $49, Apple’s adapter is pricey for a one-off presentation, but if you travel a lot, the purchase could be worthwhile. Using Wi-Fi across various venues can be a gamble. If you’re presenting to clients, you may not want to roll the dice.
Connect to a projector with an adapter.
Many modern projectors have proprietary apps to connect to wirelessly from mobile devices, but they vary drastically in quality, availability and compatibility. If you want to be certain of your ability to connect to a specific projector, an adapter is an excellent option.
Newer projectors typically have HDMI and VGA ports. If you have a choice, opt for an HDMI adapter because it’ll be more versatile. If you need to connect to an older projector, you will probably have to connect using a VGA adapter; Apple sells one (also priced at $49) with an added charging port, so you don’t run out of juice.
FAQs about sending an iOS presentation to an external display
If you’re having trouble connecting your iPad or iPhone to a monitor or have other questions about creating a great presentation, you’ll find commonly asked questions below.
What is screen mirroring?
Screen mirroring is the process of displaying the contents of a device like an iPad or iPhone on another device, such as a television, external monitor or projector. Screen mirroring is sometimes confused with screencasting, which is the process of recording everything happening on your screen.
Why do people use screen mirroring?
Screen mirroring is helpful anytime you want to share small-screen content on a big screen. People use screen mirroring in both personal and professional settings, including watching entertainment and running through presentations.
Can you screen mirror without Wi-Fi?
The only way to screen mirror without Wi-Fi is to use a cable connection or adapter. Screen mirroring apps won’t work if you can’t access Wi-Fi. In fact, if you’re using a screen mirroring app, the device you’re mirroring from and the device you’re mirroring to have to be on the same Wi-Fi network.
One significant benefit of buying an HDMI adapter is that you no longer need to worry about Wi-Fi access when mirroring – you can plug in the cord and get started.
What are the best iPad apps for creating presentations?
There are many excellent presentation tools for all platforms. Keynote is Apple’s answer to PowerPoint, and it’s a go-to among professionals who use Apple devices because it’s a free download from the App Store. You can also use PowerPoint on Apple devices via the PowerPoint mobile app. If you want to try something different, Google Slides is the current black horse in the presentation software arena, and it’s also available through Apple’s App Store.
Do I need an adapter to connect my iPad to my TV?
If you have Apple mobile devices and want to share content with a broader audience, an adapter is an excellent option. An adapter’s main advantage is allowing you to connect to nearly any external monitor. Adapters are helpful for people who want to mirror to an older TV or monitor without internet connectivity, as well as anyone who frequently hosts presentations in places without open Wi-Fi networks or smart monitors.
Can you screen mirror with an Android device?
Yes. Android and iOS both support business uses , such as screen mirroring for presentations. You can mirror your Android, PC or Google device on an external screen or projector with a built-in app, Bluetooth, a third-party app or an HDMI adapter. If you go down the app and Bluetooth route, ensure that your mobile device and the external monitor are connected to the same Wi-Fi network.
Mona Bushnell contributed to the writing and research in this article.

Building Better Businesses
Insights on business strategy and culture, right to your inbox. Part of the business.com network.
- Skip to primary navigation
- Skip to main content

8 Things I’ve Learned Using an iPad for Presentations
I love using my iPad for travel to conferences, and not just because it’s so lightweight and its battery lasts all day. For one thing, with the LTE version I’m not beholden to conference Wi-Fi; while some conferences have good connectivity, I never want to count on it. With the iPad I can nearly always get online.
But the iPad isn’t convenient only for attending conferences. It’s a good tool for presentations, too-or at least an excellent backup for a dedicated computer. I can easily be ready to present if I have a last-minute computer replacement.
Still, I had some things to learn the hard way about using an iPad for presentations. Perhaps I can save you a few steps.
The Basics of Getting Started
Learn the differences between “desktop” keynote and the ipad version.
While I present nearly exclusively from an iPad, I usually build my initial presentation on a Mac. I build all of my presentations in Keynote, and store them in iCloud. I can (and do) make tweaks to a presentation on-site via the iPad version of Keynote, but it always feels as though I’m slightly fighting with the software.
Keynote supports a customizable presenter display in both versions. On the Mac desktop version, you can pick three ways to give yourself that during-the-talk cheat sheet, instructing it to show you the current slide, next slide, and presenter notes. On the iPad, the presenter display options only give you a “two out of three” option, between current slide, next slide, and presenter notes. I begrudgingly pick Next Slide and Presenter Notes, and then I hope the venue has a confidence monitor that shows me what’s on the projector behind me.
Some folks prefer to use Powerpoint or Google Slides. This distills down to religion, and I can confidently state that those people are wrong. Both tools offer iPad versions as well, but I’m not well versed in them. Deckset doesn’t offer an iPad version, and I’ve not had much patience for the swath of custom JavaScript-based presentation tools that render Markdown inside of browsers. I want to like them, but I can’t quite get there yet. As a result, use Keynote; you’ll be happier. As an added bonus, the presentations live in iCloud; with a bit of notice you can grab a copy on someone’s Mac, iPhone, or iPad and be back in business should calamity befall your iPad.
Do be aware that this means that if your presentation requires a demo in a terminal or a web browser, you either get to do some awkward transitions—or accept that presenting from an iPad isn’t right for this talk. I still haven’t found a good way to give my “Terrible Ideas in Git” talk from an iPad due to its live demos…
Invest in a presentation remote
A presentation remote is a necessity, unless you enjoy being trapped behind the podium. I treated myself to a little luxury with the Logitech Spotlight .
This device does it all. It speaks its own wireless protocol via a USB-A dongle that plugs into most laptops, but the Spotlight also speaks Bluetooth with a great range. Its battery charges using a built-in USB-C port that hides behind the dongle, and a single charge lasts for months.
I freely accept that most folks find the idea of paying $129 for a single-purpose device a bit nutty. Those folks generally don’t give double-digit numbers of presentations a year. A word of caution: Don’t leave it behind at the podium after your talk. It’s expensive enough to buy the first time. Please don’t ask me how I know.

Pay attention to fonts and typefaces
I have a condition I jokingly refer to as “typeface blindness.” I can’t tell the difference between most fonts unless I stare at them and actively work out what I’m seeing. I’m told this is atypical, and whenever I forget this fact I get reminded on Twitter. “Well, that’s the fifth talk so far today that uses Helvetica (the system default)” always makes me facepalm. As a result, I make it a point to not use system default fonts.
Contrary to what many folks believe, you can use custom fonts on iOS, but the process is a bit arcane. Do yourself a favor and drop the $2 for AnyFont . This magic app streamlines an otherwise incredibly painful process.
Lessons I’ve Learned
I’m conservative here; while you can save money by buying third party adapters, I find that minimizing the risk of screwing up a presentation in front of 400 people is worth the extortionate rate that Apple charges for first party adapters. You’ll want both HDMI and VGA adapters. Both of these are available in Lightning and USB-C flavors, depending upon which generation of iPad you’re using. Note that this is less of a concern with USB-C than it is with Lightning adapters—just make certain you test all of your adapters before you leave home.
Save time; don’t bother looking for DVI adapters. The iPad officially doesn’t support it, Apple doesn’t sell them for Lightning, and I’ve only ever encountered it on the speaking circuit once. Your test a few hours before your talk will validate that you’ll be okay.
You can never be too rich, too thin, or have a big enough battery pack
Grab a beefy battery pack, and you can go days without finding a power outlet. You don’t want to discover that the podium power strip is full, the extension cord is a trip hazard, or that you don’t have the right adapter for the country you’re in when it’s time to give a talk. Having a battery pack that can borderline jump-start a car means you’re fine so long as your iPad battery level is anywhere about roughly 3%. (Too much lower and the tablet won’t boot at all.)
I like Anker products for this, but your mileage may vary. I soundly endorse finding reputable brands. Saving a few bucks on chargers, cables, or batteries that (a) plug into a very expensive electronic device and (b) have a propensity to include “sets the building on fire” in their list of failure modes just never seemed worth the trade-off to me.
Note: If you need to give away something at a booth, don’t use branded USB battery packs or chargers, as swag. At best, they’re cheap and feel flimsy. At worst, something with your logo on it started a fire.
Spend extra for an LTE connection
You can tether your iPad to a mobile device or ride on conference Wi-Fi. However, if you’re presenting frequently it’s worth the extra money to get an iPad version that can speak to the cell networks. Suddenly you no longer care what the conference Wi-Fi password is, whether you remembered to charge your phone, or if the captive portal login page is going to expire and pop up again mid-presentation.
Speaking of which…
Before the presentation, turn on both “Do Not Disturb” and “Airplane Mode”
In presentation mode, Keynote swears that it blocks pop-ups, reminders, incoming calls, and other distractions. To its credit, I’ve never seen it do otherwise.
That said, I always enable Do Not Disturb on my iPad. I put the device in airplane mode. And only then do I plug in the projector. Perhaps I’m paranoid, but you’re also not seeing horrible screenshots from my talks that feature embarrassing notifications, either.
Update nothing before your presentation
If a new iOS version or a Keynote update comes out the same week as your presentation, fine. But resist the upgrade. It can wait a day.
There have been enough regressions in software over the years that I’m extremely hesitant to trust that everything will “just work” an hour before I go on stage.
These are the sometimes-hard-won lessons I’ve learned after spending a year giving talks solely from an iPad.

Corey is the Chief Cloud Economist at The Duckbill Group, where he specializes in helping companies improve their AWS bills by making them smaller and less horrifying. He also hosts the "Screaming in the Cloud" and "AWS Morning Brief" podcasts; and curates "Last Week in AWS," a weekly newsletter summarizing the latest in AWS news, blogs, and tools, sprinkled with snark and thoughtful analysis in roughly equal measure.
More Posts from Corey

AWS’s (de)Generative AI Blunder
AWS has been very publicly insecure about the perception that it’s lagging behind in the Generative AI space for the past year. Unfortunately, rather than setting those perceptions to rest, AWS’s GenAI extravaganza at re:Invent 2023 seemed to prove them true. Of the 22 GenAI-related announcements, half of them are still in preview. Many were […]

Generative AI Builds a re:Invent Scavenger Hunt
Let’s begin with the tl;dr: At this year’s re:Invent, I’m hosting a photo scavenger hunt with significant prizes for “most items found” and “most creative entry.” Sign up through my webapp at findme.lastweekinaws.com. The rest of this post details how I built this app.

How to Stop Feeding AWS’s AI With Your Data
AWS may be using your data to train its AI models, and you may have unwittingly consented to it. Prepare to jump through a series of complex hoops to stop it.
Get the newsletter!
Stay up to date on the latest AWS news, opinions, and tools, all lovingly sprinkled with a bit of snark.
- PRO Courses Guides New Tech Help Pro Expert Videos About wikiHow Pro Upgrade Sign In
- EDIT Edit this Article
- EXPLORE Tech Help Pro About Us Random Article Quizzes Request a New Article Community Dashboard This Or That Game Popular Categories Arts and Entertainment Artwork Books Movies Computers and Electronics Computers Phone Skills Technology Hacks Health Men's Health Mental Health Women's Health Relationships Dating Love Relationship Issues Hobbies and Crafts Crafts Drawing Games Education & Communication Communication Skills Personal Development Studying Personal Care and Style Fashion Hair Care Personal Hygiene Youth Personal Care School Stuff Dating All Categories Arts and Entertainment Finance and Business Home and Garden Relationship Quizzes Cars & Other Vehicles Food and Entertaining Personal Care and Style Sports and Fitness Computers and Electronics Health Pets and Animals Travel Education & Communication Hobbies and Crafts Philosophy and Religion Work World Family Life Holidays and Traditions Relationships Youth
- Browse Articles
- Learn Something New
- Quizzes Hot
- This Or That Game
- Train Your Brain
- Explore More
- Support wikiHow
- About wikiHow
- Log in / Sign up
- Education and Communications
- Presentations
How to Create a Slideshow on iPad
Last Updated: February 28, 2023 Tested
This article was co-authored by wikiHow staff writer, Travis Boylls . Travis Boylls is a Technology Writer and Editor for wikiHow. Travis has experience writing technology-related articles, providing software customer service, and in graphic design. He specializes in Windows, macOS, Android, iOS, and Linux platforms. He studied graphic design at Pikes Peak Community College. The wikiHow Tech Team also followed the article's instructions and verified that they work. This article has been viewed 62,167 times. Learn more...
This wikiHow teaches you how to create a slideshow on iPad. You can create a slideshow of an album in the Photos app on iPhone and iPad.

- Click here to read how to create an album in Photos.

- Tap the Play button in the same location to resume the slideshow.

- Tap Theme to change the say the slideshow is presented.
- Tap Music to change the music of the slideshow, or turn it off.
- Use the slider bar at the bottom of the options menu to change the speed of the slide show.

Community Q&A
You Might Also Like

About This Article

1. Open Photos . 2. Tap the Albums tabs. 3. Tap Slideshow . 4. Tap the center of the screen. 5. Tap Done . Did this summary help you? Yes No
- Send fan mail to authors
Is this article up to date?

Featured Articles

Trending Articles

Watch Articles

- Terms of Use
- Privacy Policy
- Do Not Sell or Share My Info
- Not Selling Info
wikiHow Tech Help:
Tech troubles got you down? We've got the tips you need

Can You Make a Powerpoint on iPad? Here’s How To Do It
Are you familiar with Microsoft PowerPoint on your laptop or desktop computer, but don’t know how to use it on your iPad? You’re not alone.
With the popularity of tablets and iPads, many people are looking to make the switch and take advantage of the portability of their device.
In this article, we’ll guide you through the steps to create a presentation on your iPad.
We’ll cover topics such as what Microsoft PowerPoint for iPad is, how to add text, images, charts, and other elements, and how to navigate between slides.
With this knowledge, you’ll be able to create a presentation on your iPad with ease.
So let’s get started!
Table of Contents
Short Answer
Yes, you can make a PowerPoint on an iPad.
You can use the Microsoft PowerPoint app for iOS, which is available on the App Store.
You can also create and edit presentations online with PowerPoint for the web.
If you have an Office 365 subscription, you can also use the desktop version of PowerPoint on an iPad with the Office app.
What is Microsoft PowerPoint for iPad?
Microsoft PowerPoint for iPad is an app designed by Microsoft to allow users to create and present their PowerPoint presentations on an Apple iPad.
It is a powerful and easy-to-use tool that allows users to create professional-looking presentations with the help of the iPads touchscreen and Apple Pencil.
The app also offers a wide range of features that make it easy to create engaging and visually appealing presentations.
With the Microsoft PowerPoint for iPad app, users can easily create a new presentation, add text, images, charts, and other elements to their slides.
The app also allows users to use the iPads touchscreen to navigate between slides and add shapes, arrows, and other elements to their presentation.
Additionally, the app allows users to use the Apple Pencil to draw directly on the slides.
The app also offers other features such as the ability to share presentations with others, or present them on a larger screen with AirPlay.
Additionally, the iPads portability and HD display make it the perfect device for creating and sharing presentations with ease.
With its powerful features and easy-to-use interface, Microsoft PowerPoint for iPad is the perfect tool for creating professional-looking presentations on the go.
How to Create a Presentation on iPad
Creating a presentation on an iPad is an easy and convenient way to share information with others.
With the help of Microsoft PowerPoint for iPad apps, you can create a presentation, add text, images, charts, and more to create a professional-looking presentation.
With the iPad’s portability and HD display, you can create and share presentations with ease.
The first step in creating a presentation on an iPad is to download the Microsoft PowerPoint app.
Once you have downloaded the app, you can open it and begin creating your presentation.
You can add text, images, charts, and more to create a professional-looking presentation.
Additionally, you can use the Apple Pencil to draw directly on the slides, as well as use the iPads touchscreen to navigate between slides and add shapes, arrows, and other elements to your presentation.
Once you have added all of the necessary elements to your presentation, you can preview it on your iPad before sharing it with others.
You can also use the iPads AirDrop feature to quickly and easily share your presentation with others.
Additionally, you can use the PowerPoint app to collaborate with others on the presentation remotely.
Finally, you can export your presentation to a variety of formats, such as PDF, PowerPoint, and more.
This allows you to share your presentation with a variety of audiences, from colleagues to clients.
With the iPads portability and HD display, you can create and share presentations with ease.
In conclusion, creating a presentation on an iPad is easy and convenient.
With the help of Microsoft PowerPoint for iPad apps, you can create a professional-looking presentation with ease.
Additionally, you can use the iPads AirDrop feature to quickly and easily share your presentation with others, as well as export it to a variety of formats.
Adding Text, Images, and Charts to the Presentation
Adding text, images, and charts to your PowerPoint presentation on an iPad is a great way to make it look professional and engaging.
With the Microsoft PowerPoint for iPad apps, you can easily add text to your slides by simply tapping on the slide and typing in the text you want to include.
You can also use the iPads built-in dictation feature to quickly add text to your slides, or you can use the iPads on-screen keyboard to type out your text.
In addition to text, you can also add images and charts to your presentation.
You can upload images from your iPads photo library or from an online source, such as Google Images, to add to your presentation.
Similarly, you can also add charts to your presentation by using the chart feature in the PowerPoint app.
This feature allows you to quickly create bar, line, and pie charts from data you enter, as well as customize the chart to fit your presentation.
Finally, if you have an Apple Pencil, you can use it to draw directly on the slides.
This allows you to add arrows, shapes, and other elements to your presentation that would be difficult to add with the mouse or touchscreen.
With the Apple Pencil, you can quickly add any elements you need to make your presentation look professional and engaging.
Using the Apple Pencil to Draw on the Slides
Using the Apple Pencil to draw on PowerPoint slides is a great way to add a personal touch and creative flair to presentations.
With the Apple Pencil, users can draw directly onto slides with precision and detail, as well as directly write text and add shapes.
The Apple Pencil is also pressure-sensitive, meaning that it can be used to draw lightly or heavily depending on the desired effect.
It is also possible to use the Apple Pencil to erase, adjust, and move objects on the slides, allowing for easy editing of the presentation.
Additionally, the Apple Pencil can be used to easily add diagrams and other graphical elements, such as arrows and circles, to the slides.
With the Apple Pencil, slides can be quickly and easily designed to look professional and eye-catching.
Navigating Between Slides on the iPad
Navigating between slides on an iPad is made easy with its multitouch display and intuitive interface.
With a few taps, you can quickly move between slides in your presentation.
To navigate between slides, simply tap the left and right arrows in the bottom left corner of the PowerPoint for iPad app.
This will move you through the presentation slides sequentially, making it easy to review and edit your slides.
Additionally, you can select a specific slide from the Slide Navigator, which can be accessed by tapping the three dots icon in the bottom left corner of the PowerPoint app.
This will open up a list of all your slides, allowing you to quickly jump to a specific slide with just a tap.
Additionally, you can use the Apple Pencil to draw directly on the slides, as well as use the iPads touchscreen to quickly move between slides.
With the iPad’s portability and HD display, you can create and share presentations with ease, making it a great tool for creating professional presentations.
Adding Shapes, Arrows, and Other Elements
Adding shapes, arrows, and other elements to a PowerPoint presentation on an iPad is very easy to do.
With the iPads touchscreen, you can quickly and easily add a variety of shapes, arrows, lines, and other elements to your presentation.
You can use the Apple pencil to draw directly on the slides, allowing you to add intricate details to the presentation quickly and easily.
Additionally, you can use the iPads built-in shape tools to add rectangles, circles, and other shapes to the presentation.
Sharing the Presentation on iPad
Sharing a presentation on iPad is a breeze.
With the help of Microsoft PowerPoint for iPad apps, you can easily share your presentation with others from anywhere in the world.
You can share presentations in a variety of formats, including PDF, PowerPoint, and HTML.
Additionally, you can share your presentation as a read-only or a full-editable version, which allows others to make changes to the presentation if necessary.
The PowerPoint for iPad app allows you to easily send your presentation in an email, post it on social media, or even share it with a link.
If you have an Office 365 subscription, you can save your presentation to OneDrive and access it from any device with an internet connection.
You can also share your presentation with others directly from the iPad, with the ability to add notes and comments while the presentation is being shared.
The iPad also has a variety of other features that can help you share your presentation.
You can use AirPlay to mirror the contents of your iPad onto a larger display, such as a television or projector.
This feature allows you to present your presentation to a large group of people without having to carry a laptop with you.
Additionally, you can use an HDMI or VGA adapter to connect your iPad directly to a projector or monitor.
Finally, you can also share your presentation with others using a variety of cloud-based services, such as Dropbox, Google Drive, and iCloud.
With these cloud services, you can easily store and share your presentation without having to worry about copying it onto a USB drive or sending it through email.
These services also make it easy to collaborate on a presentation, as multiple users can access the same presentation and make changes and additions to it.
By leveraging the power of the iPad and the features of the Microsoft PowerPoint for iPad apps, you can easily create and share a presentation with ease.
Whether you’re giving a presentation to a large group of people or collaborating on a project with colleagues, the iPad provides an easy and efficient way to create and share presentations.
Final Thoughts
Making a PowerPoint presentation on an iPad is now easier than ever with Microsoft PowerPoint for iPad.
With its portability and HD display, you can create professional-looking presentations on the go and share them with ease.
Now that you know how to make a PowerPoint on iPad, why not give it a try? You’ll be surprised at what your creative mind can come up with.
James Wilson
James Wilson has extensive knowledge in the information technology industry.His second love, besides dealing with computers, is smart home technology. He is continually updating information to better comprehend this problem and has a deep understanding of the apartment’s support system.
Recent Posts
How To Search Airtable? Unleashing Advanced Tips and Techniques
To search in Airtable, simply navigate to the search bar located at the top of your Airtable workspace. Enter the keyword or term you are looking for, and Airtable will display relevant results...
How To Use Airtable for Inventory Management? (Master Your Stock Control)
To use Airtable for inventory management, start by creating a new base in Airtable and choosing the Inventory template to get started quickly. Customize the fields to suit your specific inventory...

Video: Run a slideshow in PowerPoint for iPad

Other tutorial videos for PowerPoint for iPad:
Open files from the cloud . Open files from OneDrive for Business (for your work or school stuff), OneDrive.com (for your personal stuff), or from a Dropbox account.
Open email attachments . Open, edit, and send back email attachments using PowerPoint for iPad.
How saving works in PowerPoint for iPad . PowerPoint for iPad automatically saves your work every time you make even a small change. In most cases, you don’t have to do anything at all to save your document. Watch this training video to learn about AutoSave.
Type in PowerPoint for iPad . Typing in PowerPoint for iPad can be tricky at first, especially if you’re used to a physical keyboard. This training video shows you some typing tips.
Select stuff in PowerPoint for iPad . Select text and pictures expertly with your finger in PowerPoint for iPad. This training video helps you move from the mouse to the touchscreen.
How to print in PowerPoint for iPad . You tap the File button to print in PowerPoint for iPad. Watch this video to learn how. At this time, you can only print to an AirPrint compatible printer.
Run a slideshow in PowerPoint for iPad. (You are here!) There are some special finger gestures you can use to advance, go back, and end a slideshow. You can even use a laser pointer and ink pen, with the touch of your finger.
Projecting your slideshow to a screen . If you want to project a slideshow from your iPad to a screen or TV, then watch this video. It will show you how to hook up an adaptor. You can also use AirPlay.
Looking for more training?
Check out the training course for Excel for iPad.
Check out training courses for the rest of the Office programs .

Need more help?
Want more options.
Explore subscription benefits, browse training courses, learn how to secure your device, and more.

Microsoft 365 subscription benefits

Microsoft 365 training

Microsoft security

Accessibility center
Communities help you ask and answer questions, give feedback, and hear from experts with rich knowledge.

Ask the Microsoft Community

Microsoft Tech Community

Windows Insiders
Microsoft 365 Insiders
Was this information helpful?
Thank you for your feedback.
- Accessories
- Meet the team
- Advertise with us
- Privacy Policy

Presentations are a handy tool for students, teachers , and professionals. Moreover, you can also use them at parties and events because gone are the days of boring slides that fail to retain your audience’s attention. Today, you can quickly create captivating slideshows that communicate your message effectively and engagingly. So, check out these best presentation apps for iPad and iPhone, no matter what kind of project you’re working on in the classroom or the boardroom.

Although Canva is well-known as a graphic design app , it can also help you create spectacular slides for a presentation that will wow your audience. There are tons of professionally designed templates that you can customize according to your needs.
Moreover, you can add your own brand elements like logos and images to create a unified look. The best part is that it is incredibly easy to use, yet gives you impeccable results. You can add your original pictures, illustrations, and text, or choose from the extensive database of design elements that it offers.
Price : Free (In-app Purchases start from $0.99)
2. Google Slides

Creating top-notch presentations with Google Slides is a breeze. It has a highly intuitive user-interface that makes your work easy. Further, the real-time collaboration feature lets you work with your friends and colleagues. You can add and rearrange slides, format text, and shapes with ease.
Further, you can also open and edit PowerPoint slides right from this app. Another notable feature is that it lets you work even offline. So, if you ever find yourself without an internet connection, your work won’t hit a roadblock. Lastly, Google Slides supports several languages, such as English, German, Italian, Japanese, and more.
Price: Free
3. Microsoft PowerPoint
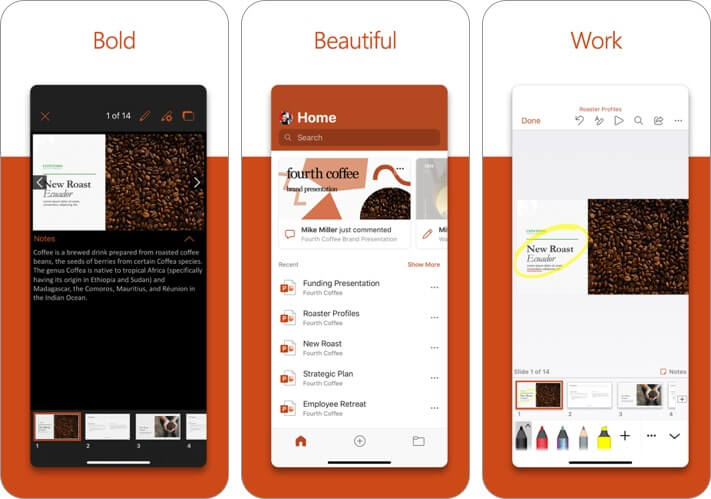
Across the world, PowerPoint has been synonymous with presentations for decades. In recent years, this tool has come a long way. So what better way to get creative than with this official app from Microsoft. It features a range of powerful and customizable slides and templates that will make you stand out.
Moreover, you can use a new AI tool called Presenter Coach that will help you practice your presentation and get real-time suggestions to adjust your pacing, avoid “umms” and speak confidently. Finally, there is seamless syncing with OneDrive that ensures your projects stay consistent across devices.
Price: Free (In-app Purchases start from $6.99)
4. Notability
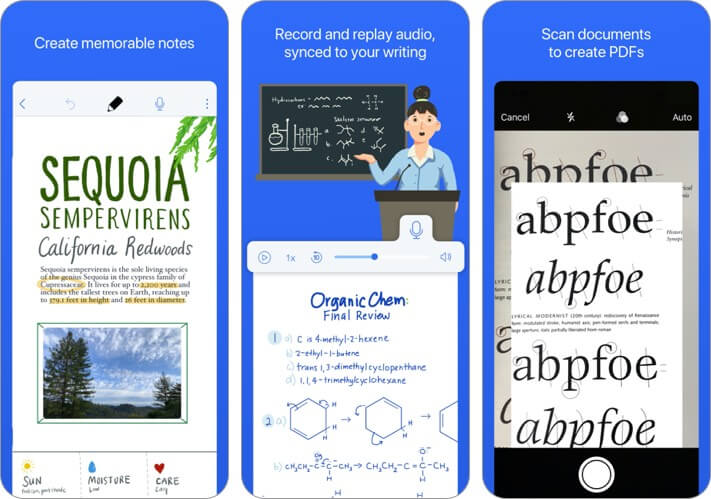
This is a renowned note-taking app for your iPad , but it doubles up as an excellent way to share presentations with others and keep your audience engaged. It has a lot of useful tools like ink, highlighter, text, and audio. If you’re working on a compatible iPad, you can even handwrite and sketch with Apple Pencil to bring your projects to life.
Further, the laser pointer makes it easy to direct attention to specific parts of your work. There’s also a multi-note feature that lets you view another note on your device that stays hidden from the audience whom you are presenting to. Not surprisingly, this is a bestselling paid app on the iPad App Store
Price : $8.99
5. Slideshow Creator
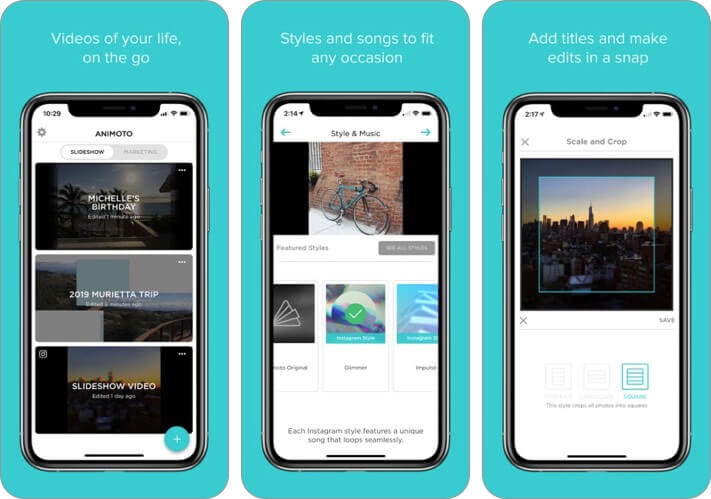
If you want to make a more casual presentation for family gatherings or parties, check out this easy-to-use iPad and iPhone presentation app. It offers various slideshow styles for everything from birthdays and graduation to sports events, invitations, and more.
You simply have to select the style you want, select the photos, videos, and music you want to collate, add text and captions, and then export it into a video that you can share through social media or project on a big screen.
Price : Free (In-app Purchases start from $4.99)
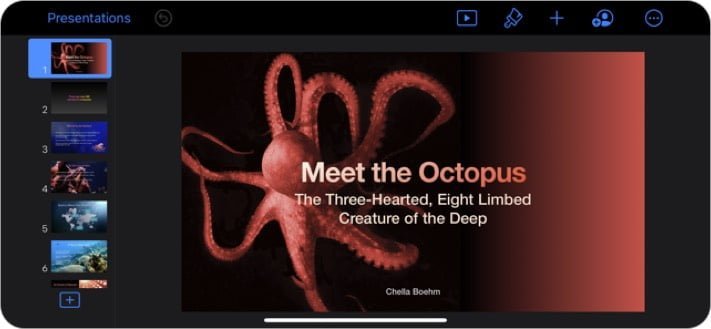
Here’s the app that Apple itself uses to present brilliant creations to the world. It’s the most powerful app to present your ideas on an iPhone or iPad. In addition to all the basic features, there are advanced options like animated charts and cinematic transitions to add that extra flair with ease.
Further, Keynote Live allows you to present a slideshow that your audience can follow on their Apple devices or online on iCloud.com. Finally, with the built-in real-time collaboration feature, it lets you work with your team seamlessly. Thanks to the Keynote for iCloud, even Windows PC users can collaborate.
7. Adobe Spark Video
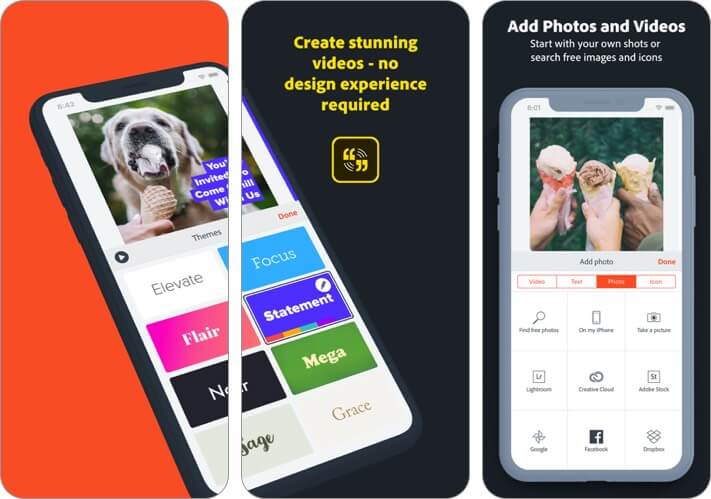
This one’s a video editor app that also lets you create professional presentations. Within minutes, you can put together compelling video stories replete with professional images that highlight your message. You can even select the soundtrack that you like best, and the app will compile everything with beautiful cinematic motion.
Whether you want to inform, persuade, or inspire, your presentations can make an impact with this app. You can even access, edit, and share your video from a browser using Adobe Spark. All this functionality for free is a pretty sweet deal.
Price: Free (Spark Subscription Monthly – $9.99)
8. Prezi Viewer
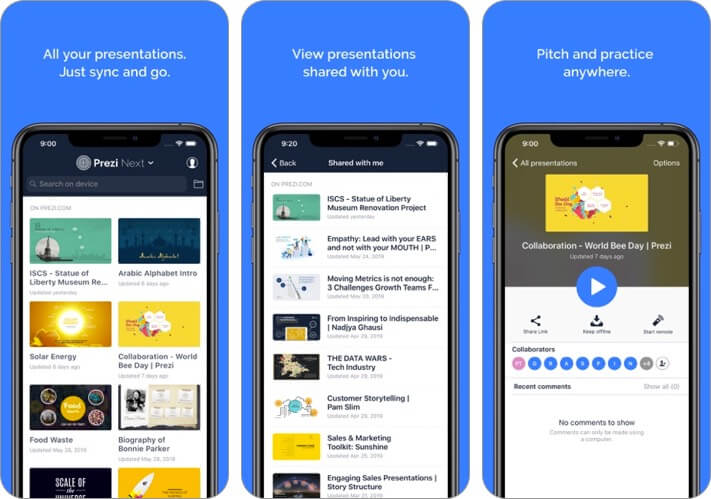
This iOS presentation app makes sure that you outshine everyone else. It’s intuitive and innovative, with stunning animations that draw your audience’s attention to precisely where you want it. You can even access and showcase your work offline if you need to.
When presenting, you don’t need to keep looking behind you because you can see your work on your phone screen too. Moreover, your iPhone or iPad acts as a clicker too! This neat app also supports multiple languages, including English, French, Spanish, German, Portuguese, Hungarian, Italian, Korean, and Japanese.
Summing Up!
So, when are you making your next presentation with one of these apps? Let us know your favorite in the comments below.
You may also like to read these:
- Best Document Scanner Apps
- How to convert Keynote Presentation to PowerPoint on iPhone, iPad, and Mac
- Document Creation Apps
- Best Project Management Apps
The founder of iGeeksBlog, Dhvanesh, is an Apple aficionado, who cannot stand even a slight innuendo about Apple products. He dons the cap of editor-in-chief to make sure that articles match the quality standard before they are published.
View all posts
🗣️ Our site is supported by our readers like you. When you purchase through our links, we earn a small commission. Read Disclaimer .
- iPhone Apps
LEAVE A REPLY Cancel reply
Save my name, email, and website in this browser for the next time I comment.
Related Articles
Best mother’s day apps for iphone in 2024, apps gone free today on the app store, ipad and iphone apps on sale today, best mac cleaner software and apps to keep your mac clean in no time.

Apple iPad event 2024 – 9 things we learned from the Let Loose event
T im Cook described today's Apple iPad event as "the biggest day for iPad since its introduction" – and hype or not, he might have a point. After all, the Let Loose event saw the launch of new iPad Airs and iPad Pros, a new Apple M4 chipset, plus new accessories and software. No, it doesn't compare to what we expect to see at WWDC 2024 , but it was a pretty big deal.
So, what were the highlights – and lowlights – of the 40-minute presentation? Here's everything we learned from the May 2024 Apple iPad event.
1. The new iPad Pro 2024 looks seriously powerful and impressively thin…
Let's start with the big one: Apple announced the new iPad Pro in two sizes, 11 inches and 13 inches.
These are Apple's thinnest ever tablets, with the 11-inch model coming in at 5.3mm thick (or rather, thin) and the 13-inch at a mere 5.1mm; that makes them 0.6mm and 1.3mm slimmer than last generation’s models respectively. In fact, Apple says the 13-incher is the thinnest product it has ever created – yes, it's even thinner than the iPod Nano.
Another couple of records set by the 2024 iPad Pros are they’re the first to feature OLED screen technology, and they’re also the first to use Apple's new M4 chipset – which represents a major step up in performance over 2022’s M2-powered Pro tablets (more on both of those features below).
Both sizes are up for preorder today (May 7) – prices start at $999 / £999 / AU$1,699 for the 11-inch and $1,299 / £1,299 / AU$2,199 for the 13-inch iPad Pro, with orders shipping from May 15.
- Read more: The iPad Pro (2024) just landed with a super-powerful M4 chipset and new OLED screen
2. …but the iPad Air 2024 has to make do with 2022 tech
In addition to the new iPad Pro models, Apple also revealed two new iPad Air 2024 tablets. Like the Pros, these come in 11-inch and 13-inch varieties, but there the similarities end. There's no OLED screen tech, obviously – you wouldn't expect there to be – but it's possibly surprising that the chipset is Apple's M2, which debuted at WWDC 2022, rather than last year's M3.
On the other hand, that's still plenty fast enough for most uses, and will have helped to keep the price down to $599 / £599 / AU$999 for the 11-inch tablet and $799 / £799 / AU$1,299 for the 13.
And it's not like there's nothing new here, either. For one, there's the fact that the Air now comes in two sizes, for the first time. There's also a landscape-oriented front-facing camera – great for video calls – and landscape stereo speakers with spatial audio. It will also come with up to 1TB of storage, and will be available in Blue, Purple, Starlight and Space Grey. Given the sizable saving over the Pro models, it might well make more sense for most people.
- Read more: Apple's iPad Air 6 launches with a bigger 13-inch screen and a MacBook-level chipset
3. The new Apple M4 chip is a powerhouse
The iPad Pro has skipped a generation on the chipset front, moving from M2 to the new M4 – which arrives on Apple's tablet before it makes its way (presumably) into MacBooks and Macs later. That's a pretty big deal for the iPad, and it makes for a massive step up in power.
The M4 chip brings the likes of mesh shading, hardware ray tracing, and dynamic caching to the iPad, and has a 10-core CPU that Apple says is 50% faster than the M2. On the graphics side, meanwhile, the 10-core GPU is supposedly 400% faster than that of the M2. Yes, 400%.
And then there's AI, because of course no 2024 launch would be complete without it. Apple says the Neural Engine is capable of carrying out 38 trillion operations a second, making it one of the fastest NPUs on the market. This can only bode well for future AI-related advances from Apple.
- Read more: Apple M4 chip debuts in iPad Pro as Apple pulls further ahead of Microsoft and Intel
4. OLED tech
It’s taken a while, but Apple’s iPad Pro tablets finally have OLED displays – and they aren’t just any old OLED panels. Rather, Apple has created the ‘Tandem OLED’ display to form the ‘Ultra Retina XDR’ screen of the new Pro iPads.
Tandem OLED is so called because it puts two layers of OLED pixels on top of each other to create a single consistent screen. The benefit of this is to double the resolution of the screen while mitigating concerns around OLED burn-in.
While OLED pixels are self-emissive, they tend to struggle to hit the brightness of LCD or mini-LED panels, and to bump up the brightness more power needs to be pumped into the pixels, which increases the heat of an OLED display and can lead to the dreaded burn-in, where by parts on a static image – think icons and taskbars – may be permanently visible on a screen, even when it's displaying something else.
But by layering two OLED panels, the individual pixels can be run at a lower brightness than they would in a single-layer OLED screen yet still achieve a peak brightness of 1,600 nits in the new iPad Pros; that’s a lot higher than even some of the best OLED TVs .
This Tandem technique should also make for a more energy-efficient OLED screen that has a longer lifespan than traditional OLED displays. So not only could Tandem OLED offer a boost in display quality over previous generation iPad Pros, it could also evolve OLED screen tech as a whole.
- Read more: Both iPad Pro 2024 models get the new Ultra Retina XDR display with Tandem OLED tech
5. Two OLED displays are approximately $200 more expensive than no OLED displays
There's good and bad news on the iPad pricing front. On the positive front, the iPad Air costs almost the same as the previous model: $599 / £599 / AU$999 for the base 11-inch model, which is unchanged from the 2022 version in the US, but a a slight increase in the UK and Australia (where it was £569 / AU$929). However, you now get 128GB as standard, rather than 64GB.
What's more, there are now 512GB and 1TB versions – though the latter of those will set you back $1,099 / £1,099 / AU$1,879, by which time you're in Pro territory.
The bad news comes with the Pro, which now starts at $999 / £999 / AU$1,699 for the 11-inch model, compared to $799 / £899 / AU$1,399 for the 2022 model. Again, you get a storage upgrade, this time from 128GB to 256GB, but that's a hefty jump all the same.
On the other hand, you're getting an OLED screen here – and a 'Tandem OLED' screen at that (see number 4 above) – and the difference that should make can't be understated. Plus, it has the effect of further differentiating the two models; if you want to go cheap, you'll need to go Air.
Either way, the new iPads are available for preorders now, and will start shipping next week (15 May).
- Read more: New iPad preorders – where to buy Apple's 2024 Pro and Air tablets
6. You'll want to squeeze the new Apple Pencil Pro
It almost goes without saying, but the Apple Pencil Pro looks like the most impressive iteration of the iconic stylus yet. Living up to the ‘Pro’ moniker, the new pencil offers a barrel sensor that allows you to squeeze the pencil to bring up a new wheel of tools and brushes on screen (in the same way you squeeze your AirPods to pause music), alongside haptic feedback.
Longtime users of the Apple Pencil will be pleased to know that the Pencil Pro will also finally support Find My – so (hopefully) no more losing your smart stylus. On the software front, meanwhile, Procreate and Procreate Dreams have also been prepped with a suit of new features just for the Apple Pencil Pro, including new brushes that take advantage of the barrel roll feature, plus the ability to hover and squeeze the pencil to select and swap between layers.
The Apple Pencil Pro charges and stores magnetically like older models, but it’s currently only compatible with the latest M2 iPad Air and M4 iPad Pro. Like the sound of it? It'll set you back $129 / £129 / AU$219, and will be available from May 15. We can’t wait to get our hands on it.
- Read more: Apple just announced a new Apple Pencil Pro, and it's so much better than I expected
7. Apple has turned the iPad into a live multicam studio
Pro video shooters will now be looking even more seriously at the iPad as a live production tool, thanks to a couple of new Apple apps.
The updated Final Cut 2 app has a new Live Multicam mode, which lets you connect up to four cameras to it simultaneously. And helping video teams to take those shots is a new, free Final Cut Camera app for both iPhone and iPad. This connects to Final Cut 2 and lets you control the exposure, white balance, focus, and more on each camera, with those shots then transferred and synced to your iPad in the Final Cut app.
If you don’t want to bother with all of that, Final Cut Camera can also just be used as a new standalone iPhone app to help you shoot better videos with much finer control than the standard Camera app. Now we just need Apple to do the same for photography…
- Read more: Not into video editing but want some great software? Check out these productivity apps
8. Function keys are back, back, back on the new Apple Magic Keyboard
You can't underestimate the usefulness of function keys – though we'd prefer they weren't stuck on a Touch Bar as on certain older MacBooks. So it's good news that the new Apple Magic Keyboard has a row of function keys along the top, making it easier to control settings such as brightness and volume on your iPad Pro.
It'll cost $299 (approximately £240 or AU$450) for the 11-inch version, and $349 (approximately £280 or AU$530) for the 13-inch version, and will ship from May 15.
- Read more: The new Magic Keyboard for the freshly debuted iPad Pro will power up your iPad experience with style and function
9. Apple's keeping back the big AI guns for WWDC… or is it?
It's possible you might have been a little disappointed that there was only a cursory mention of AI in today's Apple event. But don't be.
Apple is widely expected to (read: it will) reveal its own take on AI at its WorldWide Developers Conference next month, with the smart money being that it will unveil a raft of upgrades to iOS, iPadOS and macOS that will bring on-device generative AI to its entire mobile and computing lines.
But while there was nothing here about generative AI coming to the iPad or iPadOS, the M4 reveal is nonetheless a big part of the picture. The M4 chip should make it possible for the iPad (and MacBooks, at some point) to handle some big AI-related tasks, and indeed Apple gave the example of how Final Cut Pro will be easily able to isolate a background with just a tap. It also boasted that the M4's Neural Engine makes it "an outrageously powerful chip for AI".
These mentions indicate that Apple is planning for the AI revolution – and we can expect much, much more about it at WWDC in June.
- Read more: WWDC 2024: AI, iOS 18, and everything we're expecting from Apple's big show
How-To Geek
How to upgrade your pc to windows 11.
Here's how to get Windows 11 on most PCs.
Quick Links
How to check if windows 11 supports your pc, the safe and slow way: windows update, download windows 11 with the update assistant, create a bootable windows 11 usb drive, if your pc isn't officially supported, key takeaways.
- Run Microsoft's PC Health Check app to determine if your PC is eligible for an upgrade to Windows 11.
- You can use Windows Update to upgrade from Windows 10 to Windows 11.
- You may also use the Update Assistant or the Windows Media Creation tool to upgrade manually.
If you've decided you want to upgrade from Windows 10 , here's how you can get the free upgrade—even if Windows Update doesn't offer it. This works if Windows 11 doesn't officially support your PC, too.
To check if Windows 11 officially supports your PC hardware , download and run Microsoft's PC Health Check app .
Click the "Check Now" button and the tool will tell you whether Windows 11 officially supports your PC. If it doesn't, the tool will give you information about why. If the problem is lack of TPM 2.0, for example, you may be able to turn TPM 2.0 on in your PC's UEFI firmware (BIOS.)
Here's the good news: Even if your PC isn't officially supported, you can still upgrade to Windows 11 anyway . It's up to you, but Microsoft warns you may experience problems and won't guarantee future updates for Windows on your hardware. We've already seen some old CPUs left behind when Microsoft rolled out new instruction sets.
For the safest possible update process, go to Settings > Update & Security > Windows Update on your Windows 10 PC. (You can press Windows+i to quickly open the Settings app.)
Click the "Check for Updates" button to see if any updates are available. If Microsoft thinks your PC is ready for Windows 11, you'll see a "Windows 11 is ready—and it's free!" banner here. Click "Download and install" to get it.
If Windows 11 doesn't officially support your PC, you will never see the update offered via Windows Update. (But don't worry, Windows 10 will still be officially supported until October 2025 .)
Microsoft offers a variety of tools for downloading Windows 11 , including the Update Assistant. The Update Assistant is designed to be very simple to use.
Visit Microsoft's Download Windows 11 page, then download and install the Windows 11 Update Assistant. It will walk you through all the necessary steps.
You can also use the Media Creation Tool to create a bootable Windows 11 USB , or download a Windows 11 ISO for use on a virtual machine.
If you encounter a problem, note that you can downgrade back to Windows 10 within the first ten days after upgrading.
If your PC isn't officially supported, and you want to upgrade anyway, you will have to do some legwork to figure out why. There are several ways to install Windows 11 on an unsupported PC .
In some cases, you will be able to make your PC officially supported. In other cases, you may have to accept the risk of bugs and problems with future updates if you'd like to upgrade. Microsoft has already blocked
Whether you actually want to accept the risk of problems is up to you, but we encourage you to keep older PCs on Windows 10 unless you're enthusiastic about upgrading them for a particular reason.
Apple announces new iPad Pro: OLED display, M4 chip, thinner redesigned chassis
Apple today announced the new 11-inch and 13-inch iPad Pro, as part of its ‘Let Loose’ special event . The new iPad Pro makes the leap to the M4 chip, the next-generation of Apple silicon, for improved performance. Apple touted its new Neural Engine to stress the artificial intelligence capabilities.
The new tablets feature OLED displays, offering richer contrast and brightness, housed in a new thinner industrial design that is significantly smaller and lighter; the 11-inch is 5.3mm thin and the 13-inch is 5.1mm thin, which Apple says makes it the thinnest product they have ever created. The new 11-inch model starts at a higher $999 price point, and the 13-inch model starts at $1299.
The new iPad Pro OLED display offers up to 1600 peak HDR brightness, with brighter highlights and deeper blacks compared to the old mini-LED panels. Apple is calling this the ‘Ultra Retina XDR display’.
The OLED panel component is thinner and lighter, enabling the new overall industrial design. Apple is also offering an anti-glare nano-texture glass option for the first time on iPad.
The M4 chip includes a new display controller that helps drive the OLED display, as well as the CPU and GPU advancements that you would expect. The new 10-core CPU offers up to 50% CPU performance compared to the previous M2 iPad Pro. M4 is built on a second-generation 3 nanometer fabrication process.
The new GPU brings hardware ray tracing and mesh shading to iPad for the first time, with overall up to 4x faster rendering performance compared to M2. The new Neural Engine and CPU machine learning accelerators makes the M4 chip an “outrageously powerful chip for AI”, according to Apple.
Additionally, the new industrial design improves the thermals of the device by up to 20%, leading to an overall 4x performance boost compared to the previous-generation iPad Pro.
Top comment by freediverx
If only there were an operating system that allowed the iPad Pro to reach its potential.
Apple has also upgraded the camera modules in the new iPad Pro to take better images, and an adaptive flash improves capture for document scanning tasks. The front facing camera moves to the landscape edge, allowing for a better perspective for FaceTime calls.
The new iPad Pro is also compatible with the new versions of the Magic Keyboard and Apple Pencil accessories.
The new iPad Pro starts at 256 GB, an increase on the base storage. The 11-inch is priced starting at $999 and the new 13-inch model starts at $1299. They are available to order starting today.
Follow Benjamin: @bzamayo on Threads and Twitter .
FTC: We use income earning auto affiliate links. More.

Check out 9to5Mac on YouTube for more Apple news:

The new iPad Pro is powered by the A12Z processo…
Benjamin develops iOS apps professionally and covers Apple news and rumors for 9to5Mac. Listen to Benjamin, every week, on the Happy Hour podcast. Check out his personal blog . Message Benjamin over email or Twitter .
Benjamin Mayo's favorite gear

Philips Hue Lights
The easiest way to get into HomeKit and Apple smart home tech. Great for gifts.

iPhone Wireless Charger
Inexpensive, fast, wireless charger for iPhone.

Manage push notifications
More From Forbes
Facing $15 million deficit, st. cloud state university to cut faculty, programs.
- Share to Facebook
- Share to Twitter
- Share to Linkedin
St. Cloud State University in St. Cloud, Minnesota announces plans to eliminate almost 100 academic ... [+] programs.
In what has become an almost weekly parade of bad higher education financial news, another university has announced it must cut back dramatically on its academic programs and eliminate dozens of faculty positions to cope with a major budget deficit.
On Monday, St. Cloud State University administrators revealed their initial plans to cut about 100 academic programs and 57 faculty positions, according to the Minneapolis Star Tribune .
The announcement came from Larry Lee, St. Cloud State’s acting president, who said the plan involved cutting as much as $9 million from the budget by 2026, with the need for more reductions in the future.
"The higher education landscape is facing unprecedented struggles – student enrollment declines, affordability concerns, a proliferation of higher education alternatives, public perception of college degrees, and financial strains…among others," Lee wrote in a letter sent to the campus. "These decisions are painful; yet they are necessary for SCSU to continue to fulfill its mission."
The budget hole at SCSU reflects what has become an all-too-common story in higher education’s post-pandemic economic troubles. The university’s enrollment has steadily decreased from a high of about 18,000 students more than a decade ago to about 10,ooo currently. And its expenses have climbed. According to the university, its overall instructional costs are now the highest among the seven universities in the Minnesota State University system .
New FBI Warning As Hackers Strike: Email Senders Must Do This 1 Thing
Apple ipad 2024 release date your final complete guide to what and when, katy perry met gala dresses go viral but they re ai fakes.
SCSU currently offers 136 degree programs and 85 minors. The plan calls for reductions in both, bringing the total number of degree programs to 90 and the number of minors to 35.
Among the programs slated for elimination are criminal justice, gender and women's studies, geography, global studies, history, music teaching, physics, sociology, environmental engineering, and hospitality and tourism.
Of the 46 programs on the chopping block, 40 have 19 or fewer students, and the 46 programs combined enroll only about 9% of current SCSI students. The university said that students in discontinued programs will still be able to complete their degree.
The 57 faculty jobs recommended for elimination come from several academic areas and equal roughly 13% of SCSU’s total number of full-time faculty.
These lastest reductions follow budget cuts made last year that reduced the university’s deficit from approximately $24 million to about $18 million at the time. This year, the deficit is about $15 million.
St. Cloud State University’s budget woes have already taken a toll on the school’s leadership. Former SCSU President Robbyn Wacker resigned last week , about two months earlier than her originally scheduled departure at the end of the current academic year.
In a letter sent to faculty and staff, Minnesota State Colleges and Universities Chancellor Scott Olson said St. Cloud State’s financial pressures needed to be addressed in the coming weeks. As a result, Wacker apparently agreed that the looming budget decisions should be made by administrators who will be at the university to manage the cuts in the future.
Lee, currently SCSU’s vice president for finance and administration, was pressed into short-term service while the university awaits the arrival of interim President-Designate Larry Dietz who’s scheduled to begin on July 1.
- Editorial Standards
- Reprints & Permissions
Pages User Guide for iPad
- What’s new in Pages 14.0
- Intro to Pages
- Word-processing or page layout?
- Intro to images, charts, and other objects
- Create a document
- Intro to creating a book
- Use templates
- Find a document
- Open a document
- Save and name a document
- Print a document or envelope
- Undo or redo changes
- Prevent accidental editing
- Quick navigation
- Intro to formatting symbols
- Show or hide the ruler
- View pages side by side
- Copy text and objects between apps
- Basic touchscreen gestures
- Use Apple Pencil with Pages
- Customize the toolbar
- Create a document using VoiceOver
- Use VoiceOver to preview comments and track changes
- Select text
- Add and replace text
- Copy and paste text
- Add, change, or delete a merge field
- Manage sender information
- Add, change, or delete a source file in Pages on iPad
- Populate and create customized documents
- Format a document for another language
- Use phonetic guides
- Use bidirectional text
- Use vertical text
- Add the date and time
- Add mathematical equations
- Bookmarks and links
- Change the look of text
- Set a default font
- Change text capitalization
- Use text styles
- Copy and paste text styles
- Format fractions automatically
- Add drop caps
- Make characters superscript or subscript
- Format Chinese, Japanese, or Korean text
- Format dashes and quotation marks
- Set line and paragraph spacing
- Set paragraph margins
- Format lists
- Set tab stops
- Align and justify text
- Add line and page breaks
- Format columns of text
- Link text boxes
- Add borders and rules (lines)
- Set paper size and orientation
- Set document margins
- Set up facing pages
- Page templates
- Add and format sections
- Rearrange pages or sections
- Duplicate pages or sections
- Delete pages or sections
- Table of contents
- Footnotes and endnotes
- Headers and footers
- Add page numbers
- Change the page background
- Add a border around a page
- Add watermarks and background objects
- Add an image
- Add an image gallery
- Edit an image
- Add and edit a shape
- Combine or break apart shapes
- Save a shape to the shapes library
- Add and align text inside a shape
- Add 3D objects
- Add lines and arrows
- Add and edit drawings
- Add video and audio
- Record video and audio
- Edit video and audio
- Set the movie format
- Position and align objects
- Place objects with text
- Use alignment guides
- Layer, group, and lock objects
- Change the transparency of an object
- Fill shapes and text boxes with color or an image
- Add a border to an object
- Add a caption or title
- Add a reflection or shadow
- Use object styles
- Resize, rotate, and flip objects
- Add or delete a table
- Select tables, cells, rows, and columns
- Add or remove table rows and columns
- Move table rows and columns
- Resize table rows and columns
- Merge or unmerge table cells
- Change the look of table text
- Show, hide, or edit a table title
- Change table gridlines and colors
- Use table styles
- Resize, move, or lock a table
- Add and edit cell content
- Format dates, currency, and more
- Format tables for bidirectional text
- Highlight cells conditionally
- Alphabetize or sort table data
- Add or delete a chart
- Change a chart from one type to another
- Modify chart data
- Move, resize, and rotate a chart
- Change the look of data series
- Add a legend, gridlines, and other markings
- Change the look of chart text and labels
- Add a border and background to a chart
- Use chart styles
- Check spelling
- Look up words
- Find and replace text
- Replace text automatically
- Show word count and other statistics
- Annotate a document
- Set your author name for comments
- Highlight text
- Add and print comments
- Track changes
- Send a document
- Publish a book to Apple Books
- Intro to collaboration
- Invite others to collaborate
- Collaborate on a shared document
- See the latest activity in a shared document
- Change a shared document’s settings
- Stop sharing a document
- Shared folders and collaboration
- Use Box to collaborate
- Use presenter mode
- Use iCloud Drive with Pages
- Export to Word, PDF, or another file format
- Restore an earlier version of a document
- Move a document
- Delete a document
- Password-protect a document
- Create and manage custom templates
- Transfer documents with AirDrop
- Transfer documents with Handoff
- Transfer documents with the Finder
- Keyboard shortcuts
- Keyboard shortcut symbols
Use presenter mode in Pages on iPad
In a word-processing document, you can use presenter mode so that your text scrolls automatically like it’s on a teleprompter. The text appears in a large font against a dark background—without images or other media—so that it’s easy to read.
Note: Presenter mode displays body text only. You don’t see text in text boxes, shapes, captions, tables, headers, or other objects.
Do one of the following:
Scroll manually: Swipe up.
To return to your document, tap Done.

IMAGES
VIDEO
COMMENTS
To play the presentation, tap , then tap a slide to go to the next slide. To end the presentation, pinch closed anywhere on the screen. For more ways to show a presentation, see Play a presentation on your iPhone or iPad. To close the presentation, tap in the top-left corner of the screen. Closing the presentation doesn't quit Keynote.
Step 4: Play your presentation. To start your presentation, tap the "Play" icon. Your iPad will switch to presentation mode, displaying your slides full-screen. Swipe left or right to navigate through the slides.
Step 1: Download the PowerPoint App. First things first, download the PowerPoint app from the App Store. Once you've downloaded and installed the PowerPoint app, you're ready to get started. The app is free, but for full functionality, you might need an Office 365 subscription.
Pricing. PowerPoint for iOS is free from the App Store and allows you to view PowerPoint files from anywhere. If you want to edit or create presentations from the iPad though, you're going to need to subscribe to Office 365, which runs $6.99/month or $70/year for individuals on up to 5 devices. An Office 365 subscription comes with the full ...
In this case, all you need to do is simply open your email account on your iPad, click on the email that contains the PowerPoint file, and download it. 2. Transfer the PPT file to your iPad using a cloud storage service. Another quick and easy option is using a cloud storage services. There are plenty of cloud storage services such as Google ...
Drag your presentation to the Keynote Documents list. Then open Keynote on your iPad, go to the Document Manager (if it's not already visible), tap the folder icon in the upper-right corner, and ...
This video is a tutorial for Microsoft PowerPoint for the iPad. The iOS version of PowerPoint is surprisingly powerful with many desktop features found in th...
On your iOS device, load the presentation or content you want to share to the Apple TV. Tap the AirPlay icon. (It looks like a rectangular screen with a triangle at the bottom.) Choose your Apple ...
8 Things I've Learned Using an iPad for Presentations. I spent a year giving talks from an iPad instead of a laptop. Here are the lessons I learned along the way. I love using my iPad for travel to conferences, and not just because it's so lightweight and its battery lasts all day. For one thing, with the LTE version I'm not beholden to ...
Open Photos. It's the app that has an image of a color wheel that resembles a flower. 2. Tap the Albums tab. It's in the bottom-right corner. It has an image of a folder. Click here to read how to create an album in Photos. 3. Tap Slideshow.
I wrote about the apps I use here: https://activerecall.co/ipad-apps-for-presentations/This shows how to make a presentation. Sort of. I tried to make a vide...
How to Create a Presentation on iPad. Creating a presentation on an iPad is an easy and convenient way to share information with others. With the help of Microsoft PowerPoint for iPad apps, you can create a presentation, add text, images, charts, and more to create a professional-looking presentation.
Would you like to create a slide-based presentation straight from your iPad?In this 3-Minute Classroom Problem Solver you'll learn how to make a presentation...
You tap the File button to print in PowerPoint for iPad. Watch this video to learn how. At this time, you can only print to an AirPrint compatible printer. Run a slideshow in PowerPoint for iPad. (You are here!) There are some special finger gestures you can use to advance, go back, and end a slideshow. You can even use a laser pointer and ink ...
On an iPhone, tap Albums and then select People & Places. On an iPad, make sure the sidebar is visible and then tap People or Places. Select the right album, location, or person, and then tap the ...
6. Keynote. Here's the app that Apple itself uses to present brilliant creations to the world. It's the most powerful app to present your ideas on an iPhone or iPad. In addition to all the basic features, there are advanced options like animated charts and cinematic transitions to add that extra flair with ease.
T im Cook described today's Apple iPad event as "the biggest day for iPad since its introduction" - and hype or not, he might have a point. After all, the Let Loose event saw the launch of new ...
🚀 FREE COURSE | "Go from Overwhelmed to Productive and Happy!": https://paperlessmovement.com/freecourse"CUSTOMIZED DIGITAL PLANNER:📝 Create your own digit...
In some cases, you will be able to make your PC officially supported. In other cases, you may have to accept the risk of bugs and problems with future updates if you'd like to upgrade. ... I Tested Games, Movies, and Presentations The 2024 iPad Pro Outperforms Your Mac (And Has a Better Screen, Too) Join Our Team; Our Audience; About Us; Press ...
To set how to navigate your presentation, do the following: Open the presentation. Tap in the toolbar, tap Presentation Options, then tap Presentation Type.. Select one of the following options from the list: Normal: The presentation changes slides or starts animations when the presenter or viewer taps the slide or a link on the slide.This is useful if you want to present the slides sequentially.
Apple today announced the new 11-inch and 13-inch iPad Pro, as part of its 'Let Loose' special event.The new iPad Pro makes the leap to the M4 chip, the next-generation of Apple silicon, for ...
The announcement came from Larry Lee, St. Cloud State's acting president, who said the plan involved cutting as much as $9 million from the budget by 2026, with the need for more reductions in ...
Tap at the top of the screen, then tap Presenter Mode. Do one of the following: Scroll manually: Swipe up. Scroll automatically: Tap , then turn on Auto Scroll. To adjust the scrolling speed, drag the slider. Tap the document to start scrolling, and tap again to pause. To change other display settings like background color, font size, and line ...