Critical PowerPoint Shortcuts – Claim Your FREE Training Module and Get Your Time Back!

How to Make a PowerPoint Presentation (Step-by-Step)
- PowerPoint Tutorials
- Presentation Design
- January 22, 2024
In this beginner’s guide, you will learn step-by-step how to make a PowerPoint presentation from scratch.
While PowerPoint is designed to be intuitive and accessible, it can be overwhelming if you’ve never gotten any training on it before. As you progress through this guide, you’ll will learn how to move from blank slides to PowerPoint slides that look like these.

Table of Contents
Additionally, as you create your presentation, you’ll also learn tricks for working more efficiently in PowerPoint, including how to:
- Change the slide order
- Reset your layout
- Change the slide dimensions
- Use PowerPoint Designer
- Format text
- Format objects
- Play a presentation (slide show)
With this knowledge under your belt, you’ll be ready to start creating PowerPoint presentations. Moreover, you’ll have taken your skills from beginner to proficient in no time at all. I will also include links to more advanced PowerPoint topics.
Ready to start learning how to make a PowerPoint presentation?
Take your PPT skills to the next level
Start with a blank presentation.
Note: Before you open PowerPoint and start creating your presentation, make sure you’ve collected your thoughts. If you’re going to make your slides compelling, you need to spend some time brainstorming.
For help with this, see our article with tips for nailing your business presentation here .
The first thing you’ll need to do is to open PowerPoint. When you do, you are shown the Start Menu , with the Home tab open.
This is where you can choose either a blank theme (1) or a pre-built theme (2). You can also choose to open an existing presentation (3).
For now, go ahead and click on the Blank Presentation (1) thumbnail.

Doing so launches a brand new and blank presentation for you to work with. Before you start adding content to your presentation, let’s first familiarize ourselves with the PowerPoint interface.
The PowerPoint interface

Here is how the program is laid out:
- The Application Header
- The Ribbon (including the Ribbon tabs)
- The Quick Access Toolbar (either above or below the Ribbon)
- The Slides Pane (slide thumbnails)
The Slide Area
The notes pane.
- The Status Bar (including the View Buttons)
Each one of these areas has options for viewing certain parts of the PowerPoint environment and formatting your presentation.
Below are the important things to know about certain elements of the PowerPoint interface.
The PowerPoint Ribbon

The Ribbon is contextual. That means that it will adapt to what you’re doing in the program.
For example, the Font, Paragraph and Drawing options are greyed out until you select something that has text in it, as in the example below (A).

Furthermore, if you start manipulating certain objects, the Ribbon will display additional tabs, as seen above (B), with more commands and features to help you work with those objects. The following objects have their own additional tabs in the Ribbon which are hidden until you select them:
- Online Pictures
- Screenshots
- Screen Recording
The Slides Pane

This is where you can preview and rearrange all the slides in your presentation.
Right-clicking on a slide in the pane gives you additional options on the slide level that you won’t find on the Ribbon, such as Duplicate Slide , Delete Slide , and Hide Slide .

In addition, you can add sections to your presentation by right-clicking anywhere in this Pane and selecting Add Section . Sections are extremely helpful in large presentations, as they allow you to organize your slides into chunks that you can then rearrange, print or display differently from other slides.

The Slide Area (A) is where you will build out your slides. Anything within the bounds of this area will be visible when you present or print your presentation.
Anything outside of this area (B) will be hidden from view. This means that you can place things here, such as instructions for each slide, without worrying about them being shown to your audience.

The Notes Pane is the space beneath the Slide Area where you can type in the speaker notes for each slide. It’s designed as a fast way to add and edit your slides’ talking points.
To expand your knowledge and learn more about adding, printing, and exporting your PowerPoint speaker notes, read our guide here .
Your speaker notes are visible when you print your slides using the Notes Pages option and when you use the Presenter View . To expand your knowledge and learn the ins and outs of using the Presenter View , read our guide here .

You can resize the Notes Pane by clicking on its edge and dragging it up or down (A). You can also minimize or reopen it by clicking on the Notes button in the Status Bar (B).
Note: Not all text formatting displays in the Notes Pane, even though it will show up when printing your speaker notes. To learn more about printing PowerPoint with notes, read our guide here .
Now that you have a basic grasp of the PowerPoint interface at your disposal, it’s time to make your presentation.
Adding Content to Your PowerPoint Presentation
Notice that in the Slide Area , there are two rectangles with dotted outlines. These are called Placeholders and they’re set on the template in the Slide Master View .
To expand your knowledge and learn how to create a PowerPoint template of your own (which is no small task), read our guide here .

As the prompt text suggests, you can click into each placeholder and start typing text. These types of placeholder prompts are customizable too. That means that if you are using a company template, it might say something different, but the functionality is the same.

Note: For the purposes of this example, I will create a presentation based on the content in the Starbucks 2018 Global Social Impact Report, which is available to the public on their website.
If you type in more text than there is room for, PowerPoint will automatically reduce its font size. You can stop this behavior by clicking on the Autofit Options icon to the left of the placeholder and selecting Stop Fitting Text to this Placeholder .
Next, you can make formatting adjustments to your text by selecting the commands in the Font area and the Paragraph area of the Home tab of the Ribbon.

The Reset Command: If you make any changes to your title and decide you want to go back to how it was originally, you can use the Reset button up in the Home tab .

Insert More Slides into Your Presentation
Now that you have your title slide filled in, it’s time to add more slides. To do that, simply go up to the Home tab and click on New Slide . This inserts a new slide in your presentation right after the one you were on.

You can alternatively hit Ctrl+M on your keyboard to insert a new blank slide in PowerPoint. To learn more about this shortcut, see my guide on using Ctrl+M in PowerPoint .
Instead of clicking the New Slide command, you can also open the New Slide dropdown to see all the slide layouts in your PowerPoint template. Depending on who created your template, your layouts in this dropdown can be radically different.

If you insert a layout and later want to change it to a different layout, you can use the Layout dropdown instead of the New Slide dropdown.
After inserting a few different slide layouts, your presentation might look like the following picture. Don’t worry that it looks blank, next we will start adding content to your presentation.

If you want to follow along exactly with me, your five slides should be as follows:
- Title Slide
- Title and Content
- Section Header
- Two Content
- Picture with Caption
Adding Content to Your Slides
Now let’s go into each slide and start adding our content. You’ll notice some new types of placeholders.

On slide 2 we have a Content Placeholder , which allows you to add any kind of content. That includes:
- A SmartArt graphic,
- A 3D object,
- A picture from the web,
- Or an icon.
To insert text, simply type it in or hit Ctrl+C to Copy and Ctrl+V to Paste from elsewhere. To insert any of the other objects, click on the appropriate icon and follow the steps to insert it.
For my example, I’ll simply type in some text as you can see in the picture below.

Slides 3 and 4 only have text placeholders, so I’ll go ahead and add in my text into each one.

On slide 5 we have a Picture Placeholder . That means that the only elements that can go into it are:
- A picture from the web

To insert a picture into the picture placeholder, simply:
- Click on the Picture icon
- Find a picture on your computer and select it
- Click on Insert
Alternatively, if you already have a picture open somewhere else, you can select the placeholder and paste in (shortcut: Ctrl+V ) the picture. You can also drag the picture in from a file explorer window.

If you do not like the background of the picture you inserted onto your slide, you can remove the background here in PowerPoint. To see how to do this, read my guide here .
Placeholders aren’t the only way to add content to your slides. At any point, you can use the Insert tab to add elements to your slides.
You can use either the Title Only or the Blank slide layout to create slides for content that’s different. For example, a three-layout content slide, or a single picture divider slide, as shown below.

In the first example above, I’ve inserted 6 text boxes, 3 icons, and 3 circles to create this layout. In the second example, I’ve inserted a full-sized picture and then 2 shapes and 2 text boxes.
The Reset Command: Because these slides are built with shapes and text boxes (and not placeholders), hitting the Reset button up in the Home tab won’t do anything.
That is a good thing if you don’t want your layouts to adjust. However, it does mean that it falls on you to make sure everything is aligned and positioned correctly.
For more on how to add and manipulate the different objects in PowerPoint, check out our step-by-step articles here:
- Using graphics in PowerPoint
- Inserting icons onto slides
- Adding pictures to your PowerPoint
- How to embed a video in PowerPoint
- How to add music to your presentation
Using Designer to generate more layouts ideas
If you have Office 365, your version of PowerPoint comes with a new feature called Designer (or Design Ideas). This is a feature that generates slide layout ideas for you. The coolest thing about this feature is that it uses the content you already have.
To use Designer , simply navigate to the Design tab in your Ribbon, and click on Design Ideas .

NOTE: If the PowerPoint Designer is not working for you (it is grey out), see my troubleshooting guide for Designer .
Change the Overall Design (optional)
When you make a PowerPoint presentation, you’ll want to think about the overall design. Now that you have some content in your presentation, you can use the Design tab to change the look and feel of your slides.
For additional help thinking through the design of your presentation, read my guide here .
A. Picking your PowerPoint slide size
If you have PowerPoint 2013 or later, when you create a blank document in PowerPoint, you automatically start with a widescreen layout with a 16:9 ratio. These dimensions are suitable for most presentations as they match the screens of most computers and projectors.
However, you do have the option to change the dimensions.
For example, your presentation might not be presented, but instead converted into a PDF or printed and distributed. In that case, you can easily switch to the standard dimensions with a 4:3 ratio by selecting from the dropdown (A).
You can also choose a custom slide size or change the slide orientation from landscape to portrait in the Custom Slide Size dialog box (B).

To learn all about the different PowerPoint slide sizes, and some of the issues you will face when changing the slide size of a non-blank presentation, read my guide here .
B. Selecting a PowerPoint theme
The next thing you can do is change the theme of your presentation to a pre-built one. For a detailed explanation of what a PowerPoint theme is, and how to best use it, read my article here .
In the beginning of this tutorial, we started with a blank presentation, which uses the default Office theme as you can see in the picture below.

That gives you the most flexibility because it has a blank background and quite simple layouts that work for most presentations. However, it also means that it’s your responsibility to enhance the design.
If you’re comfortable with this, you can stay with the default theme or create your own custom theme ( read my guide here ). But if you would rather not have to think about design, then you can choose a pre-designed theme.
Microsoft provides 46 other pre-built themes, which include slide layouts, color variants and palettes, and fonts. Each one varies quite significantly, so make sure you look through them carefully.
To select a different theme, go to the Design tab in the Ribbon, and click on the dropdown arrow in the Themes section .

For this tutorial, let’s select the Frame theme and then choose the third Variant in the theme. Doing so changes the layout, colors, and fonts of your presentation.

Note: The theme dropdown area is also where you can import or save custom themes. To see my favorite places to find professional PowerPoint templates and themes (and recommendations for why I like them), read my guide here .
C. How to change a slide background in PowerPoint
The next thing to decide is how you want your background to look for the entire presentation. In the Variants area, you can see four background options.

For this example, we want our presentation to have a dark background, so let’s select Style 3. When you do so, you’ll notice that:
- The background color automatically changes across all slides
- The color of the text on most of the slides automatically changes to white so that it’s visible on the dark background
- The colors of the objects on slides #6 and #7 also adjust, in a way we may not want (we’ll likely have to make some manual adjustments to these slides)

Note: If you want to change the slide background for just that one slide, don’t left-click the style. Instead, right-click it and select Apply to Selected Slides .
After you change the background for your entire presentation, you can easily adjust the background for an individual slide.

Inside the Format Background pane, you can see you have the following options:
- Gradient fill
- Picture or texture fill
- Pattern fill
- Hide background
You can explore these options to find the PowerPoint background that best fits your presentation.
D. How to change your color palette in PowerPoint
Another thing you may want to adjust in your presentation, is the color scheme. In the picture below you can see the Theme Colors we are currently using for this presentation.

Each PowerPoint theme comes with its own color palette. By default, the Office theme includes the Office color palette. This affects the colors you are presented with when you format any element within your presentation (text, shapes, SmartArt, etc.).

The good news is that the colors here are easy to change. To switch color palettes, simply:
- Go to the Design tab in the Ribbon
- In the Variants area, click on the dropdown arrow and select Colors
- Select the color palette (or theme colors) you want
You can choose among the pre-built color palettes from Office, or you can customize them to create your own.
As you build your presentation, make sure you use the colors from your theme to format objects. That way, changing the color palette adjusts all the colors in your presentation automatically.
E. How to change your fonts in PowerPoint
Just as we changed the color palette, you can do the same for the fonts.

Each PowerPoint theme comes with its own font combination. By default, the Office theme includes the Office font pairing. This affects the fonts that are automatically assigned to all text in your presentation.

The good news is that the font pairings are easy to change. To switch your Theme Fonts, simply:
- Go to the Design tab in the Ribbon
- Click on the dropdown arrow in the Variants area
- Select Fonts
- Select the font pairing you want
You can choose among the pre-built fonts from Office, or you can customize them to create your own.
If you are working with PowerPoint presentations on both Mac and PC computers, make sure you choose a safe PowerPoint font. To see a list of the safest PowerPoint fonts, read our guide here .
If you receive a PowerPoint presentation and the wrong fonts were used, you can use the Replace Fonts dialog box to change the fonts across your entire presentation. For details, read our guide here .
Adding Animations & Transitions (optional)
The final step to make a PowerPoint presentation compelling, is to consider using animations and transitions. These are by no means necessary to a good presentation, but they may be helpful in your situation.
A. Adding PowerPoint animations
PowerPoint has an incredibly robust animations engine designed to power your creativity. That being said, it’s also easy to get started with basic animations.
Animations are movements that you can apply to individual objects on your slide.

To add a PowerPoint animation to an element of your slide, simply:
- Select the element
- Go to the Animations tab in the Ribbon
- Click on the dropdown arrow to view your options
- Select the animation you want
You can add animations to multiple objects at one time by selecting them all first and then applying the animation.
B. How to preview a PowerPoint animation

There are three ways to preview a PowerPoint animation:
- Click on the Preview button in the Animations tab
- Click on the little star next to the slide
- Play the slide in Slide Show Mode
To learn other ways to run your slide show, see our guide on presenting a PowerPoint slide show with shortcuts .
To adjust the settings of your animations, explore the options in the Effect Options , Advanced Animation and the Timing areas of the Animation tab .

Note: To see how to make objects appear and disappear in your slides by clicking a button, read our guide here .
C. How to manage your animations in PowerPoint

The best way to manage lots of animations on your slide is with the Animation Pane . To open it, simply:
- Navigate to the Animations tab
- Select the Animation Pane
Inside the Animation Pane, you’ll see all of the different animations that have been applied to objects on your slide, with their numbers marked as pictured above.
Note: To see examples of PowerPoint animations that can use in PowerPoint, see our list of PowerPoint animation tutorials here .
D. How to add transitions to your PowerPoint presentation
PowerPoint has an incredibly robust transition engine so that you can dictate how your slides change from one to the other. It is also extremely easy to add transitions to your slides.
In PowerPoint, transitions are the movements (or effects) you see as you move between two slides.

To add a transition to a PowerPoint slide, simply:
- Select the slide
- Go to the Transitions tab in the Ribbon
- In the Transitions to This Slide area, click on the dropdown arrow to view your options
- Select the transition you want
To adjust the settings of the transition, explore the options in the Timing area of the Transitions tab.
You can also add the same transition to multiple slides. To do that, select them in the Slides Pane and apply the transition.
E. How to preview a transition in PowerPoint

There are three ways to preview your PowerPoint transitions (just like your animations):
- Click on the Preview button in the Transitions tab
- Click on the little star beneath the slide number in the thumbnail view
Note: In 2016, PowerPoint added a cool new transition, called Morph. It operates a bit differently from other transitions. For a detailed tutorial on how to use the cool Morph transition, see our step-by-step article here .
Save Your PowerPoint Presentation
After you’ve built your presentation and made all the adjustments to your slides, you’ll want to save your presentation. YOu can do this several different ways.

To save a PowerPoint presentation using your Ribbon, simply:
- Navigate to the File tab
- Select Save As on the left
- Choose where you want to save your presentation
- Name your presentation and/or adjust your file type settings
- Click Save
You can alternatively use the Ctrl+S keyboard shortcut to save your presentation. I recommend using this shortcut frequently as you build your presentation to make sure you don’t lose any of your work.

This is the standard way to save a presentation. However, there may be a situation where you want to save your presentation as a different file type.
To learn how to save your presentation as a PDF, see our guide on converting PowerPoint to a PDF .
How to save your PowerPoint presentation as a template
Once you’ve created a presentation that you like, you may want to turn it into a template. The easiest – but not technically correct – way, is to simply create a copy of your current presentation and then change the content.
But be careful! A PowerPoint template is a special type of document and it has its own parameters and behaviors.
If you’re interested in learning about how to create your own PowerPoint template from scratch, see our guide on how to create a PowerPoint template .
Printing Your PowerPoint Presentation
After finishing your PowerPoint presentation, you may want to print it out on paper. Printing your slides is relatively easy.

To open the Print dialog box, you can either:
- Hit Ctrl+P on your keyboard
- Or go to the Ribbon and click on File and then Print

Inside the Print dialog box, you can choose from the various printing settings:
- Printer: Select a printer to use (or print to PDF or OneNote)
- Slides: Choose which slides you want to print
- Layout: Determine how many slides you want per page (this is where you can print the notes, outline, and handouts)
- Collated or uncollated (learn what collated printing means here )
- Color: Choose to print in color, grayscale or black & white
There are many more options for printing your PowerPoint presentations. Here are links to more in-depth articles:
- How to print multiple slides per page
- How to print your speaker notes in PowerPoint
- How to save PowerPoint as a picture presentation
So that’s how to create a PowerPoint presentation if you are brand new to it. We’ve also included a ton of links to helpful resources to boost your PowerPoint skills further.
When you are creating your presentation, it is critical to first focus on the content (what you are trying to say) before getting lost inserting and playing with elements. The clearer you are on what you want to present, the easier it will be to build it out in PowerPoint.
If you enjoyed this article, you can learn more about our PowerPoint training courses and other presentation resources by visiting us here .
🔒 Unlock the PowerPoint Shortcuts Trusted by Industry Leaders KKR, American Express, HSBC, and More!
Join over 114,880 professionals from diverse fields including consulting, investment banking, advertising, marketing, sales, and business development who have supercharged their PowerPoint game with our proven methods.
✅ Customize compelling presentations effortlessly.
✅ Master time-saving techniques for faster deck creation.
✅ Boost your career prospects with top-notch PowerPoint skills.
Get FREE access to the Critical PowerPoint Shortcuts module of our premium training course by entering your name and email below.
DISCLAIMER: PC Users Only!
We respect your privacy and will keep your info safe and confidential.
About The Author

Popular Tutorials
- How to Strikethrough Text (l̶i̶k̶e̶ ̶t̶h̶i̶s̶) in Word, Excel & PowerPoint
- How to Make Animated Fireworks in PowerPoint (Step-by-Step)
- Strikethrough Shortcut (l̶i̶k̶e̶ ̶t̶h̶i̶s̶) for Word, Excel & PowerPoint
- How to Create a Flash Card Memory Game in PowerPoint (Like Jeopardy)
- Keyboard Shortcuts Not Working: Solved
PowerPoint Tutorial Categories
- Strategies & Opinions
- Shortcuts & Hacks
- Pictures, Icons, Videos, Etc.
- New Features
- Miscellaneous
- Charts & Data Viz
We help busy professionals save hours and gain peace of mind, with corporate workshops, self-paced courses and tutorials for PowerPoint and Word.
Work With Us
- Corporate Training
- Presentation & Template Design
- Courses & Downloads
- PowerPoint Articles
- Word Articles
- Productivity Resources
Find a Tutorial
- Free Training
- For Businesses
We help busy office workers save hours and gain peace of mind, with tips, training and tutorials for Microsoft PowerPoint and Word.
Master Critical PowerPoint Shortcuts – Secure Your FREE Training Module and Save Valuable Time!
⌛ Master time-saving expert techniques.
🔥 Create powerful presentations.
🚀 Propel your career to new heights.
We value your privacy – we keep your info safe.
Discover PowerPoint Hacks Loved by Industry Giants - KKR, AmEx, HSBC!
Over 114,880 professionals in finance, marketing and sales have revolutionized their PPT skills with our proven methods.
Gain FREE access to a full module of our premium PowerPoint training program – Get started today!
We hate spam too and promise to keep your information safe.
You are currently viewing a placeholder content from Facebook . To access the actual content, click the button below. Please note that doing so will share data with third-party providers.
PowerPoint 101: The Ultimate Guide for Beginners

Are you struggling with PowerPoint? You need a quick design in PowerPoint but don't know where to start? Don't worry, you have nothing to be ashamed of.
In this article, we're going to refresh the most important PowerPoint basics so you can take advantage of this Microsoft software and create high-impact presentations at any time!
Millions of users worldwide use Microsoft 365 services , making PowerPoint the presentation design software with the highest market share. And with good reason! PowerPoint's features stand out for its usability and originality . We can tell you that PowerPoint is pretty intuitive software, and it's a great option to choose when working with presentations on a daily basis. So, are you ready for a quick PowerPoint 101 class?
Let ' s see what you ' re going to learn today with this PowerPoint Guide :
What is PowerPoint?
What are the best uses of powerpoint, powerpoint basics: what are the components of powerpoint workspace, mastering powerpoint: what are the main features of powerpoint, what are powerpoint templates and where to find them, time to practice how to make a presentation in powerpoint.

Microsoft PowerPoint is a presentation design software that is part of Microsoft 365 . This software allows you to design presentations by combining text, images, graphics, video, and animation on slides in a simple and intuitive way.
Over time, PowerPoint has evolved and improved its accessibility to users. For this reason, it has been adapted to the main operating systems and modalities:
- PowerPoint Online
Additionally, you can use Word and Excel in this online version. That way, you'll be able to make real-time changes in the cloud without fearing losing your files. Sounds great, right?
PowerPoint has a versatile range of uses. Here's a list of the different tasks you can complete with this presentation design software:
- Business presentations or Pitch decks.
- Marketing, Sales and HR plans.
- Project briefs and timelines.
- Inductions to new employees.
- Seminars and educational classes.
- Professional portfolio of photos or designs.
- Presentations of a research summary.
- Presentations for special occasions.
These are just a few examples of the multiple possibilities this Microsoft software offers. Your imagination is the only limit!
Stay tuned as we continue with this PowerPoint 101 Guide...

In order to deeply understand this presentation design software, you need to recognize its main components. Now it's time to learn about the PowerPoint basics!
A quick note before going any further: when opening PowerPoint, some of the commands in the ribbons will look grayish and won't be highlighted when you hover the mouse over them.
This happens since some commands need to be selected in order to function. For example, if you want to change the color of a text, you first need to select it.
That being said, let's start with this Guide for PowerPoint beginners:
PowerPoint Main Window
The first aspect to learn is PowerPoint Main Window. To facilitate the explanation, we've organized its main elements with numbers from 1 to 10:

Based on that, the main components of PowerPoint window are the following:
1. Quick Access Toolbar: allows you to customize commands to have them at hand. You only have to select it and go to "More commands."
2. Title Bar: shows you the name of your file and other "Suggested options" like Slide Master View . These options will vary depending on the use you give to the commands.
3. File Tab: you will see the Home Menu (PowerPoint backstage) by selecting it. There, you can create a new presentation, save it, print it, export it, and many other options.
4. The Ribbon: it's where PowerPoint tabs and tools are. These tools can also be called "commands" or “features.”
5. More Button or Down Arrow: these arrows allow you to view more tools or layout options in PowerPoint.
6. Slides Pane: shows your slides in thumbnail size. By right-clicking, you can access additional options for customizing each slide. Perfect for PowerPoint beginners!
7. Slide: PowerPoint's blank canvas and the frame to be seen when presenting the file.
8. Placeholders: they are dotted boxes that will store your content.
9. Status Bar: allows you to view the slide number, grammatical errors, speaker notes, and the comments on your file.
10. Zoom: allows you to enlarge or minimize your PowerPoint workspace. The range goes from 10 to 400%.
PowerPoint Tabs
The PowerPoint tabs are the control desk of your presentation . Since PowerPoint's features are too many, they're organized in tabs.
You can come and go between tabs as you need. Once you click on a tab, it will open its ribbon, and there, you'll be able to see all the tools related to that particular category.
This PowerPoint tutorial for beginners will give you an overview of all PowerPoint tabs . Pay attention to the following list:
- Transitions Tab
- Animations Tab
- Slide Show Tab
- Recording Tab
1. Home Tab
The Home tab is the most common tab of PowerPoint. This is the tab you'll probably use the most if you're designing a presentation deck from scratch.

It allows you to add new slides and change the text characteristics : font, size, boldness, underlining, alignment, etc. If you've ever used Microsoft Word, these features will be familiar to you.
Also, you will find commands to edit the characteristics of the geometric shapes you insert. This includes: fill color, line color, sharpe effects, among others.
2. Insert Tab
The Insert tab is exactly what its name says it is. In this ribbon, you'll find all the options concerning adding a new element to your PowerPoint presentation .

You can insert a picture, some geometric shapes, icons, WordArt graphics, among others. We can tell you that this tab is really helpful for PowerPoint beginners!
For example, if you have a lot of data in PowerPoint , you could add a chart or diagram to show your information in a more visual way. Also, you can embed videos or music into PowerPoint really easily.
- PowerPoint tip for beginners: To be able to write text on your slides, you need a text box. So, if you're designing your presentation from scratch, remember to go first to the Insert tab and add a text box to start writing.
3. Design Tab
If you are one of those people who enjoy choosing the design of a PowerPoint presentation, this tab will be your favorite.

The Design tab offers a wide range of premade designs , allowing you to get more polished slides. Even better, if you explore its ribbon, you can adjust the color palette and change the overall style of your PowerPoint deck.
The PowerPoint interface, as this basic PowerPoint Tutorial, is really intuitive. We believe that you won't have any problem with this tab!
4. Transitions Tab
Using transitions in PowerPoint is a dynamic way to move from one slide to the next during a presentation. This feature is PowerPoint's stamp, so don ' t miss it!

Some PowerPoint transitions are really classic, like wiping the old slide to present the new one. Others are somewhat over the top, like the “Vortex” or the “Airplane” effect.
If you click on each kind of transition, you'll see a preview on how it would look when presenting. Really cool, right?
5. Animations Tab
In case you want to add special effects for certain elements in your slides , the Animations tab in PowerPoint will interest you.

Like the Transitions tab, you will find various animation effects in this ribbon. It's a matter of trying and choosing the best one according to your needs!
6. Slide Show Tab
As its name says, the Slide Show tab is about presenting your slides . We really like that it gives you several options to show up your presentation!

Considering that you're a PowerPoint beginner, you're not likely to use the Slide Show tab very much.
But if you're curious about this command, you must read our article: How to Make a PowerPoint Slideshow that Runs Automatically?
7. Review Tab
The Review tab is not often used by PowerPoint beginners either.
However, if your job is related to writing or if you work at an international company, this tool can be extremely useful!

With this tab, you can check the slide's spelling, translate the text in real-time, and add comments to your slides . This last function can be helpful to give feedback to a colleague.
8. View Tab
This View tab allows you to change the view of your PowerPoint slides and make handouts from them, among other things.

As you can see, the majority of its commands are really specific. So you won't have any issues while designing, test and see!
In this section, our favorite command for PowerPoint beginners is Slide Master . Explore more about this tool in our guide!
9. Recording Tab
In the last versions of this design presentation software, PowerPoint added the Recording tab. As its name says, it allows you to record all your presentation slides .

This ribbon has advanced commands, so the most common action for a PowerPoint beginner is to take a screenshot or record the screen sequentially .
10. Help Tab
Finally, there is the Help tab. If you have any problem or question concerning how to use PowerPoint, you may go here to look for a solution.
In the latest versions, Windows has added a “Show Training” option. You can click this command to practice the PowerPoint basics since it will download training templates.

As a beginner in PowerPoint, you must recognize the objective of each PowerPoint tab to be able to master the software . But, in order to conduct an outstanding presentation deck, you also need to dominate its most important features. Let's see some of them in the next section!
If you feel ready to delve deeper into PowerPoint's tools, this section is for you.
As you may know , 24Slides specializes in creating outstanding presentations for any Design Project . So, we asked one of our experts about her favorite PowerPoint features, and we want to share them all with you!
Carmen Navarrete , Graphic Designer at 24Slides, highlighted the following features that will make your presentations stand out from the crowd:
PowerPoint Feature #1: Crop to Shape
This first PowerPoint feature is simple but effective!
Let's see how to use it:
- First, choose an image you want to cut and insert it into your workspace.
- Once inserted, select it with the mouse.
- Go to the "Picture Format" tab.
- Press the arrow of the "Crop" button (right side of the screen).
- Select "Crop to Shape."
- Choose your favorite shape and customize your PowerPoint presentation!

PowerPoint Feature #2: Merge Shapes
If you don't like any figure enough, you can create one from scratch!
This is possible thanks to the "Merge Shapes" option. Follow these steps to unleash your creativity:
- First choose an image you want to cut.
- Check the list of PowerPoint shapes (Insert tab > Shapes).
- Choose two or three figures you want to merge (they can be the same figure).
- Select the figures you are going to merge (see the image).
- Once selected, go to the "Shape Format" tab.
- Press the "Merge Shapes" option and the type of merge you want (test and choose!).

- A new figure will appear, and you must fill it with the image from the first step.
- Stay on the Shape Format tab and go to "Shape Fill" (button in the middle of the ribbon).
- Select "Picture Fill" and browse for your image.
- Select the image to fill your new figure, and that's it!

- PowerPoint tip for beginners: When your merged figure is ready, paste the image to the background of your slide to achieve a better result. This way, you can use your image as a canvas and see if both elements fit well.
PowerPoint Feature #3: Insert Icons
This PowerPoint feature is quite easy to follow for PowerPoint beginners!
Just follow these steps:
- Go to the Insert tab.
- Select the "Icons" option.
- A Microsoft 365 library will open, where you can search for the required icon.
- Now, you must insert it into your presentation and adapt it to your design.
- If you have an active Microsoft 365 subscription, you'll have access to a larger number of icons in PowerPoint.
- PowerPoint tip for beginners: If you want to learn more about icons in PowerPoint, read our article on How to Use Icons to Make Amazing PowerPoint Presentations .
PowerPoint Feature #4: Insert SmartArt
PowerPoint's SmartArt is one of the most popular and accessible tools to dominate while learning about PowerPoint basics.
To use it in your slide deck, you must:
- Select SmartArt.
- See all SmartArt categories and choose your favorite based on your needs.
- Add the text you have prepared and adapt it to your presentation.

We want to give you some ideas to master this SmartArt tool in PowerPoint: you can make timelines , flowcharts , and even a Venn diagram in just a few seconds. Try and see!
PowerPoint Feature #5: Remove Background
If you don't know how to use Photoshop and want to remove the background from an image, in this PowerPoint 101 Guide, we show you how:
- First choose the image you want to remove the background from.
- Insert the image in the PowerPoint workspace.
- Select the image and go to the "Picture Format" tab.
- Select "Remove Background" (first option on the left).
- You can keep and remove parts of the image with the first two tools of the ribbon (see image).
- Keep in mind that all the sections highlighted in purple will be deleted.

- We recommend zooming in to keep or remove parts of the image with more detail.
- Once you're done, press the "Keep Changes" button.
- Finally, adapt the new image to your PowerPoint presentation.

- PowerPoint tip for beginners: Choose a high-contrast photo or image for best results. In other words, the outline of the person or object you want to cut out must have clear edges and cannot blend with the image's background color.
PowerPoint Feature #6: Add Speaker Notes
The latest PowerPoint feature is a command you can use to prepare your speech before presenting to an audience.
Learning how to add speaker notes in PowerPoint is simple:
- Select the slide that needs some notes.
- Usually, there is a footer below the slide, but if not, you will have to activate it.
- Go to the View tab and select "Notes."
- The Speaker Notes section will appear, and you can add whatever you want!

- PowerPoint tip for beginners: In case you want to practice your entire presentation and have a lot of notes, go to the View tab and select "Notes Page" (fourth command). You'll be able to see all your Speaker Notes faster!
PowerPoint Feature #7: PowerPoint Translator
If you've ever wondered how to translate your PowerPoint Slides, we'll explain the step by step here:
- Go to the Review tab.
- Select the text you want to translate.
- Press the “Translate” button.
- A panel will open on the right side of the screen.
- Choose the language you need and you'll see the translation in real-time.
- If you press Insert, the text will change to the new translation!
PowerPoint Feature #8: Screen Recording
The process of recording your screen in PowerPoint is straightforward and intuitive. Let's see:
- Go to the “Record” or “Recording” tab.
- Press the "Record Slide Show" button or the “From Beginning” button (depending on your PPT version).
- A new window will open.
- Select the red record button and start recording!
- When you're done, select “Export.”
- By default, the video will be 1080p. If you want to lower the video quality, go to "Customize export."
- Name the video, save it to a folder and that's it!
As you may have noticed, this software has endless PowerPoint design options for beginners. We encourage you to try and test each functionality!
However, we're clear that PowerPoint has different features, so it can be hard to know where to start. That's why understanding PowerPoint basics is crucial if you truly want to master this software!
Our PowerPoint 101 Guide continues; stay tuned to discover more great stuff about this Microsoft software. Keep reading!
A PowerPoint template is a pre-made design that you can use for your own means, and that will save you a lot of time!
Templates in PowerPoint are a great resource for designing since all the structure is already done, and you only have to update the content . We can tell you they're the perfect resource for PowerPoint beginners!
They can be incredibly specific. For example, there are templates for a SWOT analysis or a complete Marketing report. Otherwise, templates can also be very general, with several slides with a similar design.
If you struggle with the artistic part of designing presentations, downloading PowerPoint templates will be a life changer!

How to download PowerPoint templates for free?
If you didn't know, 24Slides has an extensive repository of PowerPoint templates. But how to obtain them? It's really simple:
- First, create an account on our Free Templates Website with the button “Register” (that way, you can download everything without problems!).
- Think about the graphics you need and the ideal structure for your presentation deck (you can also change the color palette later!).
- Download it in PowerPoint format (if you prefer it in Google Slides format, you'll also find this type in our repository).
- Edit and change everything you need for your PowerPoint presentation!
24Slides Designers specialize in business and corporate PowerPoints, but you'll also find other types of templates on our website: Data templates, Timelines, Roadmaps, Matrixes, Diagrams, and more.
Keep in mind that a well-designed PowerPoint deck helps you communicate stronger messages to your audience . Don't waste this opportunity to make your presentation shine!

If you want to learn more about how to master PowerPoint, do not miss the last section. We'll show you some PowerPoint basics from the software itself!
A PowerPoint 101 Guide wouldn't be that useful with no examples. So, if you enjoy the step-by-step guides, this section is for you.
Below, we'll show you how to make a simple PowerPoint presentation. But first, here are some tips to be more efficient in the process:
- Be clear about what type of presentation you're going to create (is it corporate, playful, or more creative?).
- Make a draft with the most important information you need to add and, thus, generate a good structure in your presentation .
- Get inspired by examples on the internet , but adapt them to your needs and audience.
- If you will create a business presentation, keep in mind your brand identity .
- Make sure your PowerPoint works , you may need to update to the latest version or pay for the subscription.
Step 1: Make a draft to structure your presentation
As we said before, writing a draft or script of your content will be vital to start on the right foot as a PowerPoint beginner.
This advice is so important that we choose it as the first step to learning how to make a PowerPoint presentation. Remember: Planning is key!

Regarding the process of planning, we share some good practices:
- If your presentation will be very long , write down all subtitles and content in a Word document. This will help you organize your ideas and give a correct sequence to your narrative. In addition to avoiding redundancies in the message you want to communicate.
- If your presentation will use many visual resources , we recommend choosing high-quality images. This will help you have a starting graphic base. Some good free image repositories are Freepick , Unsplash , and Adobe Stock .
- If your presentation is based on data , have all your results summarized or your most relevant conclusions at hand. The idea of making a PowerPoint presentation is to show your information in the simplest way possible for your audience.
Step 2: Create a new document in PowerPoint
Once you check that all the functions are working fine with the software, please open it and go to the File tab. If you've ever used Word or Excel, you'll probably find this Home Menu familiar.
In short, this is the main page of PowerPoint, where you can create a new presentation or open an older one. Let's see:

In order to follow this part of our PowerPoint Tutorial correctly, take into consideration the following points:
- On the lower side of the screen, you'll find your recently opened PowerPoint files. This option is great for saving some time.
- If you don't find the presentation you're looking for, click on the “Open” option at the left bar and find older files.
- Don't forget to save your presentation with a relatable name so you won't lose sight of it!
Step 3: Choose the perfect design for your presentation
With your information ready in a draft, it's time to choose the design of your PowerPoint slide deck. You must imagine that the available design options are endless!
For practical reasons, you have three options regarding the design:
- Start a design from scratch (very difficult for a PowerPoint beginner).
- Choose an established PowerPoint design or layout.
- Download a PowerPoint template and modify some details.
Don't worry if you don't know how to continue! In this PowerPoint 101 class, we're going to explain step by step the second option:
How do you set a default design in PowerPoint?
- First, go to the Design tab.
- Open the list of options by clicking on the third arrow.
- Choose the design you like the most for your PowerPoint presentation.

If you want to explore more PowerPoint designs, there is a way to research online. For that, you only need to:
- Go to the File tab (first tab, next to the Home tab).
- Select "More themes" (see image).

- Use the search engine and write the keyword you want (it can be related to your business or it can be a color).
- Check the list of PowerPoint themes and choose your favorite.
- Wait a few minutes while it loads and keep designing in PowerPoint!

How do you change the layout of one slide in PowerPoint?
In this PowerPoint 101 Guide, you will also learn how to configure the layout of each slide.
Keep in mind that to have a high-impact presentation, you must adapt your slides' design to the type of content you'll add. And using layouts is perfect for this purpose.
To change the layout type in PowerPoint, follow these steps:
- Right-click on the slide you want to change.
- Select the "Layout" option.
- You will find more than ten layout models.
- Choose the one that best suits your content.
- Repeat these steps for each slide (if you wish or require).

How do you customize your slides in PowerPoint?
The design process in this PowerPoint 101 Guide doesn't stop there.
You also can customize your presentation's color palette , font style, background format , and graphics effects .
Just go to:
- Design tab > Variants.
- Select Colors, Fonts, Effects or Background Styles (as you need).
- If you're inspired and want to create your own background in PowerPoint, select Background Styles > Format Background.
- Finally, custom your slides as you want!

Step 4: Add all your information to your presentation
Now, it's time to add all your information to your slides. If your script is long, take your time to copy each part of it.
In this PowerPoint Tutorial, we're going to show how our design is going so far. We design at your side!

Step 5: Add transitions or animations to your presentation
The stamp of PowerPoint is its transitions and animations! Naturally, our PowerPoint 101 has considered these essential commands.
If you want to add them to your presentation and make your speech more fluid, follow these steps:
- Go to the tabs section of PowerPoint.
- Select "Transitions" or "Animations" and try your favorite effects.
- Remember that if you select Transitions, these will modify the entire slide, while Animations can be added to each element individually.
When choosing one Animation, you can eliminate it if you aren't 100% convinced. You only need to:
- Select the Animation number that appears on the corner.
- Press the "Delete" or "Backspace" button on your keyboard.
- Choose another Animation in PowerPoint if you want!

This “PowerPoint for dummies” is full of tips and tricks! So here is one more: Don't overuse transitions or animations in PowerPoint ; they can make your presentation slower and unprofessional . Use this tool in a subtle way!
Step 6: Refine the final details
As always, every final product must be reviewed. Especially if you're learning the PowerPoint fundamentals with us.
We recommend reviewing each slide of your PowerPoint presentation one final time. In this process, you will be able to:
- Add icons if your presentation requires it.
- Change any image or illustration if they don't convince you.
- Change transitions or animations.
- Customize your presentation's color palette .
- Proofread your slides' text or add more information.
- Add speaker notes to your presentation.

Step 7: Slideshow your presentation
When your presentation is finished, it's essential to know how to make a PowerPoint slideshow. This way, you can see your slides from the exact same perspective your audience will see them.
To slideshow your presentation in PowerPoint, follow these simple steps for PowerPoint beginners:
- Position yourself on your first slide.
- Go to the bottom right of the software.
- Select the "Slide Show" button (see image).
- Have a look of your presentation by clicking on each slide or pressing the right arrow on your keyboard.
- To go out from the Slide Show mode, you have to press the ESC key.

Now you can present your slides like an expert!
When you master this presentation design software, you'll be able to create amazing things in PowerPoint : infographics, diagrams, charts, pitch decks, business cards, calendars, you name it!
This was our PowerPoint Guide for beginners. We hope that our compilation today will be useful for conducting more professional presentations in the future and, why not, achieve all your goals!
Don't forget to share this PowerPoint 101 Guide with your co-workers or whoever you want!

Want to boost your beginner PowerPoint skills? Check out this content:
- How to Work with Multiple Images in PowerPoint
- How to Add a Timer to Your Powerpoint Presentations
- PowerPoint Charts, Graphs, & Tables Made Easy | Tips & Tricks
- How To Use PowerPoint Design Ideas - All Questions Answered!
- 36 Fun Icebreakers for Your Next Presentation
- The Cost of PowerPoint Presentations: Discover the hidden expenses you might overlook!
Create professional presentations online
Other people also read

Tutorial: Save your PowerPoint as a Video
How To Convert Google Slides To PowerPoint and Vice Versa

How To Add Animations To PowerPoint
How to Start PowerPoint: A Step-by-Step Guide for Beginners
Starting PowerPoint is as easy as opening the program and selecting a template or a blank presentation. Once you’ve got the program open, you’ll be greeted with various options to create your perfect presentation, whether it’s for a business meeting, a school project, or just for fun. Just be sure you have PowerPoint installed on your computer or you have access to it online through Microsoft 365.
After you’ve opened PowerPoint and selected your template, you’ll be able to add text, images, videos, and other elements to your slides to make your presentation unique and engaging.
Introduction
PowerPoint is a versatile tool used by millions to create engaging and dynamic presentations. Whether you’re a student, a professional, or someone who just wants to make a fun slideshow for friends and family, knowing how to start PowerPoint is a must-have skill in today’s digital world. This program has been around for decades, evolving with technology to offer a wide range of features that can make any presentation go from bland to brilliant.
But why is it so important to know how to start PowerPoint? Well, think about it. Presentations are a key part of communication in various settings. They can make or break a business pitch, help or hinder a teacher’s lesson, and add a lot of fun to personal projects. PowerPoint is relevant to just about anyone who needs to convey information in a visual and organized way. So let’s dive in and get started on mastering the basics of opening and using PowerPoint.
Step by Step Tutorial: Starting PowerPoint
Before we begin, make sure you have PowerPoint installed on your computer. If you do, fantastic! If not, you can download it from the Microsoft website or access it online through Microsoft 365. Ready? Let’s go!
Step 1: Open PowerPoint
Launch PowerPoint by clicking on the program icon on your computer.
Once you’ve found the PowerPoint icon, either on your desktop, start menu, or taskbar, give it a click, and the program will open. You may see a loading screen briefly before the main window appears.
Step 2: Choose a Template
Select a template or a blank presentation to start creating your slides.
PowerPoint offers a variety of templates to fit every need and occasion. Whether you want something simple and professional or colorful and creative, there’s a template for you. If you prefer to start from scratch, you can choose a blank presentation.
Step 3: Customize Your Slides
Add text, images, videos, and other elements to your slides.
Once you’ve picked your template or opened a blank slide, it’s time to make it your own. You can add title text, bullet points, images, and even videos. PowerPoint has a range of tools for customizing each slide to fit your content perfectly.
| Benefit | Explanation |
|---|---|
| Easy to Use | PowerPoint is user-friendly, making it accessible for beginners and experts alike. |
| Customizable | With a wide range of templates and design tools, PowerPoint allows for high levels of customization. |
| Multimedia Integration | PowerPoint supports various media types, letting you create rich, engaging presentations. |
| Drawback | Explanation |
|---|---|
| Can Be Overwhelming | The vast array of features can be daunting for new users to navigate. |
| Template Limitations | While there are many templates, finding the perfect one can sometimes be challenging. |
| Potential for Technical Issues | Like any software, PowerPoint can experience glitches or crashes, which may cause inconvenience. |
Additional Information
When starting PowerPoint, it’s essential to keep your audience in mind. Who will be viewing your presentation? What is the main message you want to convey? Answering these questions can help you choose the right template and design elements. Don’t be afraid to experiment with different fonts, colors, and layouts to find what works best for your content.
Remember, a well-organized and visually appealing presentation can significantly impact your audience’s engagement and retention of information. Also, consider using PowerPoint’s various features like transitions and animations sparingly – while they can add a dynamic touch, overuse can be distracting. And always save your work regularly!
- Open PowerPoint by clicking on the program icon.
- Select a template or a blank presentation.
- Customize your slides by adding text, images, videos, and other elements.
Frequently Asked Questions
Do i need a microsoft account to use powerpoint.
Yes, to download and use PowerPoint, you’ll need a Microsoft account.
Can I access PowerPoint online?
Absolutely, PowerPoint is available online through Microsoft 365, which allows you to work on presentations from any browser.
Is PowerPoint free?
PowerPoint is not free, but it is included in the Microsoft Office Suite, which is available for purchase. However, you can use the online version with a Microsoft 365 subscription.
Can I collaborate with others on a PowerPoint presentation?
Yes, PowerPoint supports collaboration, allowing multiple users to work on the same presentation simultaneously.
Can I convert a PowerPoint presentation to a video?
Indeed, PowerPoint has a feature that lets you save your presentation as a video file.
Starting PowerPoint is just the beginning of creating compelling and memorable presentations. Whether you use a template or start from a blank canvas, the key to a great PowerPoint presentation is creativity, clarity, and audience engagement. Remember, practice makes perfect!
So go ahead and play around with all the tools and features PowerPoint offers. The more you use it, the more proficient you’ll become. And if you ever get stuck, there’s a vast community of PowerPoint users and an array of online resources to help you out. Now that you know how to start PowerPoint, where will your presentations take you?

Matthew Burleigh has been writing tech tutorials since 2008. His writing has appeared on dozens of different websites and been read over 50 million times.
After receiving his Bachelor’s and Master’s degrees in Computer Science he spent several years working in IT management for small businesses. However, he now works full time writing content online and creating websites.
His main writing topics include iPhones, Microsoft Office, Google Apps, Android, and Photoshop, but he has also written about many other tech topics as well.
Read his full bio here.
Share this:
Join our free newsletter.
Featured guides and deals
You may opt out at any time. Read our Privacy Policy
Related posts:
- Can I Convert My Powerpoint to Google Slides?
- How to Save Powerpoint as PDF with Notes
- How to Drag Slides From One PowerPoint to Another: A Step-by-Step Guide
- How to Save a PowerPoint Template Folder: Easy Steps to Follow
- How to Make a Powerpoint Slide Vertical in Powerpoint 2013
- How to Set Time for Slides in Powerpoint
- How to Change PowerPoint Template: 2024 Guide for a Fresh Look
- How to Check Word Count on Powerpoint 2010
- How to Use a Mac With PowerPoint: A Step-by-Step Guide
- How to Create a PowerPoint Presentation Step by Step: 2024 Guide
- How to Create a Template in PowerPoint: 2024 Guide for Success
- How to Unhide a Slide in Powerpoint 2013
- How Is Microsoft PowerPoint Used in Business: A Comprehensive Guide
- How to Insert Slides from Another Presentation in Powerpoint 2010
- How to Change Hyperlink Color in Powerpoint 2010 (An Easy 5 Step Guide)
- How to Change the Font on All Slides in Google Slides
- What Are Benefits of PowerPoint? A Comprehensive Guide
- How to Convert a PowerPoint to Word and Edit with Ease
- How to Combine PowerPoint Presentations With Different Orientations
- How to Insert Check Mark in Powerpoint for Office 365
Your current User-Agent string appears to be from an automated process, if this is incorrect, please click this link:
- PRO Courses Guides New Tech Help Pro Expert Videos About wikiHow Pro Upgrade Sign In
- EDIT Edit this Article
- EXPLORE Tech Help Pro About Us Random Article Quizzes Request a New Article Community Dashboard This Or That Game Happiness Hub Popular Categories Arts and Entertainment Artwork Books Movies Computers and Electronics Computers Phone Skills Technology Hacks Health Men's Health Mental Health Women's Health Relationships Dating Love Relationship Issues Hobbies and Crafts Crafts Drawing Games Education & Communication Communication Skills Personal Development Studying Personal Care and Style Fashion Hair Care Personal Hygiene Youth Personal Care School Stuff Dating All Categories Arts and Entertainment Finance and Business Home and Garden Relationship Quizzes Cars & Other Vehicles Food and Entertaining Personal Care and Style Sports and Fitness Computers and Electronics Health Pets and Animals Travel Education & Communication Hobbies and Crafts Philosophy and Religion Work World Family Life Holidays and Traditions Relationships Youth
- Browse Articles
- Learn Something New
- Quizzes Hot
- Happiness Hub
- This Or That Game
- Train Your Brain
- Explore More
- Support wikiHow
- About wikiHow
- Log in / Sign up
- Computers and Electronics
- Presentation Software
- PowerPoint Presentations
How to Make a Great PowerPoint Presentation
Last Updated: March 2, 2024 Tested
This article was co-authored by Maureen Taylor . Maureen Taylor is the CEO and Founder of SNP Communications, a leadership communications company based in the San Francisco Bay Area. She has been helping leaders, founders, and innovators in all sectors hone their messaging and delivery for almost 30 years, and has worked with leaders and teams at Google, Facebook, Airbnb, SAP, Salesforce, and Spotify. There are 10 references cited in this article, which can be found at the bottom of the page. The wikiHow Tech Team also followed the article's instructions and verified that they work. This article has been viewed 497,955 times.
PowerPoint is a Microsoft Office Suite program which is used to make presentation slideshows, combining text and images to create captivating and motivating presentations. However, the skills and secrets to make these excellent presentations are often, simply not there within the ones who make them! If you feel your presentation could use a little extra something, read below for some helpful ideas to take it from so-so to absolutely amazing.
Create Your Narrative

- The structure of an academic presentation should follow roughly the same structure as an academic paper, first introducing your main point, supporting it with evidence, and then a short conclusion.
- The Problem
- Your solution
- Business model
- Underlying magic/technology
- Marketing and sales
- Competition
- Projections and milestones
- Status and timeline
- Summary and call to action
Utilize the Format

Nail Your Presentation

- It’s not enough to show why your information is important to someone else; you have to make it important to your audience. Make them understand why they should care. For example, don’t give a lecture on history and just expect students to care. You need to show them how that history directly ties to current events and affects their lives. Look for parallels and direct correlations to tie your information to your audience.
What Is The Best Way To Start a Presentation?
Sample PowerPoint Presentations

Expert Q&A

- If you're using Flickr Creative Commons images, make sure you give attribution to the owner of the picture (you can do a whole page of credits at the end of your presentation). Thanks Helpful 2 Not Helpful 0
- Remember the 10/20/30 Rule -- no more than 10 slides, no longer than 20 minutes, and no smaller than 30 point font. Thanks Helpful 2 Not Helpful 0
- Don't use someone else's image unless you are sure that you have permission to do so. Thanks Helpful 2 Not Helpful 0

- Even if you miss a slide or miss a topic, avoid fumbling to find it. Move along and just before the end, say that you need an important addition to be looked upon which you had skipped purposely and then revert to the slide that you have missed and fill in the gaps. At no point should it be felt that you are not in-charge of your own PPT. Thanks Helpful 19 Not Helpful 1
- Sometimes the projector you are using may develop a problem. Be patient and let the appropriate authorities handle it. Do not swear or sweat , it happens! Then, once it's fixed, you may continue from where you left with a smile or a short joke or, if the repair took a very long time, start from the beginning. Thanks Helpful 17 Not Helpful 1
- Never read your slides word for word. Thanks Helpful 23 Not Helpful 4
- Do not overdo with the transitions and slide animations, as it can become a distraction Thanks Helpful 9 Not Helpful 2
- Practice makes perfect. Finish your presentation and then speak it out loud. Try again until you have it "down." Thanks Helpful 0 Not Helpful 0
You Might Also Like

- ↑ https://www.inc.com/guides/201102/how-to-create-a-great-powerpoint-presentation.html
- ↑ http://www.forbes.com/sites/johngreathouse/2012/09/24/9-easy-ways-to-create-powerpoint-slides-that-suck-less/
- How to Make Animation or Movies With Microsoft PowerPoint
- How to Make a Computer Scrapbook Using Power Point
- How to Animate Your Own Show
- How to Animate Clay
- How to Animate With Pivot Stickfigure Animator
- How to Insert a PowerPoint to Google Page
- How to Add a PowerPoint File to a Blog
- How to Insert a PowerPoint to MySpace Profile
About This Article

- Send fan mail to authors
Reader Success Stories
Genesis Gallegos
Feb 20, 2017
Is this article up to date?

Yogendra Singh
Sep 20, 2016
Jan 7, 2017
Aug 26, 2016

Featured Articles

Trending Articles

Watch Articles

- Terms of Use
- Privacy Policy
- Do Not Sell or Share My Info
- Not Selling Info
wikiHow Tech Help Pro:
Level up your tech skills and stay ahead of the curve
How to Create a PowerPoint Presentation

Introduction: How to Create a PowerPoint Presentation

Step 1: Launch the PowerPoint Program
Step 2: choosing a design.
The next thing you want to do is decide what design you want for the presentation. To do this, go to the 'Design' tab at the top of the page. Scroll through all the options and decide which one looks best for the presentation you want. To get a preview of what the design will look like before applying it to the presentation, hover over the design you want to preview. This design will be automatically continued throughout the rest of your presentation. Once you have more than one slide, you can add a different design for just one slide. To do this, select the slide you want to change the design on by clicking on it. It will pop-up as the big slide in the screen. Then you can right-click the design you want for this slide and select 'Apply to Selected Slide'. It will appear on that slide, but will not change the design of the other slides.
Step 3: Create Title Page
Step 4: add more slides, step 5: add charts, pictures, graphs, etc., step 6: add transitions, step 7: changing the order, step 8: play the presentation, recommendations.

Art and Sculpture Contest

Woodworking Contest

Outdoor Life Contest

How to Create a Simple PowerPoint Presentation
These steps let you add titles, text, designs, and images
Christina Morillo / Pexels
- Homework Tips
- Learning Styles & Skills
- Study Methods
- Time Management
- Private School
- College Admissions
- College Life
- Graduate School
- Business School
- Distance Learning
- M.Ed., Education Administration, University of Georgia
- B.A., History, Armstrong State University
You can make your next classroom or office presentation stand out by creating slides in PowerPoint, a simple process anyone can learn with a little practice.
Getting Started
Microsoft Corporation
When you first open PowerPoint, you'll see a blank “slide” with space for a title and a subtitle in different boxes. You can use this page to begin creating your presentation right away. Add a title and subtitle in the boxes if you want, but you can also delete the boxes and insert a photo, graph, or another object onto the slide.
Creating Slides
Here is an example of a title in the “title” box, but instead of a subtitle, there's a photo in the subtitle box.
To create a slide like this, click inside the “Title” box and type a title. The “subtitle” box is a container for inserting text, but if you don't want a subtitle there, you can remove this box by clicking on one edge to highlight it and then hitting “delete.” To insert a picture into this space, go to "Insert" on the menu bar and select "Picture." Choose a photo from your saved photo files in locations such as "My Pictures" or a flash drive .
The picture you select will be inserted onto the slide, but it may be so big that it covers the entire slide. You can select the picture and make it smaller by moving your cursor to the edge of the photo and dragging the corners inward.
Now that you have a title slide, you can create additional presentation pages. Go to the menu bar at the top of the page and select "Insert" and "New Slide." You’ll see a new blank slide that looks a little different. The makers of PowerPoint have tried to make this easy and have guessed that you’d like to have a title and some text on your second page. That's why you see “Click to add title” and “Click to add text.”
You can type a title and text in these boxes, or you can delete them and add any type of text, photo, or object that you like by using the "Insert" command.
Bullets or Paragraph Text
A title and text have been inserted in the boxes on this slide template. The page is set up to insert text in bullet format. You can use bullets, or you can delete the bullets and type a paragraph .
If you choose to stay with the bullet format, type your text and hit "return" to make the next bullet appear.
Adding a Design
Once you have created your first couple of slides, you might want to add a design to your presentation. Type the text for your next slide, then go to "Format" on the menu bar and select "Slide Background." Your design choices will show up on the right side of the page. Click on the different designs to see how your slide will look in each format. The design you select will be applied to all your slides automatically. You can experiment with the designs and change them at any time.
Watch Your Slide Show
You can preview your slideshow at any time. To see your new creation under way, go to "View" on the menu bar and select "Slide Show." Your presentation will appear. To move from one slide to another, use the arrow keys on your computer keyboard.
To go back to design mode, hit the “Escape” key. Now that you have some experience with PowerPoint, you're ready to experiment with some of the other features of the program.
- Preparing for an Oral Exam
- 18 Ways to Practice Spelling Words
- How Similes Work
- Homework Guidelines for Elementary and Middle School Teachers
- 8 DIY Ideas for Back to School
- How to Change Your Habits and Improve Your Grades
- How to Run for Student Council
- How to Stop Overthinking Tests and Projects
- Understanding Very Big Numbers
- 8 Locker Organization Ideas for Back to School
- The Many Definitions of a Glyph
- Preparing for Final Exams
- External and Internal Motivation
- Lining Up Dots in a Table of Contents
- College School Supplies List
- How to Write and Structure a Persuasive Speech
How-To Geek
8 tips to make the best powerpoint presentations.

Your changes have been saved
Email is sent
Email has already been sent
Please verify your email address.
You’ve reached your account maximum for followed topics.
Android Users Should Disable 2G Connectivity, Says Google
12 single-purpose mac apps i couldn't live without, things you can 3d print at home, but shouldn't, quick links, table of contents, start with a goal, less is more, consider your typeface, make bullet points count, limit the use of transitions, skip text where possible, think in color, take a look from the top down, bonus: start with templates.
Slideshows are an intuitive way to share complex ideas with an audience, although they're dull and frustrating when poorly executed. Here are some tips to make your Microsoft PowerPoint presentations sing while avoiding common pitfalls.

It all starts with identifying what we're trying to achieve with the presentation. Is it informative, a showcase of data in an easy-to-understand medium? Or is it more of a pitch, something meant to persuade and convince an audience and lead them to a particular outcome?
It's here where the majority of these presentations go wrong with the inability to identify the talking points that best support our goal. Always start with a goal in mind: to entertain, to inform, or to share data in a way that's easy to understand. Use facts, figures, and images to support your conclusion while keeping structure in mind (Where are we now and where are we going?).
I've found that it's helpful to start with the ending. Once I know how to end a presentation, I know how best to get to that point. I start by identifying the takeaway---that one nugget that I want to implant before thanking everyone for their time---and I work in reverse to figure out how best to get there.
Your mileage, of course, may vary. But it's always going to be a good idea to put in the time in the beginning stages so that you aren't reworking large portions of the presentation later. And that starts with a defined goal.

A slideshow isn't supposed to include everything. It's an introduction to a topic, one that we can elaborate on with speech. Anything unnecessary is a distraction. It makes the presentation less visually appealing and less interesting, and it makes you look bad as a presenter.
This goes for text as well as images. There's nothing worse, in fact, than a series of slides where the presenter just reads them as they appear. Your audience is capable of reading, and chances are they'll be done with the slide, and browsing Reddit, long before you finish. Avoid putting the literal text on the screen, and your audience will thank you.
Related: How to Burn Your PowerPoint to DVD

Right off the bat, we're just going to come out and say that Papyrus and Comic Sans should be banned from all PowerPoint presentations, permanently. Beyond that, it's worth considering the typeface you're using and what it's saying about you, the presenter, and the presentation itself.
Consider choosing readability over aesthetics, and avoid fancy fonts that could prove to be more of a distraction than anything else. A good presentation needs two fonts: a serif and sans-serif. Use one for the headlines and one for body text, lists, and the like. Keep it simple. Veranda, Helvetica, Arial, and even Times New Roman are safe choices. Stick with the classics and it's hard to botch this one too badly.

There reaches a point where bullet points become less of a visual aid and more of a visual examination.
Bullet points should support the speaker, not overwhelm his audience. The best slides have little or no text at all, in fact. As a presenter, it's our job to talk through complex issues, but that doesn't mean that we need to highlight every talking point.
Instead, think about how you can break up large lists into three or four bullet points. Carefully consider whether you need to use more bullet points, or if you can combine multiple topics into a single point instead. And if you can't, remember that there's no one limiting the number of slides you can have in a presentation. It's always possible to break a list of 12 points down into three pages of four points each.

Animation, when used correctly, is a good idea. It breaks up slow-moving parts of a presentation and adds action to elements that require it. But it should be used judiciously.
Adding a transition that wipes left to right between every slide or that animates each bullet point in a list, for example, starts to grow taxing on those forced to endure the presentation. Viewers get bored quickly, and animations that are meant to highlight specific elements quickly become taxing.
That's not to say that you can't use animations and transitions, just that you need to pick your spots. Aim for no more than a handful of these transitions for each presentation. And use them in spots where they'll add to the demonstration, not detract from it.

Sometimes images tell a better story than text can. And as a presenter, your goal is to describe points in detail without making users do a lot of reading. In these cases, a well-designed visual, like a chart, might better convey the information you're trying to share.
The right image adds visual appeal and serves to break up longer, text-heavy sections of the presentation---but only if you're using the right images. A single high-quality image can make all the difference between a success and a dud when you're driving a specific point home.
When considering text, don't think solely in terms of bullet points and paragraphs. Tables, for example, are often unnecessary. Ask yourself whether you could present the same data in a bar or line chart instead.

Color is interesting. It evokes certain feelings and adds visual appeal to your presentation as a whole. Studies show that color also improves interest, comprehension, and retention. It should be a careful consideration, not an afterthought.
You don't have to be a graphic designer to use color well in a presentation. What I do is look for palettes I like, and then find ways to use them in the presentation. There are a number of tools for this, like Adobe Color , Coolors , and ColorHunt , just to name a few. After finding a palette you enjoy, consider how it works with the presentation you're about to give. Pastels, for example, evoke feelings of freedom and light, so they probably aren't the best choice when you're presenting quarterly earnings that missed the mark.
It's also worth mentioning that you don't need to use every color in the palette. Often, you can get by with just two or three, though you should really think through how they all work together and how readable they'll be when layered. A simple rule of thumb here is that contrast is your friend. Dark colors work well on light backgrounds, and light colors work best on dark backgrounds.

Spend some time in the Slide Sorter before you finish your presentation. By clicking the four squares at the bottom left of the presentation, you can take a look at multiple slides at once and consider how each works together. Alternatively, you can click "View" on the ribbon and select "Slide Sorter."
Are you presenting too much text at once? Move an image in. Could a series of slides benefit from a chart or summary before you move on to another point?
It's here that we have the opportunity to view the presentation from beyond the single-slide viewpoint and think in terms of how each slide fits, or if it fits at all. From this view, you can rearrange slides, add additional ones, or delete them entirely if you find that they don't advance the presentation.
The difference between a good presentation and a bad one is really all about preparation and execution. Those that respect the process and plan carefully---not only the presentation as a whole, but each slide within it---are the ones who will succeed.
This brings me to my last (half) point: When in doubt, just buy a template and use it. You can find these all over the web, though Creative Market and GraphicRiver are probably the two most popular marketplaces for this kind of thing. Not all of us are blessed with the skills needed to design and deliver an effective presentation. And while a pre-made PowerPoint template isn't going to make you a better presenter, it will ease the anxiety of creating a visually appealing slide deck.
- Microsoft Office
Find the perfect PowerPoint presentation template
Bring your next presentation to life with customizable powerpoint design templates. whether you're wowing with stats via charts and graphs or putting your latest and greatest ideas on display, you'll find a powerpoint presentation template to make your ideas pop., presentations.
Help your data, insights, and recommendations make a statement with beautiful and easily customizable presentation templates.
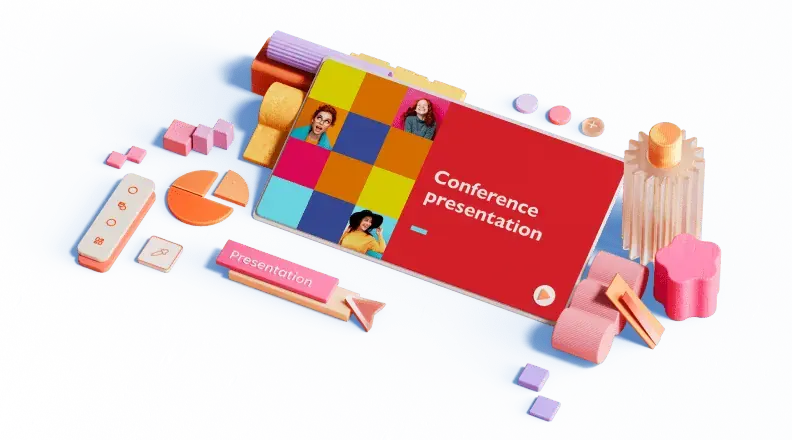
Certificates
Celebrate accomplishments big and small with customizable certificate templates. From gift certificates to awards for finishing a course or training, find a template that highlights their accolades.
Boost visibility for your show, project, or business with easily customizable poster templates. Find templates for all your promotion needs and make them uniquely yours in a flash.

Keep track of whatever you need to in style. From personal planning to promotional calendars, find templates for every kind of project and aesthetic.

Infographics
Say more with less using helpful and easily customizable infographic templates. Add clarity to business presentations, school projects, and more with these helpful templates.
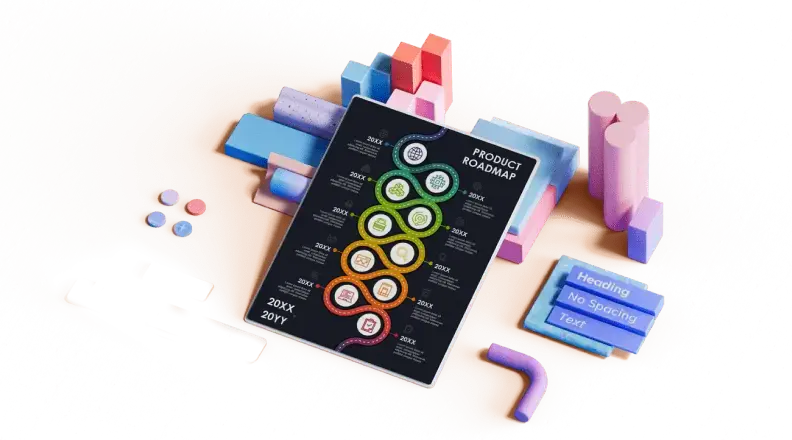
Start with the best PowerPoint templates

Elevate your storytelling
Tips, tricks, and insider advice from our business and design experts
A quick way to create beautiful, powerful PowerPoint presentations
Create captivating, informative content for PowerPoint in just a few minutes—no graphic design experience needed. Here's how:

1. Find the perfect PowerPoint template
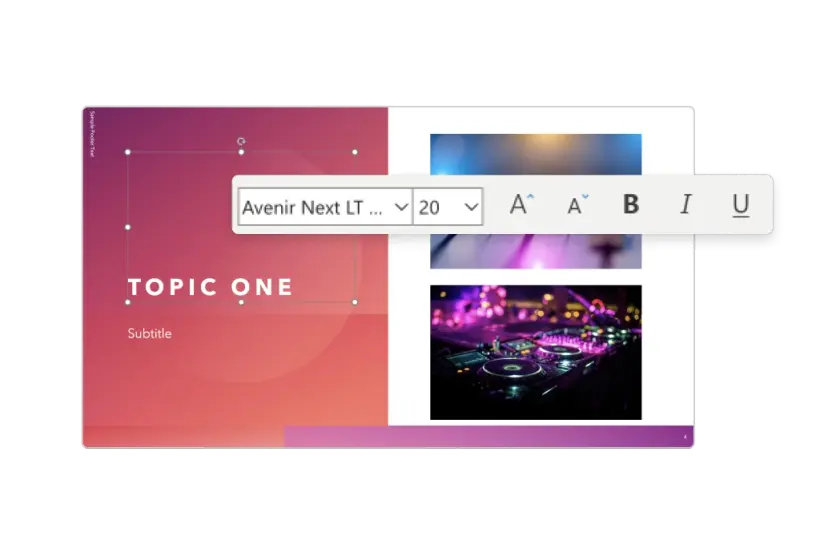
2. Customize your creation
3. Show it off
Let's create a powerpoint design, frequently asked questions, where can i find slide templates and themes that i can customize.
To find customizable slide templates and themes, you can explore the business presentations templates or search by PowerPoint templates . Once you find a template that resonates with you, customize it by changing its color scheme, add in your own photos, and swap out the font.
How do I use pre-made PowerPoint templates?
After you've chosen a PowerPoint template to use, customize it. Explore [design tips] on how to customize a deck that resonates with your brand while putting emphasis on the topic at hand. Play with other design elements, like photo shapes, to make each slide unique.
How can I make or edit my own custom PowerPoint templates?
Start from scratch by creating your own PowerPoint template . Follow tips for designs and business presentations so that your unique template is cohesive and relevant to your brand. Incorporate your brand's color scheme and graphics so that all your slides aren't text only.
What kinds templates can I get online for PowerPoint?
You can get PowerPoint templates that have modern designs, animated ones, or even hand-drawn art in each slide. The color schemes range from bold to subtle. Each template's slides are also organized based on what you may want to include in your presentation . You can use the template as a starting point and customize its specific details from theme.
Popular categories

How To Make Your PowerPoint Interactive: A Complete Guide

Are your audience being idle throughout your presentation? Do you want to know how to make a PowerPoint interactive? An interactive presentation will help you to make the inactive audience into active participants. You can use interactive elements to keep your audience engaged. Above all, an interactive PowerPoint presentation will give a dynamic and interesting experience for both the presenter and the audience. Whether you’re presenting in a classroom, a boardroom, or a conference hall, interactive presentations will help to get a better experience.
This guide will explain the different aspects of making your PowerPoint presentation interactive. You can learn what makes a PowerPoint presentation interactive, and tips to make the presentation more interactive and engaging. We have covered everything you need to know to make your next presentation a success.
Table of Contents
- What is an Interactive PowerPoint?
Advantages of Interactive PowerPoints
- Enhancing Understanding
- Participation
- Know Your Audience
- Setting Clear Goals
- Use Animations
- 3D Elements
- Triggered Animations
- Non-Linear Slide Navigation
- PowerPoint Morph Transition
Live Quizzes
- Running Polls
Brainstorming Sessions
- Draggable Objects
Creating Interactive Games
- Gathering Feedback
- Data Visualization
- Key Takeaways
- Tips for Continuous Improvement
What is an Interactive PowerPoint?
An interactive PowerPoint is a presentation that includes elements that allow audience participation and engagement. It can be animations, live polls, interactive charts, and other features that make the audience an active part of the presentation. Moreover, static presentations and interactive PowerPoints utilize non-linear navigation, allowing the presenter to adapt the flow of the presentation based on audience input and interaction.
Why Make Your Presentation Interactive?
Interactive presentations help to engage your audience more effectively than traditional presentations. By using interactive elements that promote audience participation, you can keep the audience focused, make the presentation memorable, and create a dynamic and engaging experience.
How do I make my PowerPoint engaging? To make your PowerPoint engaging, use interactive elements like animations, quizzes, polls, and multimedia to actively involve your audience and maintain their interest throughout the presentation.
Interactive PowerPoints will help you to improve audience engagement in your presentation. You can use polls, quizzes to engage your audience as active rather than passive listeners. This interaction and engagement will lead to better retention and presentation experience.
Enhancing Understanding
Audience interaction with the presentation will help you make the complex information more understandable. You can use interactive elements like animations and 3D models to illustrate your message more clearly.
Participation
An interactive PowerPoint presentation also encourages audience participation. You can use discussion prompts which can lead your audience to ask questions to make the environment more collaborative.
How To Create Interactive PowerPoint – Things to Remember
To make your PowerPoint interactive, include elements such as clickable links, live polls, quizzes, and non-linear navigation that could help in improving audience participation and engagement. Also try the use of animations, 3D models, and games to make your presentation dynamic.
Know Your Audience
Understanding your audience is the first and most important part of creating an interactive PowerPoint. Customize elements to retain their interest, knowledge levels, and preferences. And that could make your presentation to be the most relevant and engaging for your audience.
Setting Clear Goals
Next, set the exact goal of the presentation that you need to achieve. No matter what the presentation is about. It could be to educate or entertain, but having a clear goal and objective will help in selecting the most appropriate elements to use in the presentation design to engage your audience.
How Do You Make an Interactive PowerPoint – Pre-Presentation Tips
How do you add an interactive element to a presentation? To add an interactive element to a presentation, use the help of features like clickable links quizzes, polls, animations with triggers, or non-linear slide navigation in your PowerPoint slides. These elementsengage your audience and enhance their participation throughout the presentation.
Use Animations
Animations can bring your slides to life, but it’s essential to use them wisely. Overusing animations can be distracting and reduce the effectiveness of your presentation. Instead, use animations to highlight key points, illustrate concepts, and maintain audience interest.
Animations will help you to make your slides more impressive but don’t overload them. Overusing animations will distract the audience. Use animations to highlight key points and showcase concepts, to keep audience retention.
3D Elements
The use of 3D elements helps to make your presentation visually impressive and interesting, and it could also explain complex ideas in digestive form. It is possible to insert editable 3D models in PowerPoint to provide a more interesting experience for your audience. PowerPoint offers stock 3D elements and also you could use elements from external sources.
Triggered Animations
Another interesting feature is triggered animations which occur when anyone interacts with a specific element in the presentation. It could be a button, image, or any other. These triggered animations will help you to pop up additional pieces of information, get feedback on quizzes, or navigate into the different sections of the presentation.
Non-Linear Slide Navigation
Non-linear slide navigation helps you to jump to different slides based on audience input. This could help to make your presentation more flexible and responsive to the audience. Use hyperlinks or action buttons to create a non-linear navigational flow.
PowerPoint Morph Transition
The Morph transition in PowerPoint helps to create a seamless animation from one slide to another, making it look like objects moving within the same slide itself. This could be used to create engaging visuals and smooth transitions, keeping your audience’s attention.
How to Create an Interactive PowerPoint Presentation – During Presentation Tips

Live quizzes can be a fun and engaging way to make your presentation more interactive. It can also be used to test your audience’s knowledge and reinforce key points. You can use tools like Kahoot and Mentimeter which can be integrated into your Microsoft PowerPoint to conduct real-time quizzes and display results instantly.
Running Polls

Polls can gauge audience opinions, collect feedback, and make your presentation more and more interactive. Tools like Slido or Poll Everywhere help to run polls during your presentation and show live results on your slides.
Brainstorming sessions by using tools like virtual whiteboards and collaborative documents will make your PowerPoint presentation interactive and engaging. Encourage your audience to contribute ideas, discuss topics, and participate in problem-solving activities with the help of these brainstorming sessions.
Draggable Objects
As PowerPoint doesn’t have a prebuilt feature supporting draggable elements, you can use third-party tools like iSpring Suite to create drag and drop feature in your presentation.
Games will surely help to make your presentation more engaging and fun. You can add simple games like trivia, puzzles, or interactive stories to keep your audience entertained and involved.
How To Create an Interactive Presentation – Post-Presentation Tips
Gathering feedback.
Getting feedback after your presentation will help you understand what worked well and what you need to improve. You can use polls and surveys to collect audience opinions and suggestions that could help in delivering your next presentation.
Data Visualization
Interactive data visualizations allow the audience to explore data and information in more detail. Interactive charts and graphs are the best tools to present your data in a more engaging and informative way. Try them.
Summary and Best Practices
Key takeaways.
Now you have learned how to make PowerPoint Interactive. Interactive PowerPoint presentations will enhance the audience’s engagement, understanding, and participation. Use interactive elements to create a more dynamic and memorable presentation.
Tips for Continuous Improvement
- Experiment with Different Tools : Try new interactive tools and features to find what works best for the audience and your presentation.
- Practice : Always practice well and make sure you are comfortable with all interactive elements and tools before your presentation.
- Gather Feedback : Collect feedback and use them to continually improve your presentations and make them more effective.
At SlideBazaar, we help you create engaging and memorable presentations. Choose from our collection of professional templates or opt for our custom design services for a personalized touch. Your presentations deserve to be elevated to new heights, and we’re here to help you achieve just that!
BROWSE BY CATEGORY
- PowerPoint Templates
- Keynote Presentations
- Infographic
- Free slides
QUICK LINKS
- Frequently Asked Questions
- Terms & Conditions
- Privacy Policy
- DMCA Policy
EMAIL NEWSLETTER
Get updates of our PowerPoint templates and slide designs before anyone else.
The 5 Best Slideshow Template Resources I Trust for My Presentations

Your changes have been saved
Email is sent
Email has already been sent
Please verify your email address.
You’ve reached your account maximum for followed topics.
5 AI-Powered Language Learning Apps Worth Trying
The 7 best obsidian plugins for mobile, why i use libreoffice instead of microsoft 365, quick links.
- SlidesCarnival
- SlidesMania
Key Takeaways
- Canva offers user-friendly templates, drag-and-drop functionality, and real-time collaboration.
- SlidesCarnival has free templates, no need to sign in, and unlimited downloads.
- Visme provides interactive elements and multiple download formats in one central location.
With so many slideshow templates available, finding the best of the best can be a challenge. I usually rely on Slidesgo, but I’ve found some great alternatives after plenty of exploration. I’ve trusted these resources to create many presentations that elevate my slides to the next level.

Canva is an online design tool that I use to create content . This includes presentations, social media graphics, and more. Canva offers different plans, including Canva Free, Canva Pro, Canva Teams, and Canva Enterprise. There are more options tailored for K-12 and higher education.
Key Features of Canva’s Presentation Templates
These four key features have simplified the slideshow template process for me.
- Canva’s drag-and-drop feature simplifies the template customization process. This feature makes it easy to add and arrange elements (e.g. text and images) and streamline the creation process more efficiently.
- The real-time collaboration feature has been invaluable for group projects. This allowed me to easily share templates as editable files or finished designs. You can use this too, to make the collaboration and content process much smoother.
- The Resize and Magic Switch feature has been a great help. This feature helped me resize my creation for different social media platforms. This feature is available on Canva Pro, Canva Teams, Canva for Education, and Canva for Nonprofits.
- The Canva Design School resource page has been helpful in the creation process. It offers guidance on the tools and features available. It also allowed me to maximize the tool’s potential during editing. This helped to create polished and impactful designs.

SlideEgg is another top template resource that I trust for my presentation needs. It offers a vast collection of customizable templates to boost productivity and creativity. SlideEgg offers a free version. More pricing plans include the Unlimited Quarter, Unlimited Year, Annual Pass, and Lifetime.
Key Features on SlideEgg
These four key features on SlideEgg explain why this is a great template resource.
- SlideEgg offers regular updates. I love how it consistently keeps up with the latest trends and interests.
- I also love how SlideEgg’s high-quality graphics make presentations look professional and polished. This attention to detail significantly enhances the impact and appeal of each presentation.
- The Redesign Your Slides option takes four simple steps to quickly revamp presentations. With the help of SlideEgg experts, you can elevate your slides in a short time frame. If you prefer, you can also use the live chat in the bottom right corner for fast and reliable help.
- I found the SlideEgg site very easy to navigate for the free and paid versions. Each template comes with detailed descriptions of its theme and features. This helps to select a template based on its format options and the platform it is compatible with.
3 SlidesCarnival

SlidesCarnival is a great tool for crafting projects. Most templates are compatible with PowerPoint, Google Slides, and Canva. SlidesCarnival aims to elevate presentations for business meetings, marketing efforts, and creative projects.
Key Features of SlidesCarnival
Here are the three top features of SlidesCarnival while creating projects:
- SlidesCarnival is straightforward to use, with no paid plans or subscriptions. Just remember to keep the end credit slide for SlidesCarnival in your presentation.
- I was able to explore the site and download templates without creating a new account. This made it incredibly convenient to access the template I needed.
- I downloaded as many templates as I needed. There is no limit on the number of downloads for SlidesCarnival. This is particularly useful for the times you need to create several presentations.

Visme’s robust template collection is designed to help create visually engaging presentations. It quickly became a go-to resource for me. This option is great for built-in multimedia content, as well as seamless integration of images, videos, and charts.
Key Features of Visme
- Visme’s interactive features are worth exploring. You can try clickable pop-ups, embedded polls, and more. These elements boost engagement by adding interactive content that captures your audience's interest.
- With Visme, I could download my projects in various formats . For example, HTML5 was useful for downloading presentations with embedded audio and animations.
- Implementing interactive features was simple. Especially since I could create any infographics, surveys, and social media graphics, all in one central location.
5 SlidesMania

SlidesMania offers a wide selection of slideshow templates for PowerPoint and Google Slides. With their slides, you can add flair to your professional or personal presentations.
Key Features of SlidesMania
- All the templates are completely free on this site and I didn't have to create an account or register, which makes it an accessible resource.
- SlidesMania offers a variety of stylish templates. Their creative templates will help give your presentations a fresh and creative look.
- SlidesMania offers a Tips and Tricks for Google Slides feature. This was especially helpful when I was working with Google Slides . There are many guides, including how to add image placeholders or lock content to prevent accidental changes.
Each of these five slideshow template resources can add value to your presentations. I usually rely on Slidesgo . But these alternatives offer distinct features that are worth exploring to take your projects to new heights.
- Productivity
- Office Templates
- Vote: Reader’s Choice
- Meta Quest 4
- Google Pixel 9
- Google Pixel 8a
- Apple Vision Pro 2
- Nintendo Switch 2
- Samsung Galaxy Ring
- Yellowstone Season 6
- Recall an Email in Outlook
- Stranger Things Season 5
How to use Gemini AI to create presentations in Google Slides
The only thing people enjoy less than sitting through a slideshow presentation is making a slideshow presentation. But with the integration of Gemini AI into Google Slides , that process is about to get a whole lot easier.
How to integrate Gemini into Google Slides
Getting started with gemini, what gemini can do in slides, what you can do with gemini in slides.
In this guide, we’ll explore everything you need to seamlessly incorporate Gemini AI into your workflow. Whether you’re looking to enhance your design elements, streamline content generation, or simply save yourself some time, Gemini AI offers a suite of features that can transform the way you build your presentations.
As with the integrations for Docs and Sheets, Gemini AI is not available for use with Slides at the free tier. You’ll need a $20/month subscription to the Google One AI Premium Plan to gain access; otherwise, a work or school account through a Gemini for Google Workspace add-on will work.
Simply click on the “Try Gemini Advanced !” radio button in the top-right corner of the Gemini home screen and follow the prompts.
To begin, open a new or existing Slides presentation, then click the Ask Gemini button in the top-right corner of the screen (to the right of the share button). This will expand the Gemini AI sidebar running down the right side length of the screen. On the sidebar, you’ll be able to either enter your idea directly into the prompt window or take inspiration from the AI-generated image slideshow at the bottom of the screen.
Primarily, Gemini AI can create images, generate new slides, summarize a presentation, and write and rewrite content. It can also reference Drive files or Gmail as you write, as well as search the internet for current information and statistics to answer questions that arise while you write. Basically, it works as a writing and research aide, same as it does for Docs.
Gemini takes the grunt work out of the slide creation process and accelerates my workflow to a startling degree. While I’ve watched countless slideshows as a journalist (on earnings calls, product demos, keynote events, and the like), I’ve been lucky enough to not have had to make one myself in well over a decade. Suffice to say, actually producing a professional-looking slide deck these days takes me ages to accomplish, what with all the bullet points, image sourcing, thematic formatting, and whathaveyou.
But with the help of Gemini, I was able to pop out a solid eight-slide introduction to the Seattle, Washington, region that discusses the city’s main attractions, the state of its housing market (both sales and rentals), its education and health care systems, and reasons why folks should move to the region — all using simple prompts like, “add a slide discussing the education system in Seattle, the number of primary schools in the Seattle area, and Washington’s average education ranking among U.S. states.” I did all of that in under 10 minutes.
There were a few limitations to what Gemini could help me with, mind you. I repeatedly asked it to incorporate motion transitions between each slide ( because who doesn’t love a good star wipe ?); however, the system kept generating slides discussing transitions as a subject topic instead. I ultimately had to add those effects by hand.
Also, if I were actually giving this presentation in public, I’d have to spend a good amount of time going back through and confirming the veracity of each of the bullet points to ensure the system didn’t hallucinate anything, but without the AI, just creating this deck by hand would have taken me a couple of miserable hours at least.
Editors’ Recommendations
- How to use Gemini AI to master Google Sheets
- GPTZero: how to use the ChatGPT detection tool
- More AI may be coming to YouTube in a big way
- Google Chrome has its own version of Window’s troubled Recall feature
- Copilot Pro: how to use Microsoft’s advanced AI sidekick

A new research paper from Apple reveals that the company relied on Google's Tensor Processing Units (TPUs), rather than Nvidia's more widely deployed GPUs, in training two crucial systems within its upcoming Apple Intelligence service. The paper notes that Apple used 2,048 Google TPUv5p chips to train its AI models and 8,192 TPUv4 processors for its server AI models.
Nvidia's chips are highly sought for good reason, having earned their reputation for performance and compute efficiency. Their products and systems are typically sold as standalone offerings, enabling customers to construct and operate them as the best see fit.
In the rapidly evolving landscape of artificial intelligence, Microsoft's Copilot AI assistant is a powerful tool designed to streamline and enhance your professional productivity. Whether you're new to AI or a seasoned pro, this guide will help you through the essentials of Copilot, from understanding what it is and how to sign up, to mastering the art of effective prompts and creating stunning images.
Additionally, you'll learn how to manage your Copilot account to ensure a seamless and efficient user experience. Dive in to unlock the full potential of Microsoft's Copilot and transform the way you work. What is Microsoft Copilot? Copilot is Microsoft's flagship AI assistant, an advanced large language model. It's available on the web, through iOS, and Android mobile apps as well as capable of integrating with apps across the company's 365 app suite, including Word, Excel, PowerPoint, and Outlook. The AI launched in February 2023 as a replacement for the retired Cortana, Microsoft's previous digital assistant. It was initially branded as Bing Chat and offered as a built-in feature for Bing and the Edge browser. It was officially rebranded as Copilot in September 2023 and integrated into Windows 11 through a patch in December of that same year.
Google announced Thursday that it is releasing Gemini 1.5 Flash, it's snack-sized large language model and ChatGPT-4o mini competitor, to all users regardless of their subscription level.
The company promises "across-the-board improvements" in terms of response quality and latency, as well as "especially noticeable improvements in reasoning and image understanding."
- English Español Deutsch Português Italiano Français 日本語 한국어 繁體中文 Türkçe Dutch Polish Thai Indonesian Malay
- Free Download For Windows For macOS
- Screen Recording RecExperts For Windows Screen recorder for PC RecExperts For Mac Screen recorder for macOS Online Screen Recorder Record screen online free ScreenShot Take Screenshot on PC
- Buy Now Buy Now
- Student Discount
- Resources Screen Recorder Windows 10 Record Zoom Meeting Record Internal Audio Mac Record Gameplay on PC Video Recording Software
- Support Support Center Guides, License, Contact Chat Support Chat with a Technician Pre-Sales Inquiry Chat with a Sales Rep
How to Video Record Yourself Presenting PowerPoint: Windows, Mac, iOS, Phones
Learn how to video record yourself in PowerPoint using your Windows pcs or laptops, Mac devices, iPhone or iPad, and Android phones or tablets. You can use EaseUS RecExperts or the built-in screen recorder to record yourself presenting presentations.
Trustpilot Rating 4.7
Don’t forget to share this post!
Page Table of Contents
Updated on Aug 16, 2024
Do you know how to record a presentation with your face and voice on Microsoft PowerPoint? Adding narration in a presentation helps enhance audience engagement and convey insights better for tutorials, lectures, and video creation.
This article will focus on how to video record yourself in PowerPoint and teach you to add your face, voice, and video easily when narrating a PPT.
How to Video Record Yourself Presenting PowerPoint on Windows/Mac with EaseUS Screen Recorder
One of the most important reasons why you need a professional screen recorder for presentation is that it simplifies your task and gives you the smoothest experience.
EaseUS RecExperts lets you record yourself doing a presentation on PowerPoint , Google Slides, Zoom, Keynote, and other presenting apps without lag and watermark.
It has both Windows and Mac versions, allowing you to record high-quality about-me presentations, self-presenting videos, and slideshows on multiple applications. The AI-empowered functions enable you to AI transcribe video to text , reduce background noise, and enhance video quality.
Download the EaseUS recording software on your Windows or Mac to record MS PowerPoint with your face and audio.
Let's see how to video record yourself in PowerPoint with EaseUS recording software.
(The stepwise guide applies to the Windows version; Mac users can find steps similar in the application.)
✅Preparations to do:
- Configure your microphone as the input audio device.
- Configure your camera as the input video device if you need to record PowerPoint presentation with webcam .
- Open the MS presentation in advance.
- Shut down other applications to avoid distraction.
- Practice your narration.
Step 1. Launch EaseUS RecExperts on your computer. Choose a recording mode from "Full Screen" or "Region" . To record a part of the screen, select the recording area manually.

Step 2. After selecting the recording mode, click on the camera sign on the interface. This will let the tool record your screen and the webcam at the same time.

Step 3. You can also change the background with the AI Recognition ot green screen feature. Classroom, blur, studio, or your local images are supported. Just click "Webcam" > "Settings" > "Remove Background" to download and use these modules. Then, click the "REC" button to start recording.

Step 4. After recording, the recording list window will open. Here you can view, split, delete, manage your recordings easily.

How to Record PowerPoint Presentation with Audio and Video on Windows/Mac with Internal Recorder
If you don't want to install additional software, use MS PowerPoint's built-in recording function. Both Windows and Mac users can screen record PowerPoint with audio .
Before you get started, there are some tips you need to pay attention to:
- The recording feature is only available on PowerPoint 2016, PowerPoint 2019, and PowerPoint 365.
- You cannot go back to the previous slide when you are recording. Make sure you have covered everything on a slideshow before you go to the next one.
- MS PowerPoint cannot record full screen . It only captures the app area.
- The saved recording can be very large. Ensure that your laptops or desktops have enough capacity.
- Only support MP4 and WMV video types.
After reading these notes, follow the steps below to record a voice-over PowerPoint.
Step 1. Open the presentation on your Windows or Mac computer.
Step 2. Click Slide Show on the toolbar. Under the tab, click Record and select From Current Slide… or From Beginning….

Step 3. You will enter the recording page. Click SETTINGS in the upper-right corner to turn on the Microphone and Camera. Then, click the red RECORD button to start recording. A 3-second countdown timer will appear on the screen.

Step 4. During the process, you can:
- Use the RECORD, PAUSE, STOP, and REPLAY button at any time.
- Use the pen to take notes.
- Click CLEAR to clear recordings on the current side or all slides.
- Click the close button to quit recording.

Step 5. Go to File > Export > Create a video to export the PowerPoint presentation as a video. Here you can change the recording settings such as video quality, recorded timings and narrations, and even the seconds for every slide.

Step 6. Click Create Video again to select a location, file name, and file type (MP4 or WMV) for the recording. Click Save to close the window.
Spread this post out to help more people!
How to Record on PowerPoint on iOS/Android Mobile with Built-in Tools
Some narrators may need to record PowerPoint on the go to give a quick presentation. Both iOS and Android can install Microsoft PowerPoint on mobile phones and tablets to open, edit, and create presentations.
Although the app MS PowerPoint does not have a screen recording feature, iOS and Android users can record a video with their mobile phones' built-in screen recorders.
#1. Video record yourself in PowerPoint on iPhone/iPad
Step 1. Launch the PowerPoint app and open the PPT you want to add narration.
Step 2. Enable the screen recording feature on your iPhone and iPad. Navigate to Settings > Control Center > Customize Controls and tap the green plus icon next to Screen Recording. (It is usually enabled by default.)
Step 3. Swipe down from the top right corner of the screen and scroll to click the screen recording button (a circle within a circle). A 3-second countdown will appear before the recording begins.
Step 4. Play the presentation while you are talking. You can see the red dot recording icon in the upper left corner of the screen, which means your recording is in progress.
Step 5. Tap the red dot recording icon again to stop recording. Click Stop in the popup to confirm operations.
Step 6. You can find the recording in the Photos app.

#2. Video record yourself in PowerPoint on Android phones and tablets
Step 2. Swipe down from the top of the phone screen to launch Quick Settings.
Step 3. Tap the Screen Record button from the list, give permission to track your activity if prompted, and click Start recording.
Step 4. When the 3-second countdown appears, play the presentation and start talking.
Step 5. If you want to stop recording, access Quick Settings and tap the Screen Record button again.
Step 6. You can find the recording in the Gallery app.

Final Words
Now, you have learned how to video record yourself in PowerPoint on different devices, including Windows, Mac, iOS, and Android. Capturing your face and audio in the presentation recording can be easy if you choose the proper method.
It is recommended that EaseUS RecExperts be used to screen record a presentation on Mac and Windows computers. Its intuitive interface and robust features let you easily record presentations on Microsoft PowerPoint, Google Slides, Zoom, and more platforms.
Download and use it to make your presentation narration smoother and more effective.
Record PowerPoint with Face FAQs
If you want more information on how to record a video of yourself in PowerPoint, continue reading.
1. How do I insert a voice recording into PowerPoint?
To add a voice-over to PowerPoint:
Step 1. If you have a computer, save this automated voice file. Open the presentation PPT and locate the slide where you want to add audio.
Step 2. Click Insert on the toolbar, tap Audio under the tab, and click Audio on my PC… to select an existing audio file or click Record Audio… to record audio immediately.
Step 3. Now, you can play and pause the audio on the slide.
2. Why don't I have a record button on PowerPoint?
You cannot find a record button because you have not activated this function in your PowerPoint 2016, 2019, or 365. To enable the recording feature in PowerPoint:
Step 1. Go to Files > Options > Customize Ribbon.
Step 2. Under Main Tab, scroll down to find Record, check the box, and click OK to save changes.
Step 3. Go back to the toolbar, and you will see the Record tab.
3. What is the shortcut to start a video in PowerPoint?
To start a video in PowerPoint, press Alt + P or Ctrl + spacebar.
EaseUS RecExperts

One-click to capture anything on screen!
No Time Limit, No watermark
Melissa Lee
Related Posts

7 Best Video Player with Speed Control for Window 11/10/8/7

5 Best Lightweight Screen Recorder [Windows/Mac/linux]

How to Record A Voicemail Message on Different Devices

(5 Best Ways) How to Record Video with Blurred Background
Success, thanks for submitting!
- Refund Policy
- Terms & Conditions
- Do Not Sell
Copyright © 2004 - 2023 EaseUS. ALL RIGHTS RESERVED.

Create a presentation in four simple steps in PowerPoint
You can quickly create a simple framework for a professional-looking presentation by applying a theme for a unified look, adding new slides with various slide layouts, and then adding visual interest by applying a slide transition to all slides.
On the Design tab, select the theme you want.

On the Home tab, click New Slide .

To choose a different slide layout, click the arrow next to New Slide and then click the slide layout you want.
On the Transitions tab, click the transition you want.

On the Transitions tab, click Apply To All .

Now you've set up a presentation with a consistent theme and transition style. Next, add more slides, and fill them in with the text and visuals you need for your message.

To choose a different slide layout, click Layout to see a gallery of options, and then select the slide layout you want.
On the Transitions tab, select the transition you want.

On the Transitions tab, in the Timing group, click Apply To All .

Need more help?
Want more options.
Explore subscription benefits, browse training courses, learn how to secure your device, and more.

Microsoft 365 subscription benefits

Microsoft 365 training

Microsoft security

Accessibility center
Communities help you ask and answer questions, give feedback, and hear from experts with rich knowledge.

Ask the Microsoft Community

Microsoft Tech Community

Windows Insiders
Microsoft 365 Insiders
Was this information helpful?
Thank you for your feedback.
Presentations
- Most Recent
- Infographics
- Data Visualizations
- Forms and Surveys
- Video & Animation
- Case Studies
- Design for Business
- Digital Marketing
- Design Inspiration
- Visual Thinking
- Product Updates
- Visme Webinars
- Artificial Intelligence
How To Create a Slide Deck: Templates & Tips

Written by: Unenabasi Ekeruke
Wondering how to create slide decks that hit the mark? Look no further; you've come to the right place.
Whether you're pitching investors or making a keynote presentation, the quality of your slide deck matters a great deal.
Well-designed slide decks can pique your audience's interest and win them over.
In fact, about 91% of presenters swear beautiful slide decks boost their confidence during presentations.
In this article, we'll discuss what a slide deck is and how to create one. We've also included templates and helpful tips for creating powerful slide decks that leave a lasting impression.
In this video, we've also put together 13 presentation design tips for creating awesome slide decks.
Let's dive in!
Table of Contents
- What Is a Slide Deck
How To Make a Slide Deck in 5 Steps
10 slide deck templates for creating successful presentations, slide deck faqs, create attractive slide decks with visme, what is a slide deck.
A slide deck is a collection of slides used as visual aids during a pitch or presentation. Think of each slide as a single card in a deck with unique content, meanings, value and structure.
Like a deck of cards, you can queue up your slides to tell a story about a topic. Depending on your story's angle, tone and mood , you can shuffle your slides or eliminate some of them.
How you build your slide deck depends on these three things:
- The type of presentation you're making
- Who your audiences are
- What you want to accomplish or the message you're passing across
Slide decks like the one below are a valuable resource for entrepreneurs, marketers and businesspeople.

When used to pitch a startup or idea , a slide deck is also called a pitch deck . But you could call it a presentation deck when you're using it for other purposes like presenting a proposal in a professional or academic setting.
Slide decks help you present ideas in an organized format and aid delivery during presentations. Many presentation programs like Visme and PowerPoint let you add as many slides as you want to your deck. The best part is that you can design and customize your deck, making it look professional and attractive.
Create a stunning presentation in less time
- Hundreds of premade slides available
- Add animation and interactivity to your slides
- Choose from various presentation options
Sign up. It’s free.

How you craft your slide deck can play a big role in the success of your presentation. Here's a step-by-step guide on how to create an effective slide deck.
Step 1: Build Your Deck Around Your Story
Want to up the value of your presentation? Start by focusing on your core message. Regardless of your presentation type, your slide deck outline should answer these key questions:
- What is the purpose of your presentation?
- What do you want your audience to understand or remember?
- What actions do you want them to take after listening to you?
Many people, including experienced presenters, tend to fill their slides with points that don't add value. This leaves the audience confused about whether to listen or read the slide.
Remember, the pitch deck should visually enhance your audience's learning experience. Once you weave your narrative around your main story, you can organize your supporting points around it. You're sure to engage your audience and drive your message across.
Dealing with busy execs who won't sit through your presentation? Use a startup one pager instead. It'll get their attention quicker and more efficiently. You can then secure a meeting to present your pitch deck.
Step 2: Use Premade Templates
Templates give you a creative head start. They provide consistency in design, layout and ideas. Visme has thousands of editable slide deck templates to help you create presentations quickly.
Here's how to customize your slide deck in Visme.
1. Select and Edit a Template
Each slide deck template in Visme has two or more slides. Feel free to add, remove or reorder slides to your deck as you proceed. Once your presentation structure is ready, pick out slides to edit and input your own content.
If you have an existing presentation in PowerPoint, you can import it and continue editing your slides in Visme.
2. Input and Edit Text
After you've selected your slides, add custom text to them. Our templates have built-in text placeholders. Click and drag the placeholder to change the text position. Or click each placeholder and highlight the block of text to edit it.
Type your text or paste the text you copied from elsewhere. Repeat the process throughout the rest of the slide deck.
Want to add more fun and personality to your text? Visme editor makes it easy for you to change font style, text color, size, style, direction and much more. Animate your text and add other special effects to make your text alluring.
3. Use High-quality Stock Images
High-quality images capture and convey abstract concepts like color and emotions. Upload images stored on your computer and use them in your design. Or select from Visme's rich library of free high-resolution images to find the perfect one for your slide deck.
4. Add Shapes, Icons and Animated Graphics
Use these elements to bring boring presentations to life. They are effective for creating minimalistic designs and explaining complex ideas.
Visme has a comprehensive library of more than one million shapes, icons , illustrations and animations . Click the graphics tab, select the asset, and add it to the slide. You can change the color, position and size of your design assets.
5. Add Data Visualizations
Use data visualizations to share statistics, financial and other numerical data in your presentation. You'll find bar charts, pie charts , graphs , timelines , flowcharts , maps and more in Visme.
Select the chart or graph and customize the title, color, data, legends and more.
6. Eliminate Unwanted Elements
Pre-built slide decks contain lots of placeholder content. They serve as a guide to help you create the perfect presentation. You don't have to use all of it.
Feel free to eliminate anything that isn't useful to your deck. Watch this video to learn more about creating beautiful slide deck presentations in Visme.
Step 3. Make Your Design Count
When preparing for your big day, invest as much time into your slide design as your content. What's in it for you? An engaging slide deck can draw in your audience and get them excited about what you have to offer.
Be Consistent
If your company has a brand guideline, apply your brand elements to the slides. But if you haven't got one, Visme helps create a strong and memorable brand identity .
Use the brand style guide template below to define your brand personality and ensure consistency.

After creating your logo, fonts and colors, you can save them in Visme's brand design tool . Your team members can easily create presentations in Visme and your brand theme will automatically appear on their designs.
Watch the video below to learn how to set up your branding kit in Visme.
Use the Right Font Pairing
Choosing the right font pairing and sizes can be a big deal, especially for non-designers. But getting it right can turn a boring slide deck into an appealing one.
Stick to two or three typefaces and assign distinct roles to each font —the more contrast between your fonts, the better.
For instance, you can use the same font for headings, another for the intro, another for the body and the fourth for quotes.
Use typefaces that connote your personality and style. If you're pitching art or design themes, incorporate classic and contemporary typefaces that connote creativity and elegance.
Not sure how to pair fonts? We've created this detailed guide to help you choose the right font combination for your designs.
Step 4: Incorporate the Right Visuals
Without a doubt, the human brain is wired for visuals . The mental capacity to process visual content far exceeds that of written and spoken words.
Attractive visual aids help you tell more compelling stories than text. Incorporating images, video animations and sleek transitions to break up static slides will get people's attention.
Bar charts that show patterns or trends can boost investors' confidence and convey excitement. The same goes for pie charts, which are great for comparing growth areas.
Use infographics to condense lengthy text into visuals that people can easily relate to. Luckily, Visme has the right tools for every job. With our infographic maker , you can easily translate your ideas into digestible graphics.
Step 5: Make Your Slide Deck Clear and Brief
One big mistake people make is that they want to keep adding content to their slide deck. They end up filling it up with tedious details irrelevant to their audience.
Remember, your slides are supposed to aid your presentation rather than contain every word you say. If you fill it with text, you could quickly lose your audience. They'll keep longing for the end and leave the room with little or no information.
To make your slide deck impactful, eliminate fluff. Keep it brief yet filled with key action points. Fit your information into three key blocks- a persuasive intro, a strong body and an actionable conclusion. You will have a more focused, shorter, and memorable presentation .
Whether you want to create slide decks for business, education, or nonprofits, Visme has everything you need. We have thousands of templates to help you create stunning slide decks you can be proud of. Here are our top 10 templates from each of these categories.
Template #1: HybCab Pitch Deck Presentation Template
Got a new business idea? Or do you want to scale your business? Get your investors pumped up with this Uber-inspired professional pitch deck template.
The editable 20-slide deck template covers every element of a winning pitch. It features a striking slide layout, a beautiful color scheme, and high-resolution photos and icons. The interactive data visualizations allow you to share compelling numbers that attract investors' interest.

Template #2: Buyer Presentation Template
Use this attractive slide deck template to win over clients for your real estate business. The simple and classy design makes it unique and impactful.
You'll find a lot of space to play around with colors, fonts and other design elements. Feel free to tweak the layout design, add compelling images of your properties, key stats and much more.

Template #3: BuffIT Pitch Deck Presentation Template
This template is a perfect pick for companies looking to pitch to customers or investors. Use this Buffer-inspired slide deck to share your key information like goals, traction, milestones, financial projection and more.
The consistent blue color theme and elegant styling provide a refreshing visual experience. Notice how charts, timelines and images are used to draw attention to critical data. You can add or remove slides, edit the content, and use your brand colors, fonts and logo to keep it on brand.

Template #4: Training Course Presentation Template
Bridge the skills gap in your organization with this training slide deck template. The template has a minimalistic design and seamlessly blends different shades of blue across all 13 slides.
The slides feature valuable elements and sections to help your audience retain the information better. You'll find quality icons, images, a chart, timeline, checklist and evaluation matrix.
Use this template to onboard new hires and get them in the mood for work. You can also use it to prepare training courses or introduce new policies and procedures.

Template #5: Coffee Lover Statistics Presentation
Here's another cutting-edge slide deck template for education, training and informational purposes. The coffee-themed presentation has a rich blend of white, brown and black color themes.
You can use it to highlight the benefits of a product with relevant statistics, charts and graphs to make it digestible. The text, icons and images are evenly spaced, making it easier for your audience to grasp key information.
Create the perfect slide deck with Visme's design collaboration feature. Team members can view, edit and leave feedback on your presentation in real-time. You can reply, resolve and delete comments till the design is top-notch.

Template #6: Nonprofit Report Presentation
Are you starting a nonprofit or growing an existing one? This editable slide deck presentation can serve multiple purposes.
You can use it to share what you and your volunteers have been up to in the past year. It's also helpful in building support for your charitable projects.
It features sections like executive summary, introduction, map of projects, number of incidences, cases, casualties and more. Use images, data visualizations and widgets from Visme's library to tell stories that pique your audience's interests.

#Template 7: Lesson Plan Presentation
With this slide deck template, you can build a learning trajectory for your students. It outlines what students need to learn, how lessons will be delivered, and how learning will be evaluated. You can also list resources needed by teachers and students, methods and assignment types.
Change the color, font and logo to fit your brand and your deck is ready for use.

Template #8: Creative Product Presentation
Weave a captivating narrative about your product with this slide deck template. The template has a dynamic layout, creating room for you to present any information.
It highlights key information like the product mockup, milestones and timelines, revenue projections, product pricing and more. Use this template to visualize the creation process for SaaS-based platforms, cloud solutions and tech products.
Template #9: Financial Report Presentation
Looking to communicate financial activities and performance within your company? This visual-rich slide deck template fits the bill. It contains bars, charts, and graphs, making your data easier to comprehend.
The dark background and bright-colored fonts and elements create the perfect visual contrast. Liven up your presentation with animated icons, illustrations and special effects. Also, incorporate hover effects and clickable pop-ups to make your slides interactive.
Template #10: Parenting Keynote Presentation
Use this appealing keynote presentation template to deliver a powerful presentation on parenting. This colorful slide deck can help you connect with other parents, teachers and child caregivers.
Utilize our crisp stock photos, icons and illustrations to make your audience engagement more rewarding.

Why Is It Called a Slide Deck?
The term slide decks date back to an old technology where slides were physically inserted into a carousel projector and projected on the wall or screen. These slides were shuffled like a deck of cards to create a presentation. Hence, the name "slide deck" has stuck with the modern age.
Today slide decks are created and projected digitally using software like Visme , PowerPoint, Google Slides and more.
What Is the Difference Between a Slide Deck vs. Powerpoint vs Presentation vs Pitch Deck?
A slide deck is a group of slides put together to tell a story. PowerPoint is a software application used to create slide decks or presentations. A pitch deck is a distinct type of slide deck used to pitch a solution, idea, or product when seeking financing from investors.
How Do You Make a Beautiful Slide Deck?
Whether you're sharing strategies or performance updates, you don't need to build your slide deck from scratch. Visme has a rich library of beautifully-designed slide decks that leaves a lasting impression on your audience.
Now you know what makes a slide deck great. It's time to create one for your business.
Visme presentation software and templates provide everything you need to create beautiful slide decks for any purpose. Our software has helped thousands of businesses and professionals nail their presentations.
Each template comes with pre-designed slides. You can replace your content and customize other design elements according to your preference. With Dynamic Fields , you're sure your personal, company and other critical information will be accurate and updated throughout your presentation in real-time.
Visme lets you download your slide deck in multiple formats or share online using a link . You can generate an embed code and paste it on your website or blog. From your analytics page , you can see who has viewed your presentation and other metrics.
Easily put together winning slide decks in Visme

Trusted by leading brands
Recommended content for you:

Create Stunning Content!
Design visual brand experiences for your business whether you are a seasoned designer or a total novice.
About the Author
Unenabasi is a content expert with many years of experience in digital marketing, business development, and strategy. He loves to help brands tell stories that drive engagement, growth, and competitive advantage. He’s adept at creating compelling content on lifestyle, marketing, business, e-commerce, and technology. When he’s not taking the content world by storm, Unenabasi enjoys playing or watching soccer.
Recommended content for you
Top 12 powerpoint alternatives compared.
Victoria Taylor Aug 06, 2024

15 Successful Startup Pitch Deck Examples, Tips & Templates
Olujinmi Oluwatoni Aug 02, 2024

30+ Pitch Deck Templates for Startups, Real Estate & More
Idorenyin Uko Jul 26, 2024

How to Write an Impressive Sponsorship Deck + Best Templates to Use
Victoria Taylor Feb 19, 2024
COMMENTS
In PowerPoint, you can create a presentation from scratch, or from a theme with built-in graphics, fonts, and placeholders for your text, images, and content...
Create a presentation. Open PowerPoint. In the left pane, select New. Select an option: To create a presentation from scratch, select Blank Presentation. To use a prepared design, select one of the templates. To see tips for using PowerPoint, select Take a Tour, and then select Create, . Add a slide.
Open the PowerPoint app, select a template and theme, then like "Create.". Click the text box to add your title and subtitle to create your title slide. Click the "Insert" tab, then "New Slide" to add another slide. Choose the type of slide you want to add, then add text and pictures. Rearrange slides by dragging them up or down in ...
To do that, simply go up to the Home tab and click on New Slide. This inserts a new slide in your presentation right after the one you were on. You can alternatively hit Ctrl+M on your keyboard to insert a new blank slide in PowerPoint. To learn more about this shortcut, see my guide on using Ctrl+M in PowerPoint.
Get started with PowerPoint for Beginners. Follow this 20-Minute step by step PowerPoint tutorial to start creating presentations smoothly.Contents of this v...
Learn everything you need to know to get started using Microsoft PowerPoint! You'll learn all the basics plus more, including: how to choose a design theme...
Create a new presentation. Open PowerPoint. Select Blank presentation, or select one of the themes. Select More themes to view the gallery and search for more. Add a slide. Select the slide you want your new slide to follow. Select Home > New Slide. Select Layout and the you type want from the drop-down.
Create a presentation from a theme. Select File > New. Double-click a theme in the gallery to create a presentation in that theme. Or search for more templates.
Microsoft PowerPoint is a presentation design software that is part of Microsoft 365. This software allows you to design presentations by combining text, images, graphics, video, and animation on slides in a simple and intuitive way. Over time, PowerPoint has evolved and improved its accessibility to users.
Step 2: Choose a Template. Select a template or a blank presentation to start creating your slides. PowerPoint offers a variety of templates to fit every need and occasion. Whether you want something simple and professional or colorful and creative, there's a template for you. If you prefer to start from scratch, you can choose a blank ...
Make sure that your text is still easily readable with the background you choose. 3. Add images. Adding pictures, diagrams, and other visual aids can help the audience grasp the ideas of your presentation and drive your point home. Images break up the monotony of text and help keep the audience from tuning out.
Six steps for creating a slide show. 1. Plan your slide show. Before getting too deep into your slide show project, it's a good idea to select and save the photos and videos you want to use. This helps you create a slide show more efficiently and purposefully, ensuring a better outcome. 4.
Share and collaborate. Start with Microsoft Copilot. Generate a presentation outline instantly with Microsoft Copilot for Microsoft 365. Expand your ideas. Ask for more information or a new slide on your topic directly through Copilot in PowerPoint. Use a free template. Choose from thousands of customizable templates to kickstart your slideshow.
2. Present as if there were no PowerPoint. Don't use your slides as a crutch. They're there to add to your speech, not carry it along. If you present as if there were no slide, by being an engaging, enthusiastic speaker, your audience will be enthralled and remember your presentation for years to come.
Step 3: Create Title Page. Click the first box that says 'Click to add title' and add the title of your presentation. Click the bottom box to add your name, or any other subtitle that you choose. Once you have your text in the boxes, you can change their font, size, color, etc. with the toolbar options at the top.
Go to the menu bar at the top of the page and select "Insert" and "New Slide." You'll see a new blank slide that looks a little different. The makers of PowerPoint have tried to make this easy and have guessed that you'd like to have a title and some text on your second page. That's why you see "Click to add title" and "Click to add ...
Make Bullet Points Count. Limit the Use of Transitions. Skip Text Where Possible. Think in Color. Take a Look From the Top Down. Bonus: Start With Templates. Slideshows are an intuitive way to share complex ideas with an audience, although they're dull and frustrating when poorly executed.
Select the text. Under Drawing Tools, choose Format. Do one of the following: To change the color of your text, choose Text Fill, and then choose a color. To change the outline color of your text, choose Text Outline, and then choose a color. To apply a shadow, reflection, glow, bevel, 3-D rotation, a transform, choose Text Effects, and then ...
Find the perfect PowerPoint presentation template Bring your next presentation to life with customizable PowerPoint design templates. Whether you're wowing with stats via charts and graphs or putting your latest and greatest ideas on display, you'll find a PowerPoint presentation template to make your ideas pop.
How to Create an Interactive PowerPoint Presentation - During Presentation Tips Live Quizzes . Live quizzes can be a fun and engaging way to make your presentation more interactive. It can also be used to test your audience's knowledge and reinforce key points. You can use tools like Kahoot and Mentimeter which can be integrated into your ...
Master the art of creating impressive presentations in PowerPoint with our step-by-step guide! Perfect for beginners and professionals alike. Watch now to el...
Click on "Blank presentation" to create your presentation from scratch, or pick your preferred free PowerPoint template from the options at the top (there's also a host of editable templates you ...
Canva is an online design tool that I use to create content. This includes presentations, social media graphics, and more. Canva offers different plans, including Canva Free, Canva Pro, Canva Teams, and Canva Enterprise. There are more options tailored for K-12 and higher education. Key Features of Canva's Presentation Templates
Like most presentation apps, Canva lets you collaborate with your team members and work across devices seamlessly. The Canva app for mobile also lets you control your slides remotely during your ...
It's available on the web, through iOS, and Android mobile apps as well as capable of integrating with apps across the company's 365 app suite, including Word, Excel, PowerPoint, and Outlook.
To add a voice-over to PowerPoint: Step 1. If you have a computer, save this automated voice file. Open the presentation PPT and locate the slide where you want to add audio. Step 2. Click Insert on the toolbar, tap Audio under the tab, and click Audio on my PC… to select an existing audio file or click Record Audio… to record audio ...
On the Home tab, click New Slide. To choose a different slide layout, click the arrow next to New Slide and then click the slide layout you want. On the Transitions tab, click the transition you want. To see more transitions, expand the Transition gallery . On the Transitions tab, click Apply To All. Now you've set up a presentation with a ...
How to make a PowerPoint animation and a PowerPoint presentation with this 12-mins PowerPoint tutorial for beginners! Edit your presentation videos seamlessl...
Free Google Slides theme, PowerPoint template, and Canva presentation template. Crafted for marketing professionals, this Advertising Report Slides template is your go-to tool for presenting data and insights. Perfect for quarterly reviews, campaign analysis, and client pitches, this slideshow template shines with a sleek grey and black UI/UX ...
If you have an existing presentation in PowerPoint, you can import it and continue editing your slides in Visme. ... Upload images stored on your computer and use them in your design. Or select from Visme's rich library of free high-resolution images to find the perfect one for your slide deck. 4. Add Shapes, Icons and Animated Graphics