We use essential cookies to make Venngage work. By clicking “Accept All Cookies”, you agree to the storing of cookies on your device to enhance site navigation, analyze site usage, and assist in our marketing efforts.
Manage Cookies
Cookies and similar technologies collect certain information about how you’re using our website. Some of them are essential, and without them you wouldn’t be able to use Venngage. But others are optional, and you get to choose whether we use them or not.
Strictly Necessary Cookies
These cookies are always on, as they’re essential for making Venngage work, and making it safe. Without these cookies, services you’ve asked for can’t be provided.
Show cookie providers
- Google Login
Functionality Cookies
These cookies help us provide enhanced functionality and personalisation, and remember your settings. They may be set by us or by third party providers.
Performance Cookies
These cookies help us analyze how many people are using Venngage, where they come from and how they're using it. If you opt out of these cookies, we can’t get feedback to make Venngage better for you and all our users.
- Google Analytics
Targeting Cookies
These cookies are set by our advertising partners to track your activity and show you relevant Venngage ads on other sites as you browse the internet.
- Google Tag Manager
- Infographics
- Daily Infographics
- Graphic Design
- Graphs and Charts
- Data Visualization
- Human Resources
- Training and Development
- Beginner Guides
Blog Graphic Design

15 Effective Visual Presentation Tips To Wow Your Audience
By Krystle Wong , Sep 28, 2023

So, you’re gearing up for that big presentation and you want it to be more than just another snooze-fest with slides. You want it to be engaging, memorable and downright impressive.
Well, you’ve come to the right place — I’ve got some slick tips on how to create a visual presentation that’ll take your presentation game up a notch.
Packed with presentation templates that are easily customizable, keep reading this blog post to learn the secret sauce behind crafting presentations that captivate, inform and remain etched in the memory of your audience.
Click to jump ahead:
What is a visual presentation & why is it important?
15 effective tips to make your visual presentations more engaging, 6 major types of visual presentation you should know , what are some common mistakes to avoid in visual presentations, visual presentation faqs, 5 steps to create a visual presentation with venngage.
A visual presentation is a communication method that utilizes visual elements such as images, graphics, charts, slides and other visual aids to convey information, ideas or messages to an audience.
Visual presentations aim to enhance comprehension engagement and the overall impact of the message through the strategic use of visuals. People remember what they see, making your point last longer in their heads.
Without further ado, let’s jump right into some great visual presentation examples that would do a great job in keeping your audience interested and getting your point across.
In today’s fast-paced world, where information is constantly bombarding our senses, creating engaging visual presentations has never been more crucial. To help you design a presentation that’ll leave a lasting impression, I’ve compiled these examples of visual presentations that will elevate your game.
1. Use the rule of thirds for layout
Ever heard of the rule of thirds? It’s a presentation layout trick that can instantly up your slide game. Imagine dividing your slide into a 3×3 grid and then placing your text and visuals at the intersection points or along the lines. This simple tweak creates a balanced and seriously pleasing layout that’ll draw everyone’s eyes.
2. Get creative with visual metaphors
Got a complex idea to explain? Skip the jargon and use visual metaphors. Throw in images that symbolize your point – for example, using a road map to show your journey towards a goal or using metaphors to represent answer choices or progress indicators in an interactive quiz or poll.
3. Visualize your data with charts and graphs
The right data visualization tools not only make content more appealing but also aid comprehension and retention. Choosing the right visual presentation for your data is all about finding a good match.
For ordinal data, where things have a clear order, consider using ordered bar charts or dot plots. When it comes to nominal data, where categories are on an equal footing, stick with the classics like bar charts, pie charts or simple frequency tables. And for interval-ratio data, where there’s a meaningful order, go for histograms, line graphs, scatterplots or box plots to help your data shine.
In an increasingly visual world, effective visual communication is a valuable skill for conveying messages. Here’s a guide on how to use visual communication to engage your audience while avoiding information overload.

4. Employ the power of contrast
Want your important stuff to pop? That’s where contrast comes in. Mix things up with contrasting colors, fonts or shapes. It’s like highlighting your key points with a neon marker – an instant attention grabber.
5. Tell a visual story
Structure your slides like a storybook and create a visual narrative by arranging your slides in a way that tells a story. Each slide should flow into the next, creating a visual narrative that keeps your audience hooked till the very end.
Icons and images are essential for adding visual appeal and clarity to your presentation. Venngage provides a vast library of icons and images, allowing you to choose visuals that resonate with your audience and complement your message.

6. Show the “before and after” magic
Want to drive home the impact of your message or solution? Whip out the “before and after” technique. Show the current state (before) and the desired state (after) in a visual way. It’s like showing a makeover transformation, but for your ideas.
7. Add fun with visual quizzes and polls
To break the monotony and see if your audience is still with you, throw in some quick quizzes or polls. It’s like a mini-game break in your presentation — your audience gets involved and it makes your presentation way more dynamic and memorable.
8. End with a powerful visual punch
Your presentation closing should be a showstopper. Think a stunning clip art that wraps up your message with a visual bow, a killer quote that lingers in minds or a call to action that gets hearts racing.

9. Engage with storytelling through data
Use storytelling magic to bring your data to life. Don’t just throw numbers at your audience—explain what they mean, why they matter and add a bit of human touch. Turn those stats into relatable tales and watch your audience’s eyes light up with understanding.

10. Use visuals wisely
Your visuals are the secret sauce of a great presentation. Cherry-pick high-quality images, graphics, charts and videos that not only look good but also align with your message’s vibe. Each visual should have a purpose – they’re not just there for decoration.
11. Utilize visual hierarchy
Employ design principles like contrast, alignment and proximity to make your key info stand out. Play around with fonts, colors and placement to make sure your audience can’t miss the important stuff.
12. Engage with multimedia
Static slides are so last year. Give your presentation some sizzle by tossing in multimedia elements. Think short video clips, animations, or a touch of sound when it makes sense, including an animated logo . But remember, these are sidekicks, not the main act, so use them smartly.
13. Interact with your audience
Turn your presentation into a two-way street. Start your presentation by encouraging your audience to join in with thought-provoking questions, quick polls or using interactive tools. Get them chatting and watch your presentation come alive.

When it comes to delivering a group presentation, it’s important to have everyone on the team on the same page. Venngage’s real-time collaboration tools enable you and your team to work together seamlessly, regardless of geographical locations. Collaborators can provide input, make edits and offer suggestions in real time.
14. Incorporate stories and examples
Weave in relatable stories, personal anecdotes or real-life examples to illustrate your points. It’s like adding a dash of spice to your content – it becomes more memorable and relatable.
15. Nail that delivery
Don’t just stand there and recite facts like a robot — be a confident and engaging presenter. Lock eyes with your audience, mix up your tone and pace and use some gestures to drive your points home. Practice and brush up your presentation skills until you’ve got it down pat for a persuasive presentation that flows like a pro.
Venngage offers a wide selection of professionally designed presentation templates, each tailored for different purposes and styles. By choosing a template that aligns with your content and goals, you can create a visually cohesive and polished presentation that captivates your audience.
Looking for more presentation ideas ? Why not try using a presentation software that will take your presentations to the next level with a combination of user-friendly interfaces, stunning visuals, collaboration features and innovative functionalities that will take your presentations to the next level.
Visual presentations come in various formats, each uniquely suited to convey information and engage audiences effectively. Here are six major types of visual presentations that you should be familiar with:
1. Slideshows or PowerPoint presentations
Slideshows are one of the most common forms of visual presentations. They typically consist of a series of slides containing text, images, charts, graphs and other visual elements. Slideshows are used for various purposes, including business presentations, educational lectures and conference talks.

2. Infographics
Infographics are visual representations of information, data or knowledge. They combine text, images and graphics to convey complex concepts or data in a concise and visually appealing manner. Infographics are often used in marketing, reporting and educational materials.
Don’t worry, they are also super easy to create thanks to Venngage’s fully customizable infographics templates that are professionally designed to bring your information to life. Be sure to try it out for your next visual presentation!

3. Video presentation
Videos are your dynamic storytellers. Whether it’s pre-recorded or happening in real-time, videos are the showstoppers. You can have interviews, demos, animations or even your own mini-documentary. Video presentations are highly engaging and can be shared in both in-person and virtual presentations .
4. Charts and graphs
Charts and graphs are visual representations of data that make it easier to understand and analyze numerical information. Common types include bar charts, line graphs, pie charts and scatterplots. They are commonly used in scientific research, business reports and academic presentations.
Effective data visualizations are crucial for simplifying complex information and Venngage has got you covered. Venngage’s tools enable you to create engaging charts, graphs,and infographics that enhance audience understanding and retention, leaving a lasting impression in your presentation.

5. Interactive presentations
Interactive presentations involve audience participation and engagement. These can include interactive polls, quizzes, games and multimedia elements that allow the audience to actively participate in the presentation. Interactive presentations are often used in workshops, training sessions and webinars.
Venngage’s interactive presentation tools enable you to create immersive experiences that leave a lasting impact and enhance audience retention. By incorporating features like clickable elements, quizzes and embedded multimedia, you can captivate your audience’s attention and encourage active participation.
6. Poster presentations
Poster presentations are the stars of the academic and research scene. They consist of a large poster that includes text, images and graphics to communicate research findings or project details and are usually used at conferences and exhibitions. For more poster ideas, browse through Venngage’s gallery of poster templates to inspire your next presentation.
Different visual presentations aside, different presentation methods also serve a unique purpose, tailored to specific objectives and audiences. Find out which type of presentation works best for the message you are sending across to better capture attention, maintain interest and leave a lasting impression.
To make a good presentation , it’s crucial to be aware of common mistakes and how to avoid them. Without further ado, let’s explore some of these pitfalls along with valuable insights on how to sidestep them.
Overloading slides with text
Text heavy slides can be like trying to swallow a whole sandwich in one bite – overwhelming and unappetizing. Instead, opt for concise sentences and bullet points to keep your slides simple. Visuals can help convey your message in a more engaging way.
Using low-quality visuals
Grainy images and pixelated charts are the equivalent of a scratchy vinyl record at a DJ party. High-resolution visuals are your ticket to professionalism. Ensure that the images, charts and graphics you use are clear, relevant and sharp.
Choosing the right visuals for presentations is important. To find great visuals for your visual presentation, Browse Venngage’s extensive library of high-quality stock photos. These images can help you convey your message effectively, evoke emotions and create a visually pleasing narrative.
Ignoring design consistency
Imagine a book with every chapter in a different font and color – it’s a visual mess. Consistency in fonts, colors and formatting throughout your presentation is key to a polished and professional look.
Reading directly from slides
Reading your slides word-for-word is like inviting your audience to a one-person audiobook session. Slides should complement your speech, not replace it. Use them as visual aids, offering key points and visuals to support your narrative.
Lack of visual hierarchy
Neglecting visual hierarchy is like trying to find Waldo in a crowd of clones. Use size, color and positioning to emphasize what’s most important. Guide your audience’s attention to key points so they don’t miss the forest for the trees.
Ignoring accessibility
Accessibility isn’t an option these days; it’s a must. Forgetting alt text for images, color contrast and closed captions for videos can exclude individuals with disabilities from understanding your presentation.
Relying too heavily on animation
While animations can add pizzazz and draw attention, overdoing it can overshadow your message. Use animations sparingly and with purpose to enhance, not detract from your content.
Using jargon and complex language
Keep it simple. Use plain language and explain terms when needed. You want your message to resonate, not leave people scratching their heads.
Not testing interactive elements
Interactive elements can be the life of your whole presentation, but not testing them beforehand is like jumping into a pool without checking if there’s water. Ensure that all interactive features, from live polls to multimedia content, work seamlessly. A smooth experience keeps your audience engaged and avoids those awkward technical hiccups.
Presenting complex data and information in a clear and visually appealing way has never been easier with Venngage. Build professional-looking designs with our free visual chart slide templates for your next presentation.
What software or tools can I use to create visual presentations?
You can use various software and tools to create visual presentations, including Microsoft PowerPoint, Google Slides, Adobe Illustrator, Canva, Prezi and Venngage, among others.
What is the difference between a visual presentation and a written report?
The main difference between a visual presentation and a written report is the medium of communication. Visual presentations rely on visuals, such as slides, charts and images to convey information quickly, while written reports use text to provide detailed information in a linear format.
How do I effectively communicate data through visual presentations?
To effectively communicate data through visual presentations, simplify complex data into easily digestible charts and graphs, use clear labels and titles and ensure that your visuals support the key messages you want to convey.
Are there any accessibility considerations for visual presentations?
Accessibility considerations for visual presentations include providing alt text for images, ensuring good color contrast, using readable fonts and providing transcripts or captions for multimedia content to make the presentation inclusive.
Most design tools today make accessibility hard but Venngage’s Accessibility Design Tool comes with accessibility features baked in, including accessible-friendly and inclusive icons.
How do I choose the right visuals for my presentation?
Choose visuals that align with your content and message. Use charts for data, images for illustrating concepts, icons for emphasis and color to evoke emotions or convey themes.
What is the role of storytelling in visual presentations?
Storytelling plays a crucial role in visual presentations by providing a narrative structure that engages the audience, helps them relate to the content and makes the information more memorable.
How can I adapt my visual presentations for online or virtual audiences?
To adapt visual presentations for online or virtual audiences, focus on concise content, use engaging visuals, ensure clear audio, encourage audience interaction through chat or polls and rehearse for a smooth online delivery.
What is the role of data visualization in visual presentations?
Data visualization in visual presentations simplifies complex data by using charts, graphs and diagrams, making it easier for the audience to understand and interpret information.
How do I choose the right color scheme and fonts for my visual presentation?
Choose a color scheme that aligns with your content and brand and select fonts that are readable and appropriate for the message you want to convey.
How can I measure the effectiveness of my visual presentation?
Measure the effectiveness of your visual presentation by collecting feedback from the audience, tracking engagement metrics (e.g., click-through rates for online presentations) and evaluating whether the presentation achieved its intended objectives.
Ultimately, creating a memorable visual presentation isn’t just about throwing together pretty slides. It’s about mastering the art of making your message stick, captivating your audience and leaving a mark.
Lucky for you, Venngage simplifies the process of creating great presentations, empowering you to concentrate on delivering a compelling message. Follow the 5 simple steps below to make your entire presentation visually appealing and impactful:
1. Sign up and log In: Log in to your Venngage account or sign up for free and gain access to Venngage’s templates and design tools.
2. Choose a template: Browse through Venngage’s presentation template library and select one that best suits your presentation’s purpose and style. Venngage offers a variety of pre-designed templates for different types of visual presentations, including infographics, reports, posters and more.
3. Edit and customize your template: Replace the placeholder text, image and graphics with your own content and customize the colors, fonts and visual elements to align with your presentation’s theme or your organization’s branding.
4. Add visual elements: Venngage offers a wide range of visual elements, such as icons, illustrations, charts, graphs and images, that you can easily add to your presentation with the user-friendly drag-and-drop editor.
5. Save and export your presentation: Export your presentation in a format that suits your needs and then share it with your audience via email, social media or by embedding it on your website or blog .
So, as you gear up for your next presentation, whether it’s for business, education or pure creative expression, don’t forget to keep these visual presentation ideas in your back pocket.
Feel free to experiment and fine-tune your approach and let your passion and expertise shine through in your presentation. With practice, you’ll not only build presentations but also leave a lasting impact on your audience – one slide at a time.
.css-1qrtm5m{display:block;margin-bottom:8px;text-transform:uppercase;font-size:14px;line-height:1.5714285714285714;-webkit-letter-spacing:-0.35px;-moz-letter-spacing:-0.35px;-ms-letter-spacing:-0.35px;letter-spacing:-0.35px;font-weight:300;color:#606F7B;}@media (min-width:600px){.css-1qrtm5m{font-size:16px;line-height:1.625;-webkit-letter-spacing:-0.5px;-moz-letter-spacing:-0.5px;-ms-letter-spacing:-0.5px;letter-spacing:-0.5px;}} Best Practices The #1 rule for improving your presentation slides
by Tom Rielly • May 12, 2020

When giving presentations, either on a video conference call or in person, your slides, videos and graphics (or lack of them) can be an important element in helping you tell your story or express your idea. This is the first of a series of blog posts that will give you tips and tricks on how to perfect your visual presentations.
Your job as a presenter is to build your idea -- step-by-step -- in the minds of your audience members. One tool to do that is presentation graphics, such as slides and videos.
Why graphics for your presentation?
A common mistake is using slides or videos as a crutch, even if they don’t actually add anything to your presentation. Not all presentations need graphics. Lots of presentations work wonderfully with just one person standing on a stage telling a story, as demonstrated by many TED Talks.
You should only use slides if they serve a purpose: conveying scientific information, art, and things that are hard to explain without pictures. Once you have decided on using slides, you will have a number of decisions to make. We’ll help you with the basics of making a presentation that is, above all, clear and easy to understand. The most important thing to remember here is: less is more.
Less is so much more
You want to aim for the fewest number of slides, the fewest number of photos, the fewest words per slide, the least cluttered slides and the most white space on your slides. This is the most violated slide rule, but it is the secret to success. Take a look at these examples.

As you can see in the above example, you don’t need fancy backgrounds or extra words to convey a simple concept. If you take “Everything you need to know about Turtles”, and delete “everything you need to know about” leaving just “turtles”, the slide has become much easier for your audience to read, and tells the story with economy.

The above example demonstrates that a single image that fills the entire screen is far more powerful than a slide cluttered with images. A slide with too many images may be detrimental to your presentation. The audience will spend more mental energy trying to sort through the clutter than listening to your presentation. If you need multiple images, then put each one on its own slide. Make each image high-resolution and have it fill the entire screen. If the photos are not the same dimensions as the screen, put them on a black background. Don’t use other colors, especially white.

Your slides will be much more effective if you use the fewest words, characters, and pictures needed to tell your story. Long paragraphs make the audience strain to read them, which means they are not paying attention to you. Your audience may even get stressed if you move on to your next slide before they’ve finished reading your paragraph. The best way to make sure the attention stays on you is to limit word count to no more than 10 words per slide. As presentation expert Nancy Duarte says “any slide with more than 10 words is a document.” If you really do need a longer explanation of something, handouts or follow-up emails are the way to go.
Following a “less is more” approach is one of the simplest things you can do to improve your presentation visuals and the impact of your presentation overall. Make sure your visuals add to your presentation rather than distract from it and get your message across.
Ready to learn more about how to make your presentation even better? Get TED Masterclass and develop your ideas into TED-style talks.
© 2024 TED Conferences, LLC. All rights reserved. Please note that the TED Talks Usage policy does not apply to this content and is not subject to our creative commons license.
7 Types of Visual Presentations

When it comes to delivering a presentation, visuals can be extremely helpful in getting your point across. There are many types of visual presentations that can be used to communicate your message.
This blog post will discuss seven different types of visual presentations and when they might be appropriate to use. We will also provide examples of each kind of presentation. Let’s get started!
What are Visual Presentations?
3. whiteboards, 5. infographics, 7. paper handouts, which one is right for you.
Visual presentations are a visual aid that can be used in both business and academia to help explain concepts or topics that might otherwise be difficult for an audience member to understand without seeing them firsthand.
In addition, visuals allow the presenter to provide more information than just words alone would do on their own because they provide context and give the audience something concrete to look at while listening.
There are many types of visual presentations, but we will focus on seven of the most common ones here. Each type has its own strengths and weaknesses, so it’s important to understand when each would be appropriate to use.
Slides are the most common type of visual aid. You can use slides to demonstrate your point and make it easier for the audience to follow along with what you’re saying. They are also pretty easy to prepare.
For example, a slide that shows how much money was spent on advertising last year might be useful in an annual meeting where everyone’s attention span is short or they don’t want to take the time to read a long report.
Graphs and charts are other types of visual presentation that can be used to show trends or compare data.
For example, you might use a graph to illustrate how your company’s revenue has increased or decreased over the past five years. Or, you could use a chart to compare the number of sales your company has made this year compared to last year.
Whiteboards are a great way to explain something in detail, as they allow you to draw pictures and write on them. For example, if your company is thinking about designing a new website but needs some ideas first, then using whiteboards would help everyone get their thoughts out.
One issue about using whiteboards is that they cannot be easily saved and shared with others. Moreover, as you need to write manually, it can be time-consuming and prone to errors.
Videos are another type of visual aid that can be used to demonstrate a concept or show how something works. It’s beneficial when you want to show live instances of your products or services through movements.
For example, if you’re selling cars, then showing them driving around would help people get an idea of what they look like in action (and not just sitting still on a lot).
The downside to using videos is that creating one from scratch can be time-consuming and expensive, so this isn’t always feasible. In addition, videos can be challenging to follow if they are not properly edited.
Infographics are visual presentations that use images and text to convey information. They can be used in many ways, from illustrating trends or comparing data points graphically; to explaining complex concepts in an easy-to-understand manner.
Infographics are especially handy when trying to illustrate a point based on a massive number of data. For example, if you wanted to show how much data your company has collected over the past year, you could use an infographic.
Posters are used primarily in academic settings because they allow students to display their research findings at conferences or other events where the audiences are present.
For example, if someone were presenting on the use of social media in politics, they might create a poster with an image of the political landscape and then use text to explain how social media is being used.
Posters can be created using software or hand-drawing, but they should always be designed with legibility.
Paper handouts are visual aids that can be used to supplement slides or other visuals.
They can be especially useful if you want to provide the audience with additional information that isn’t easily conveyed in a slide or chart.
For example, you might use paper handouts to give the audience more details about the data shown in a graph or provide them with a list of your company’s products and services.
Now that you know about the different types of visuals, how do you decide which one is right for your presentation?
Well, it depends on what you’re trying to accomplish. If you want to make your presentation more interesting and engaging, then using slides or videos might be a good option.
However, if you need to show complex data or explain a concept in detail, charts, whiteboards, or infographics might be better.
In the end, it’s crucial to pick the right type of visual that will help you communicate your message most effectively.
While there are many different types of visual presentations, the seven we’ve outlined in this blog post should give you a good place to start when creating your own visual presentation.
Keep in mind the tone and purpose of your presentation as you select which type will work best for you. And always be sure to test out your visuals on a small audience before presenting them to a larger group. Happy presenting!
Related Posts:

Engage your audience with powerful visual presentations.
Visual tools are critical to have in any presentation as they’re one of the key presentation aids that will help enhance your overall presentation .
We’ll give you tips on how to develop a sense of good presentation design whether you’re using PowerPoint, Prezi, Google Slides or any presentation software under the sun. The secret to creating a great presentation does not lie in a superior software, but understanding a few universal design concepts that can applied for all types of visual presentations.
Don’t be afraid to use a few presentation templates – there are ways to make the presentation ideas in those templates your own ideas and advance it in several different ways. Let’s make your next presentation on point and designed beautifully.
Presentations Are The Visual Communication Tool To Your Story

In the age of information, people remember facts faster through stories. Keep your bullet points and information short. You can use a rule of thumb to not put more than a paragraph and 3 points per slide to start.
Make your presentation the visual component of your story, but not something your audience has to read. Something that is short and succinct on screen will capture your audience’s attention and make sure they retain the main points of your message.
This does not mean incomplete slides. A common mistake presenters make is putting too little information on a slide in the name of simplicity when in fact they’re leaving out the main context.
A well designed visual presentation has a great story behind it and a well rehearsed voice telling it as well. Engaging the audience is also a great way to associate meaning or connection to the content of your slide decks. Ask questions and tell stories while showing off a great visual presentation! Think of writing the copy like writing for social media – you only have a certain amount of characters to use and a short audience attention span.
General Tips For Visual Presentations
Before you begin creating your presentation, you first need to know what makes effective presentations – storytelling. Such presentations target the audience’s emotions leading to a stronger connection to the audience member and the main point of the presentation.
Below are some storytelling tips for your slides, but remember to keep the presentation itself simple and practice makes perfect. And again, these are more for your spoken component that accompanies the visual component. These tips can be useful because they can be applied to all your presentations in general.
Step 1 is to ask yourself who your audience is and how to convey the key message you have in mind to them. Once you settle on your message, you can start designing your slides with that direction in mind.
You may wonder how to connect with an audience with your slides. Look to your own experiences, your own speaking style and tailor your message to what you know. Not many people want to hear others recite facts with no real meaning driving the story. Ask yourself, “Why does this matter to the audience and why should they care?”.
There is a lot of trust that can be built when the audience has a genuine connection to the presenter. Overall, if you have something that can solve a problem or teach someone complex things, that is enough to form a connection with your audience.
Think of the last app you used, the last email you read or perhaps the last business you purchased from. What was the content or visual elements that pulled you in?
Are you making a PowerPoint, Prezi or other form of visual presentation but it’s taking too much of your time? Enlist the help of Presentation Geeks and consider outsourcing your presentation design . Outsourcing your presentation slides allows you to free more of your time while still getting the results of an interesting presentation. You’ll have the support of expert slide designers who know what presentation visuals work and don’t work thanks to years of presentation feedback and background knowledge.
Color Design Tips For Presentation Slides
When designing your presentation, make sure you take into consideration the colors you’re using. We’ve listed a few background color combinations you might want to consider when developing the overall slide deck and the font to use.
Color Wheel Alignments:
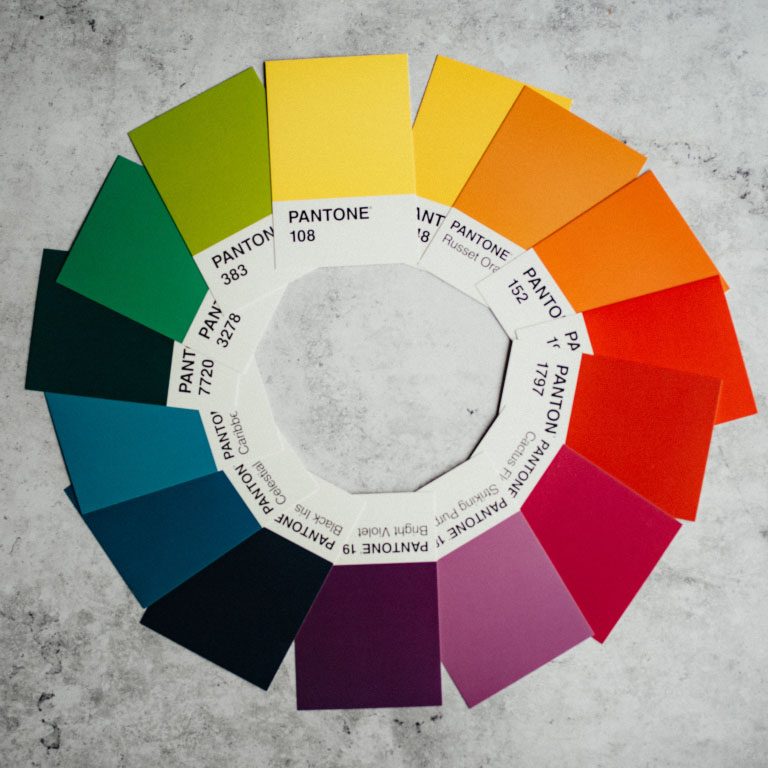
Primary Colors: Red, yellow, blue
Secondary Colors: Green, orange, purple
Tertiary Colors: Yellow-orange, red-orange, red-purple, blue-purple, blue-green & yellow-green
Analogous Colors: These are any three colors which are side by side on a color wheel. (Think green, lime green, yellow)
Complementary Colors: These are colors that are directly opposite of a color wheel. (Think green vs. purple, red vs. blue)
Monochromatic Colors: This is when you use one color and various shades or hues of it. It works well for minimal looks.
Color moods:
Red/Orange/Yellow: Generally these convey a sense of energy, are warm colors and catch your attention. Yellow is a happy warm color on one end and red is very striking and can warn of danger, and symbolizes importance, passion and sometimes violence.
Blue/Purple/Green: These colors are calming, reserved, elegant and often used for corporate slides. Think of how indigo blue is used for many large corporate entities. Green often is branded with earth or medical brands. Purple often conveys a sense of royalty, money and creativity.
Use The Power Of Photography Or Video

Pictures and videos are great visuals to incorporate into any presentation. Remember the saying, “A picture is worth a thousand words”? Well, it’s true! Photos help visualize complex information. You’ll often come across a lot of photos in research presentations as they help the audience understand examples better.
They can also save you from having to put a thousand thoughts into the PowerPoint presentation slide!
The first tip we can give to make a great visual presentation is to choose all your photos before you start. This way you can keep the consistency of the images across your slide deck and make sure they’re somewhat alike in terms of composition, mood and brand.
Use free stock photos
You don’t have to take the photos or videos yourself.
There are plenty of free resources and web pages for stock photos online – Unsplash , Pexels , Pixabay , Free Range , Creative Commons and some photos from Freepik are free to use with some accreditation.
Effective photo use
Make sure you pick an image that will focus on the main theme of the slide. One image is usually enough if the image choice is very relevant to the slide. If you have multiple photos, avoid poor or loose placement of photos all over the slide. Try to use a grid or gallery placement and it will immediately enhance the layout of the slide.
If you pick great images, making presentations can be faster. Instead of having to create an elaborate template with multiple elements, a photo with a couple of bullet points can go a long way in terms of capturing attention and making your presentation slides look professional. This is true on any presentation design platform – whether its PowerPoint, Google Slides, etc.

You can also embed videos whether they’re located on your computer, YouTube, Vimeo or other major video streaming sites. If you’re feeling nervous about your presentation or have a complex message that would be hard to condense in one slide, a video is a dynamic way of conveying your message in any type of presentation.
The Typography You Use Matters

Typography is how you will arrange and present the words in your presentation. An audience can engage when text is readable, functional and works well with the other elements in the presentation. Fonts and sizing are a good place to start establishing the tone of your presentation.
Overview of Font Choices
Elegant fonts often denote a sense of luxury or lifestyle tone. Use script fonts sparingly, but as titles they immediately give this polished and high-end look. This should not be used as body text or something lengthy to read. Think about if you sent an email in that text – it would be tedious to read. However, maybe if it were a title or a way to name email, the choice may be more correct.
Corporate fonts often are traditional, serif fonts or clean sans serif fonts that evoke a sense of trust and a clear message. Think of the fonts Lato, Helvetica or Arial – they’re go-to fonts that are easy to read, and work across many systems. This is especially helpful if you are working across teams when creating content or having to approve the content, idea or visuals.
Of course, you can incorporate more stylistic or playful fonts if you want to give your presentation a personal feel. Much like the scripted font, when used sparingly but in large titles, this choice of font can be very effective at conveying a certain personality.
Adding Symbols & Icons To Your Presentation

You can consolidate information by using symbols or icons to direct your eye to information such as an arrow symbol. What if you used a symbol instead of a bullet point? Think of symbols as anchors for the eye to quickly find information. You can collect symbols off free stock sites or use the built-in ones in PowerPoint that are free to use!
Depending on if your presentation is formal or informal , you may also want to consider adding emojis! Emojis are fun ways to express different emotions and can help connect with a younger demographic.
Overall Branding, Tone of Voice & Consistency
Another tool you may have at your disposal is if your brand, business or company has brand guidelines. It will be the guide and compass to your presentation’s information that goes within it. By keeping consistent you can achieve a polished look even if it looks very simple.
Use your business voice to communicate ideas and set the tone for your presentation. Are you in an investment banking business and want people to rely on the information given to you? That would inform perhaps using blues and purples, which are calmer colors and a cleaner look. Are you an influencer who’s buying power and spending choices matter to your audience? Maybe choosing bright colors with personal touches will make the connection. Are you designing an innovative app? Maybe more interactive slides would do the trick.
Use these questions to make sure your text and tone is consistent as this is a foundation of a well articulated brand or personal identity.
Consistent Hierarchy
Visual hierarchy is how you will arrange objects and text in relation to one another to guide your user and not confuse the objects and how they should read them in your slides. Setting rules helps differentiate and prioritize what’s important in order.
Look at the difference between these two.
Snoop Dogg just launched a wine and it’s coming to Canada
Daily hive branded content | aug 11 2020, 6:30 am.
Australian winery 19 Crimes recently announced that its new Cali Red wine, created in collaboration with Entertainment Icon, entrepreneur, and hip-hop artist Snoop Dogg, will be hitting shelves across Canada later this summer.
The collaboration offers a refreshing take on celebrity partnerships as the apparent shared values and history between the brand and famous rapper make for a perfectly organic pairing.
Comment Name:
By browsing the site, you agree to the use of cookies on this website. see our user agreement for the use of cookies..
You can see a clear distinction in the example below:
Think of hierarchy of a form of narration or story structure. Your eye goes to the title, then to the subtitle, then to the body copy in a logical manner. Where the eye travels is one of those things we don’t think about often. But you can also utilize eye lines in photos. Is your subject in the photo looking left or right? Consider placing text to where your subject is looking and see how effectively your eye travels to that text.
We’ll look at hierarchy strictly as sizing of words for now, but note you can establish hierarchy with type, white space, alignment, etc. As a general rule of thumb, you should have consistent sizing for your Header (or title slide / slide title), your subtitles and your body text. That’s it! If the sizing in your PowerPoint is consistent, your words will look uniform and clean. Everything will be much easier to read and the eye will be trained to move each slide.
Don’t Forget Your Own Style
Also don’t forget to incorporate your own style and what kind of visuals you like. Even if your early visuals may seem simple, build up that design muscle with the basics and design techniques that look clean and consistent.
You’ll find as you design these basics, you’ll probably start noticing other visuals and things you like in other mediums and presentations. Keep a note or screenshot the presentation that inspired you. Create a mood-board that you can refer to in the future for quick idea inspiration. Copying gets a bad rap, but learning how to design something you like even if it’s a clone copy will teach you many things about design. Build a collection of images that informs everything you do: for your color scheme, your designs, the cadence of images, etc.
That being said, you can also use free stock websites like Freepik for some design layouts inspiration. Creative Market is a paid website but the site offers a ton of design inspiration. This site has design templates for what’s currently in and trending. You can subscribe to an email newsletter on either site to get bite sized design influence each day that goes straight to your inbox.
However, don’t be afraid to try something new!
Once you get to a level of comfortable designing, these new ideas will be much easier to execute with the technical knowledge you amassed when you started. You could even try using a new app to design your ideas to keep your knowledge fresh! (Keep in mind that most online apps like SlideShare use cookies to improve functionality and performance.)
Ask your friends or people at your organization to give you feedback and critique, as that’s also crucial to honing your design skills. The people around you also represent different audiences!

The above image looks boring, right?
That’s because there are no visual elements!
Powerful visual presentations can engage audiences psychologically with both the presentation itself and the energy of the presenter. By understanding a few universal design concepts, you can begin your journey creating wonderful visual presentations and becoming a better presenter ! Thanks for reading this blog post, tell us your tips in the comments below.
Author: Content Team
Related posts.

FREE PROFESSIONAL RESOURCES DELIVERED TO YOUR INBOX.
Subscribe for free tips, resources, templates, ideas and more from our professional team of presentation designers.
- Hand-Illustrated Explainer Videos
- Illustrated Conversation
- Infographics
- Strategy & Ideas
- Training Design & Development
- Event Communications
- Video Production
- Scripting & Script Assistance
- llustration
- Our Method: Scribology
- Our Process
- Our Guarantee
- What We Care About
- General Contact Info
- Book a Consult
- Book a Quote
- Schedule an Artist
Art of Presentation: A Guide to Captivate Your Audience with Visuals
Andrew Herkert
April 17th, 2023
Whiteboard Video

Presenting a complex topic often results in an audience with glazed -over expressions, or hours of agonizing preparation to avoid those blank stares. Preparation is essential and can be simplified when you know how to use visuals to engage, explain and boost retention.
There is no definitive answer to whether drawn images are better than photos, videos, charts, or graphs. The choice largely depends on the type of information being presented and the presentation objectives. Each type of visual has strengths and weaknesses.
Charts and Graphs
Charts and graphs often simplify presenting complex data sets in a concise manner that summarizes a state or condition. They are effective because visual representation transforms numbers and abstract concepts, revealing the most important aspects of the information. Charts and graphs, however, are limited in their ability to tell a story or convey the nuances behind the numbers.
Photos and Vide os
Photos and videos, on the other hand, can provide a more realistic and immersive audience experience. They are particularly effective for demonstrating real-life situations and processes, conditions, procedures, or actions. Photos and videos can also convey emotion and social cues, making them suitable for presenting social science topics. The challenge is often finding or capturing the exact best image(s) to support the message. Searching or producing what’s required can involve considerable time and expense to capture quality images.
Drawn Images

Drawn images offer unique flexibility and broader application than any other single visual approach. The ability to create, re-create, conceptualize, and summarize with imagery checks a lot of application boxes. Ultimately drawn images allow the audience to focus immediately on the most important aspects of the information. When verbal delivery and images are synchronized, it enhances the clarity and understanding of the story. The images also provide visual cues and details that support the message, making it easier for the audience to follow along and recall. Images can also convey emotions that may be difficult to express through dialogue alone.
The choice between static drawn images or animation also depends on the presentation objectives and the type of information being presented. Animation can provide an interactive learning experience by demonstrating processes and procedures in real-time, illustrating cause-and-effect relationships or conveying emotions and social cues.
However, the detail and motion of animation can distract the viewer from important aspects of your message. It can also be more complex and time-consuming to create compared to drawn images. It requires additional resources, like software and premade stock images. Stock images aren’t custom made for your message so they may not fully connect with your audience. Custom animations require expertise in animation design to produce high-quality content. Regardless of quality, animation can lack authenticity, or a feeling of human connection.
A compelling solution is hand-drawn whiteboard video where an artist’s hand is filmed as it creates the drawings. This form of drawing is particularly excellent in providing a framework for understanding complex topics. Moreover, the neuroscience behind it explains its power to engage audiences and boost retention.
Things to Consider When Planning Your Visuals
Ultimately, the choice of presentation visuals depends on the presentation objectives and the audience. Visuals make it easier to absorb information by enabling the brain to process information quickly and retain it for longer periods. Here are some considerations in planning presentation visuals:
To take your presentations to the next level, consider using hand-drawn whiteboard video. This powerful medium will illustrate complex ideas and engage your audience in a dynamic and interactive way. To learn more about how hand-drawn whiteboard video can enhance your presentation, contact us today . Let us help you deliver presentations that leave a lasting impression on your audience.
- Understand the purpose: Before creating visuals, understand the role they will play. What is the goal of using visuals? Are they meant to explain a concept, highlight important points, or provide a summary? Knowing the purpose will help you to create relevant and effective visuals.
- Choose appropriate visuals : The choice of visuals should be guided by the content being presented. Are you explaining a process? Are you presenting data or are you interpreting it? Choose visuals that are easy to understand and support the presentation objectives.
- Consider relationships: How do your visuals connect with your message points? How much space/time should a visual have in your presentation? It will help your audience understand better and remember longer if the visuals sync with what is being said. Present your visuals in manageable chunks that directly support your message.
- Keep it simple : Visuals should be simple and easy to understand. Avoid cluttering the visual with too much information or using complicated graphics. Use colors sparingly and fonts that are easy to read. Create a visual hierarchy that guides the eye.
- Make it accessible : Ensure visuals are accessible to everyone in your audience, including those with visual impairments. Use alternative text, captions, and audio to make visual content accessible.
Incorporating visuals into your presentation is a powerful way to engage and communicate complex information. By understanding the purpose of your visuals, choosing appropriate visuals, organizing the information, keeping it simple, and making it accessible, you can create effective presentations that will stick with your audience long after your presentation is over.
how to give the perfect presentation
Using visuals in your presentation, how to design memorable presentations.
Visuals can impact your presentation dramatically.These images, photos, objects, charts, diagrams, tables, graphs or illustrations have the potential to make or break your presentation. Used sloppily, they can damage your credibility and reputation. Designed wisely, they can strengthen your verbal message and enable you to achieve your objective. Why? Because a picture really is worth a thousand words.
According to research done by Professor Albert Mehrabian, a leading communications expert, we take in about 55% of visual information, versus only 7% of textual information. This means that whenever possible, you should use visuals such as photos, charts, graphs, and tables in your presentation. Also, eliminate sentences unless you are showing a quotation. Reduce the number of words or bullet points you use on your slides.They only distract your audience members and encourage them to read the slides, instead of listening to your words.
Hi-Tech or Low-Tech?
Today’s rapidly evolving technology enables us to add strong state-of-the-art audio-visual elements to our presentations. When planning a presentation before a huge audience, consult with your technical team (or, at least, your teenagers!) to come up with the best options. Yet, hi-tech technological components are not always the answer. In meeting rooms around the world, millions of people give presentations every day with or without the aid of laptops and powerpoint software. Remember the purpose of the visuals is to add interest and enhance your message. Yet, you are still the star, the primary focus. No amount of technology can cover up a poor performance.
Handling Equipment & Visuals
When you handle the equipment and visuals, you are still performing for your audience. Make sure you remain calm when using unfamiliar equipment or solving technical glitches. Remember the audience is watching and listening to the way you treat technicians and assistants. Speak respectfully to all who come up to help you. Practice, to ensure you can move confidently and seamlessly between your speech and your visuals, without fuss or delay. Rehearse the visual part of your presentation, just like other parts of your speech.
Benefits of Visuals
A study at the Wharton Research Centre also revealed that participants remembered 50% of the visual information, but only 5% of the bulleted points. Visuals can help you clarify points, reinforce your message, and create greater interest and enthusiasm for your subject. What’s more, visuals encourage audience interaction and provide a change from just hearing, to seeing and hearing.
As a presenter, you can be more relaxed and active when you show a slide. You may walk around, gesture, or point out key relationships in the information you are presenting graphically. Visuals take some of the attention off you and allow people to focus on your information. In this way, they are beneficial to you and your audience. According to research, audiences retain 10% of what was presented orally, 35% of what was presented visually alone, and 65% of what was presented visually and orally. The bottom line is that incorporating visuals can add to your bottom line.
Developing Visuals
Visuals include a variety of communication tools such as flip charts, overhead transparencies, slides, and videos. Powerpoint slide presentations are often the most popular, though not always what’s necessary. What you use depends on the size of your audience. If you are presenting for up to 50 people, you could use boards, flipcharts, overhead transparencies, handouts, and slides. If you are presenting for about 125 people, it is best to stick to overhead transparencies and slides. If you are presenting for 125 people or more, use slides alone.
When considering which type of visuals to use, take into account time and cost factors. Determine the number of times the slides can be used. Decide if professional development is necessary.
Plan a maximum of one transparency for every five minutes of your presentation. Don’t run after your visuals by trying to pack in too many in a short period of time. Let your visuals support your message and not the other way around.
If you are planning to develop your own visuals, keep the following points in mind:
- Emphasize only one thought or comparison on each slide. If you include more than one message, it may confuse your audience.
- Number your slides in case they get mixed up.
- Keep visuals brief and simple.
- Create visual material that is bold and easily seen from a distance.
Remember that research has shown that people remember most when there is only narration and graphics. In other words, they learn less when there is narration alone and they learn less when there is narration, graphics, and text. Check the effectiveness of your visuals by seeing if they can tell the story without added written information.
Environmental Influences
Lastly, remember that many of us are sleep-deprived. Try to keep some lights on during the presentation or it will be too easy for even the most well-intentioned audience members to doze off comfortably and miss all your hard work!
I put a lot of information on my slides. I need it so I won’t forget what to say, even though I’ve spoken English all my life. What can I do about that?
Start by reducing the number of words on the slides slowly. Soon, you will discover that it’s easier to speak when you don’t have to read every single word. Since you’re an English speaker, you only need a few key words to help you elaborate on the subject. Don’t get caught up in thinking you have to deliver the information only in a certain way. Accept the fact that each time you speak the words may be different but the message will come across just the same. I’m sure you can do it.
Ask a Question: Cancel reply
Ask only about topics covered on this page.
Your Question:
About Presentation Prep

Being able to speak in public can change your life! Presentation Prep is your complete, free guide to delivering speeches, lectures, and presentations more successfully and confidently. Whether you're a native English-speaker who suffers from public speaking anxiety, or a non-native speaker who needs guidelines for presenting to international audiences, this site will give you everything you need. Presentation Prep is written by Rebecca Ezekiel, an experienced corporate trainer who specializes in the areas of communications, presentations, and cross-cultural skills. Her online English language training videos are watched by millions of students worldwide.
The Visual Communication Guy
Learn Visually. Communicate Powerfully.

- About The VCG
- Contact Curtis
- Five Paragraph Essay
- IMRaD (Science)
- Indirect Method (Bad News)
- Inverted Pyramid (News)
- Martini Glass
- Narrative Format
- Rogerian Method
- Toulmin Method
- Apostrophes
- Exclamation Marks (Points)
- Parentheses
- Periods (Full Stops)
- Question Marks
- Quotation Marks
- Plain Language
- APPEALS: ETHOS, PATHOS, LOGOS
- CLUSTER ANALYSIS
- FANTASY-THEME
- GENERIC CRITICISM
- IDEOLOGICAL CRITICISM
- NEO-ARISTOTELIAN
- O.P.T.I.C. (VISUAL ANALSYIS)
- S.O.A.P.S.T.O.N.E. (WRITTEN ANALYSIS)
- S.P.A.C.E.C.A.T. (RHETORICAL ANALYSIS)
- BRANCHES OF ORATORY
- FIGURES OF SPEECH
- FIVE CANONS
- LOGICAL FALLACIES
- Information Design Rules
- Arrangement
- Organization
- Negative Space
- Iconography
- Photography
- Which Chart Should I Use?
- “P” is for PREPARE
- "O" is for OPEN
- "W" is for WEAVE
- “E” is for ENGAGE
- PRESENTATION EVALUTION RUBRIC
- POWERPOINT DESIGN
- ADVENTURE APPEAL
- BRAND APPEAL
- ENDORSEMENT APPEAL
- HUMOR APPEAL
- LESS-THAN-PERFECT APPEAL
- MASCULINE & FEMININE APPEAL
- MUSIC APPEAL
- PERSONAL/EMOTIONAL APPEAL
- PLAIN APPEAL
- PLAY-ON-WORDS APPEAL
- RATIONAL APPEAL
- ROMANCE APPEAL
- SCARCITY APPEAL
- SNOB APPEAL
- SOCIAL APPEAL
- STATISTICS APPEAL
- YOUTH APPEAL
- The Six Types of Résumés You Should Know About
- Why Designing Your Résumé Matters
- The Anatomy of a Really Good Résumé: A Good Résumé Example
- What a Bad Résumé Says When It Speaks
- How to Write an Amazing Cover Letter: Five Easy Steps to Get You an Interview
- Make Your Boring Documents Look Professional in 5 Easy Steps
- Business Letters
- CONSUMER PROFILES
- ETHNOGRAPHY RESEARCH
- FOCUS GROUPS
- OBSERVATIONS
- SURVEYS & QUESTIONNAIRES
- S.W.O.T. ANALYSES
- USABILITY TESTS
- CITING SOURCES: MLA FORMAT
- MLA FORMAT: WORKS CITED PAGE
- MLA FORMAT: IN-TEXT CITATIONS
- MLA FORMAT: BOOKS & PAMPHLETS
- MLA FORMAT: WEBSITES AND ONLINE SOURCES
- MLA FORMAT: PERIODICALS
- MLA FORMAT: OTHER MEDIA SOURCES
- Course Syllabi
- Checklists and Peer Reviews (Downloads)
- Communication
- Poster Prints
- Poster Downloads
- Handout & Worksheet Downloads
- QuickGuide Downloads
- Downloads License Agreements

How to Design a PowerPoint: A Visual Guide to Making Slides with Impact
Home > Speaking > How to Design a PowerPoint
A quick Google Images search for “worst PowerPoint slides” proves two very clear realities: 1) anybody can create a PowerPoint; and 2) many don’t know how to do them well.
That’s understandable, though. Unless you’ve recently taken courses or training in design, data visualization, and public speaking, you likely haven’t had any more education on how to create an effective slide deck than a ten-year-old.
And you’re not alone.
Bad PowerPoints are everywhere: professor lectures, science conferences, human resources trainings, team meetings, sales review gatherings, thesis and dissertation defenses, product pitches, job interviews, you name it. Some of the brightest people in the world have created some of the most awful PowerPoints. For most, it’s just not a natural skill.
That’s unfortunate, too, because a well-designed slide deck can make a tremendous difference in the reception of the message you’re trying to convey.
To start designing excellent slide decks right away, follow my quick guide to designing better PowerPoints right after this paragraph. To get a whole workshop’s worth of information about how to design better slides, scroll below. 🙂
Click image to enlarge.

The question is, does designing a nice PowerPoint actually matter?
Well, if you’ve made it this far, you already know my opinion. But the short answer is, YES! Effective slide decks can make a HUGE difference in the outcome of your presentation. Why? Because slides—which should be used to supplement and enhance your well-prepared script (not be the presentation, as we often see in slides that are nothing more than bulleted lists)—significantly improve engagement during the presentation and recall after the presentation.
Basically, if you want people to both pay attention AND remember what you said, good slides can make all the difference. Plus, research has shown that people trust information more when it’s well-designed. In sum, good slides will cause your audience to:
- Pay attention more and stay more engaged;
- Remember the key messages from your presentation better;
- Trust you and your information more; and
- Believe you are super smart and awesome. (I mean, you already are, but good slides will seal the deal.)
Bad slides, on the other hand, are not only distracting, but they can actually damage a person’s ability to understand and follow your message.
At best, poorly designed slides will make you look less professional. At worst, they’ll encourage people to not listen to anything you have to say. Bad slides (which are caused by a whole range of things, including being too text-heavy, too busy, too inconsistent, or too color crazy, etc. [see my article on 40 Ways to Screw Up a PowerPoint Slide ]), overwhelmingly distract from your presentation.
If a slide has too much text, people try to read it and listen to you at the same time—which damages their ability to do either well. If your slides are too busy, your audience won’t be able to understand the information quick enough. If it’s ugly, well…people just tune out and ignore (and judge you, to boot).
Okay, so enough of the why . Let’s get to making better slides!
The 9 Steps to Designing a Better PowerPoint Slide
Step 1: empathize with your audience.

The term “empathy” in this context comes from a relatively new theory called “design thinking,” in which you can apply the mindset of a designer to a variety of contexts. So, whether you’re creating a toothbrush, a video game, an automobile, or…a PowerPoint, you need to be thinking a like a designer—which starts with empathy.
Empathizing with an audience is like applying the Golden Rule: present unto them as you would like to be presented to. Of course, the content of presentation itself comes first and foremost, but the design of your slides should support and enhance your content, so you’ll be thinking of your script and your slides at the same time. To begin, it’s best to start with a few concrete questions about your audience:
- Why are they there? Are they at your presentation because they want to be, or because they have to be? Is your presentation the only one of the day, or is it one of many (like at a conference)? Are they expecting to learn, be entertained, be inspired, be trained? In essence, you want to know their state of mind before coming so you can plan to accommodate that as best you can.
- Why would they care? Dig deep here. Does your audience actually care about the topic as much as you do? And…if you don’t care, why don’t you? If the topic isn’t meaningful and you can’t make it feel that way, then why even present? But…if they do care, know why they do. What will they hope for and expect out of it? What can you do to meet and exceed their expectations?
- What do they need to know? And what DON’T they? How much about your subject do they already know? Are they novices, experts, or a blend of both? Does it make more sense to break your topic into separate presentations on separate days, rather than giving it all at once? Is it focused and narrow enough to make an impact? Can you leave anything that is irrelevant out?
- What will keep them engaged? Consider your content and your big takeaways. Consider the personalities and knowledge base of the audience? What can you do to keep them engaged? Now…remember that “engaged” doesn’t mean “entertained” (though it can). If you’re a scientist presenting on bacterial infections in the liver, entertainment is obviously not appropriate. But…if you don’t engage them, they may not appreciate your research, no matter how valuable it is. What will they want to see, hear, and know and how can you display that to them in a way that will keep them interested?
Once you have clear idea about your audience’s needs and desires, you can begin to develop slides (along with the content of your script) that will give them exactly what they’re looking for rather than wasting their time (and yours).
Step 2: Define the Story

Think of your presentation as a story and you, the presenter, as an author in real time. As you deliver a presentation, you are creating the tone, setting, and plot for what happens. Your execution of the presentation will, if done right, create a climax/conflict and an important resolution. Consider how your slide development functions like the five components of a story, then write down how you plan to control (define) that story:
- The Setting. You create a mood and presence by the way you enter the room, interact with the audience, and display your title. While you may not have full control over who comes and what the room looks like, you do have relative control over the tone and ambiance and how they will react to your message. Consider the title of your presentation. Does it capture your message while also creating a buzz about your topic? Can you add a photo on the title slide that will intrigue your audience? What colors will you use? How do you plan to interact with the slides and how will you keep the audience involved?
- The Characters. You may not know all the people in the room, but you should know as much about them as possible (start with Step 1). Still, you have a way to shape their interest and engagement in this topic. Characters in this story are stakeholders. Your ultimate goal for giving should be one of three things: help them think about something in a new, meaningful way; learn something valuable they didn’t know before; and/or act as a result of what they learned. If you can’t get them to one of those three points, you’ve never really developed the characters.
- The Plot . A plot in storytelling is a series of events that build towards a conclusion. A plot needs to have direction, with clear and meaningful series of events. As you develop your script, you should be thinking about your rhetorical progression of ideas—your building towards a final outcome or conclusion. The development of slides can help you with this and they can help your audience stay on track. The key is, you need to make sure your audience is following the plot. If the plot starts to feel loose, disconnected, fragmented, or…all over the place, you’ll lose them faster than a 0-star rated movie.
- The Conflict. There must be some reason why everyone is there to see you presentation. It’s possible they don’t fully understand it themselves, but you, as the presenter, must make their purpose evidently clear. You must make them care. The more and more you pull them into your subject matter, the more you have effectively built a climax, which is the key to any successful story.
- The Resolution . The resolution is the takeaway—it’s what resolves the conflict. If you’ve built a strong climax, you now need to make sure your audience leaves with something valuable. If they leave thinking in a new, meaningful way; if they have learned something valuable that they can apply today; or if they are ready and knowledgeable about how to act, then the resolution is there and you, the author, have done your job.
Step 3: Brand Your Message

Jeff Bezos is famous for having said, “Brand is what others say about you when you’re not in the room.” You might think similarly about your presentation. How will your audience feel about your presentation afterwards, when you’re not around?
That can be an intimidating question to ask. And, it may seem a little odd to think about your message as a “brand.” But…applying brand theory to messaging makes a lot of sense. You want people to get on board with what you have to say. To do that, you have to establish what they value, what motivates them, and what you’ll have to do meet or exceed their expectations.
Brand experts use a lot of terms to describe and define brands. Let’s address a few, and apply them to slide design:
- Differentiation. How yours is different from the rest. What can you do to make your message stand out from a world of clutter and information? What makes yours unique? Is it your approach, the stories you tell, your language, your humor, your ideas, something else?
- Authenticity . How much you genuinely care. Audiences can tell if you’re passionate or not. They know if you care about both your topic and them learning it. If you fake it, the message gets diluted. Use your slides to help showcase how much you care.
- History . What people already know about you, your topic, or your experience. Do you need to establish credibility, or do you already have it? Do you have experience you can lean into? Does your audience already like/agree with this topic? Is it totally new and unfamiliar to them? How can you bring the history of your topic and yourself into the presentation? Will you audience need a primer on the history or does it matter?
- Simplicity. Making the most important things stick. Good brands almost always have simple logos, simple taglines, and simple brand positioning statements. Many also focus on limited products—they focus on what they do well. Your message can work the same way. Can you simplify your entire message into 2 – 5 key points? Can you reduce the amount of information that has to be taken in all at once? Can you help organize and chunk information to be clearer and simpler to follow? People generally have a hard time remembering complex information all at once—determine what the real purpose of your presentation is and what your audience can reasonably get out of it, then simplify to make sure that happens.
- Visual Identity . Your message, like a brand, can be enhanced if people resonate with the overall look and feel. Just like with buying a brand of shoes, people will be drawn to the design of your information. If it looks static, cliche, poorly design, or just plain ugly, you’ve created an undesirable visual identity and people will have a harder time buying into it. But if you can take your message and harmonize with strong design and imagery, people will be more likely to be attracted by, latch onto, and “buy in” to what you have to say. What should your visual identity look like, considering your topic?
Step 4: Select Your Fonts

The choice of your font may seem a small thing, but it can make the difference between a sleek, professional presentation and one that is static, boring, or, worse, painfully obnoxious.
If you’re not a professional designer, being font savvy may not come natural. Fortunately, there just a few rules you can follow to help you make your choices:
- Avoid the Defaults . In PowerPoint (as in MS Word), the default font is Calibri. Before 2010, the default was Times New Roman. Other programs use Arial or Myriad Pro as the default. What’s wrong with defaults? The fonts themselves are actually fine fonts—that’s why Microsoft went with them. BUT…because they’re the defaults, they are so widely used that they’ve become dull. If you just leave the defaults, your audience will subconsciously feel that you didn’t design your PowerPoint (because you probably didn’t). Just changing the font can bolster your PowerPoint’s professionalism quickly.
- Stick to Simple, Modern Fonts. Okay, so you don’t want to use the defaults, but what DO you use? Something simple. Don’t go crazy. Find something that is similar to the default, with just a little variation. Find something that is super easy to read and looks clean, simple, and sleek. Nothing distracting. Remember: you want people to focus on your story and message, not the lettering. Look at the graphic above for a list of some good, simple, modern fonts. Avoid, at all costs, the notoriously ugly or cliched fonts: Comic Sans; Chiller; Papyrus; Algerian; Curlz MT; and so forth.
- Make Sure Your Fonts Are on the Computer(s) You’re Presenting On. Remember: fonts are installed on individual computers, not attached to a program. A misunderstanding that many people have is that a font comes with PowerPoint (or any other program you’re working on). That’s NOT accurate. Fonts are installed on your computer. So…if you use a cool font that was on your desktop PC, but you are presenting your slides on a MacBook laptop, you’ll want to check that both computers have the font you’re using. Some fonts are pretty standard and you’ll find them on pretty much all computers: Palatino Linotype, Century Gothic, Segoe UI, Garamond. Others, however, are proprietary and may not be on other computers: Acumin Pro, Raleway, Helvetica. If you know you’ll be presenting on multiple different computers, find a standard font. One I’ve always liked to use is Century Gothic.
- Consider Using Two Fonts . The “two-font rule” suggests that designs will be more attractive if they use two fonts—one for headings and titles, the other for body text. You can get away with just one font if you make your headings stand out in some way—by size, weight, or color—but it’s often a nice aesthetic to use two. Just be sure that the two fonts are obviously different from each other (don’t use both Arial AND Century Gothic—they’re too similar, which will look like an accident) and that they harmonize well together. It’s often good to use a serif font (the type with little “feet” like in Palatino Linotype) paired with a sans serif font (the kind without “feet,” like Century Gothic).
Step 5: Narrow Your Colors

A hallmark of any good design is a simple, consistent color scheme. Keep your slide designs to fewer than four colors. Often, it’s good to use black, white, gray, and then one or two accent colors. Years ago, when I was new to design, I had someone tell me that a brochure I created looked like a clown exploded on the page. You DON’T want your slides to look like a clown exploded! To avoid that, find your color scheme in advance and stick to it.
Color can be tricky. If you work for a company that already has a pre-established style guide and color scheme, definitely use it! Not only is that important for your company’s brand, it makes your life a whole lot easier. If you do have to choose colors yourself, though, consider going to this website first: color.adobe.com . You can type things into the “explore” bar and you’ll be led to color schemes that look nice.
What you want to look for are colors that are a bit muted and won’t overwhelm the eyes of your viewers. Remember that you want to keep a high contrast so it doesn’t strain your audience members’ eyes. So…stick to black or really dark gray for text. Keep a white or very light background. Use the accent color for headings or important pieces of content. And…just make sure the colors match your topic or industry.
Step 6: Divide into Sections

Good presentations are well organized. Your slides should visually reflect your organization by using different slide “types” for different parts of your presentation or content.
All presentations should have at least three slide types: a title slide, a body slide, and a closing slide. Most presentations will have a fourth: a section slide. Section slides are used to transition your presentation from one major topic to the next. Many presentations can also benefit from callout slides, which are used to designate unique types of content that show up periodically—like for direct quotes or polling questions to audience members.
If you’ve ever taken a college course on public speaking, you probably remember your professor telling you to use “signposts.” A signpost is a metaphor for visual or oral cues that let your reader know where they’re at in the journey. Signposts keep your audience oriented. Sectioning your slides provides a visual signifier to your audience that you are shifting gears—plus, it just makes your slides feel cohesive, professional, and organized.
Take the time to design your slide types first. Then, fill in the content from your presentation script.
A quick note about body slides, though. These are going to be the most frequently used slides, the ones that you put the majority of your content on. Note that body slides don’t all have to look identical. They need to be consistent in design—repeating the same fonts, colors, photography style, highlights, etc.—but the layouts can change. Providing some visual variation is good for your audience.
Step 7: Visualize Every Slide

One of the biggest errors inexperienced presenters make is believing that audience members need to be able to read a lot of text to understand the message.
The reality is, when you put a lot of text on the screen—even if it’s in a bulleted list—you end up creating more difficulty for your audience. They’ll try to read while also trying to listen to you, creating a conflict of noise that will eventually cause them to only catch about half of what you wanted them to. Plus, a lot of text is boring and not efficient for the human brain.
Research has actually shown (and there is significant evidence to prove this) that making information visual is good for humans for four reasons: engagement, cognition, trust, and recall.
- Visual information is more engaging . Most all people will tell you that they are “visual learners.” The reality is that pretty much all humans are. We pay attention to visual information because our brains are designed to process visual information faster. When you provide visuals—photographs, charts, diagrams, icons, etc.—people will pay far more attention than if you just have text. In fact, if you just have text on a screen, people will likely zone out.
- Visual information is easier to understand. If designed well and related to the topic, people will understand visual information faster than they will from reading. Even as you read this article (assuming you’re still here!), the information that is really going to help you are the visual examples and explanations I’ve added for each section. That’s the stuff where you’ll say, “aha! now I know what Curtis is telling me to do.” All this text—it’s just ancillary stuff to provide more detail. But the photos/graphics are what you’ll really learn from.
- Visualized information builds trust. For better or for worse, humans are wired to trust information more when it has been visualized, especially when it looks professional. If you take a table of data and turn it into a data visualization that is professionally design, people will tend to trust it more. Something about taking the time to visualize information makes people assume you know what you’re talking about. Now, that said, you have to make sure your data visualizations are accurate. The real pitfall here is that people will tend to trust it more, even if it’s misleading. If they discover any flaws, your entire argument (and credibility) will go out the window.
- Visual information is easier to remember . Research studies have shown that visual information will be retained more than six times better if visuals are attached to it. If you actually want people to remember your presentation you must do two things: tell stories and use pictures. If you simply regurgitate information and make it very text-heavy, your audience will forget almost everything you said within three days. If you add pictures, though, they’ll have mental images to trigger memory, helping them retain your message much longer.
Find ways to visualize every chance you can, making sure that your visuals emphasize, clarify, or enhance the content you are talking about. Look at the examples above. Find ways to reduce text and enlarge graphics; turn bullets into images or icons; and use simple, easy to understand graphics that draw attention to the most important point.
Step 8: Play with Photos and Layouts

This is the one that takes the most practice, but it can be the most fun and rewarding. Recognize that your body slides can take multiple forms and that there are endless ways to organize, crop, and adjust visualizations, photos, headings, and designs. As long as you keep your color scheme, fonts, and highlighting techniques consistent, the slides will still feel uniform and professional, while giving variety to your slides.
Some things to think about as you play with the design of your slides:
- CONTRAST: Make sure you use high contrast in colors, especially for areas where you have text (black text on white backgrounds almost always work best). In addition, make sure that things that are different actually look significantly different. If two fonts are different sizes, make them obviously different sizes. If you’re using two colors, make them completely different colors. When two things look similar, there isn’t much contrast, which looks accidental and/or visually dull.
- REPETITION: Repetition is all about consistency in design. Repeat design elements throughout: fonts, colors, highlights, logos, shapes, styles, etc. Repeat the same visual feel for photos. Use the same types of icons and graphics. The more unified the design, the strong the appeal and the more professional you look.
- ALIGNMENT: Make sure everything on your slide is aligned with something else. Nothing should be “floating,” or placed arbitrarily. Align photos to titles, words to other words, rules/lines to other elements. Keep it all tightly aligned and crisp.
- PROXIMITY: Put things that are related close together and things that aren’t apart from each other. The brain will automatically assume that, if two things are next to each other (like a photo and a caption) that they are connected. Avoid confusing your audience by separating things that are different and connecting things that go together.
- Move Photos to the Bleeds . The term “bleed” is a graphic design principle that describes moving photos to the edge of page (where the ink “bleeds” off) in order to reduce visual noise. An old design principles developed by Josef Albers, 1+1=3, suggests that when you insert two objects, you automatically create a third—the space between. When you insert a photo, you end up creating a margin of white space around the edges. If that white space isn’t necessary, just make the image larger and push clear to the edge of the screen. This will remove the margin and the noise. Plus, it just makes slides look simpler and more professional and it really draws the eyes to the photo.
Step 9: Orient Your Audience

In addition to creating section slides (see Step 6 above), you can help your audience—and yourself—stay organized by giving visual cues and textual information in footers, slide counts, and headers or sidebars.
These orienting features of a slide deck can be especially valuable if you’re giving a long presentation, workshop, or training.
Start by creating a footer. These aren’t required and you don’t need them on every slide, but in most costs, presentations will benefit from some information in the footer. Some of the most common things to include in a footer:
- Company logo
- Company name
- Name of presenter
- Name of event or conference
- Title of presentation
- Copyright information
Beyond the footer, you can also include a slide count (in example above, look at the bottom right of the slide). While some argue that this can be distracting, most would say that a slide count will help audience members know how much more to expect, putting their “I’m being held hostage by this presenter!” fears away.
If your presentation is particularly long (like, say, 45 minutes or more) or you’re giving a workshop, you can really help your audience by giving them a sort of contents or guide, so that they know where they’re at in relation to everything else. You might, for example, create a small sidebar on the left that includes the section they’re in with the subsection. Or, as in the example at the top (see top left of example), you might just include which section you’re on and a summary title of that section.
There is no one or perfect way to orient your audience members. Just make sure it’s on the forefront of your mind as you work to build empathy into your slide design. The presentation is for them, after all, not you. Give them as much as you can to help them appreciate the message you’re delivering.
- ← Is a Doctor of Nursing Practice Degree Worth it?
- 6 Things You Should Do to Preserve Your Wealth →
Shop for your perfect poster print or digital download at our online store!
IMAGES
VIDEO
COMMENTS
7. Add fun with visual quizzes and polls. To break the monotony and see if your audience is still with you, throw in some quick quizzes or polls. It’s like a mini-game break in your presentation — your audience gets involved and it makes your presentation way more dynamic and memorable. 8.
The best way to make sure the attention stays on you is to limit word count to no more than 10 words per slide. As presentation expert Nancy Duarte says “any slide with more than 10 words is a document.”. If you really do need a longer explanation of something, handouts or follow-up emails are the way to go.
There are many types of visual presentations, but we will focus on seven of the most common ones here. Each type has its own strengths and weaknesses, so it’s important to understand when each would be appropriate to use. 1. Slides. Slides are the most common type of visual aid. You can use slides to demonstrate your point and make it easier ...
These tips can be useful because they can be applied to all your presentations in general. Step 1 is to ask yourself who your audience is and how to convey the key message you have in mind to them. Once you settle on your message, you can start designing your slides with that direction in mind. You may wonder how to connect with an audience ...
Create the right mood with typography. Good visual communication extends way beyond images and charts. The fonts you choose also create a visual impact. Just think of all the different typography you see in company logos. A typeface can communicate so much! So choose a font that complements your presentation narrative.
Avoid cluttering the visual with too much information or using complicated graphics. Use colors sparingly and fonts that are easy to read. Create a visual hierarchy that guides the eye. Make it accessible: Ensure visuals are accessible to everyone in your audience, including those with visual impairments. Use alternative text, captions, and ...
Let’s begin! Tip #1: Ensure that your presentation reflects your core message. Tip #2: Always consider the age of your audience in both presentation design and length. Tip #3: Both content and design should be simple and complementary. Tip #4: Don’t be afraid to switch it up! Tip #5: Choose your colors wisely.
Visuals can impact your presentation dramatically.These images, photos, objects, charts, diagrams, tables, graphs or illustrations have the potential to make or break your presentation. Used sloppily, they can damage your credibility and reputation. Designed wisely, they can strengthen your verbal message and enable you to achieve your objective.
o Allow for ample white space between elements (i.e. paragraphs and graphics) THIS not THAT *For more ideas, check out PC World’s list of the 10 worst PowerPoint presentations! Images Mayer’s Image Principle: People don’t necessarily benefit from the speaker’s image being added to a presentation
Visual information is easier to remember. Research studies have shown that visual information will be retained more than six times better if visuals are attached to it. If you actually want people to remember your presentation you must do two things: tell stories and use pictures. If you simply regurgitate information and make it very text ...