

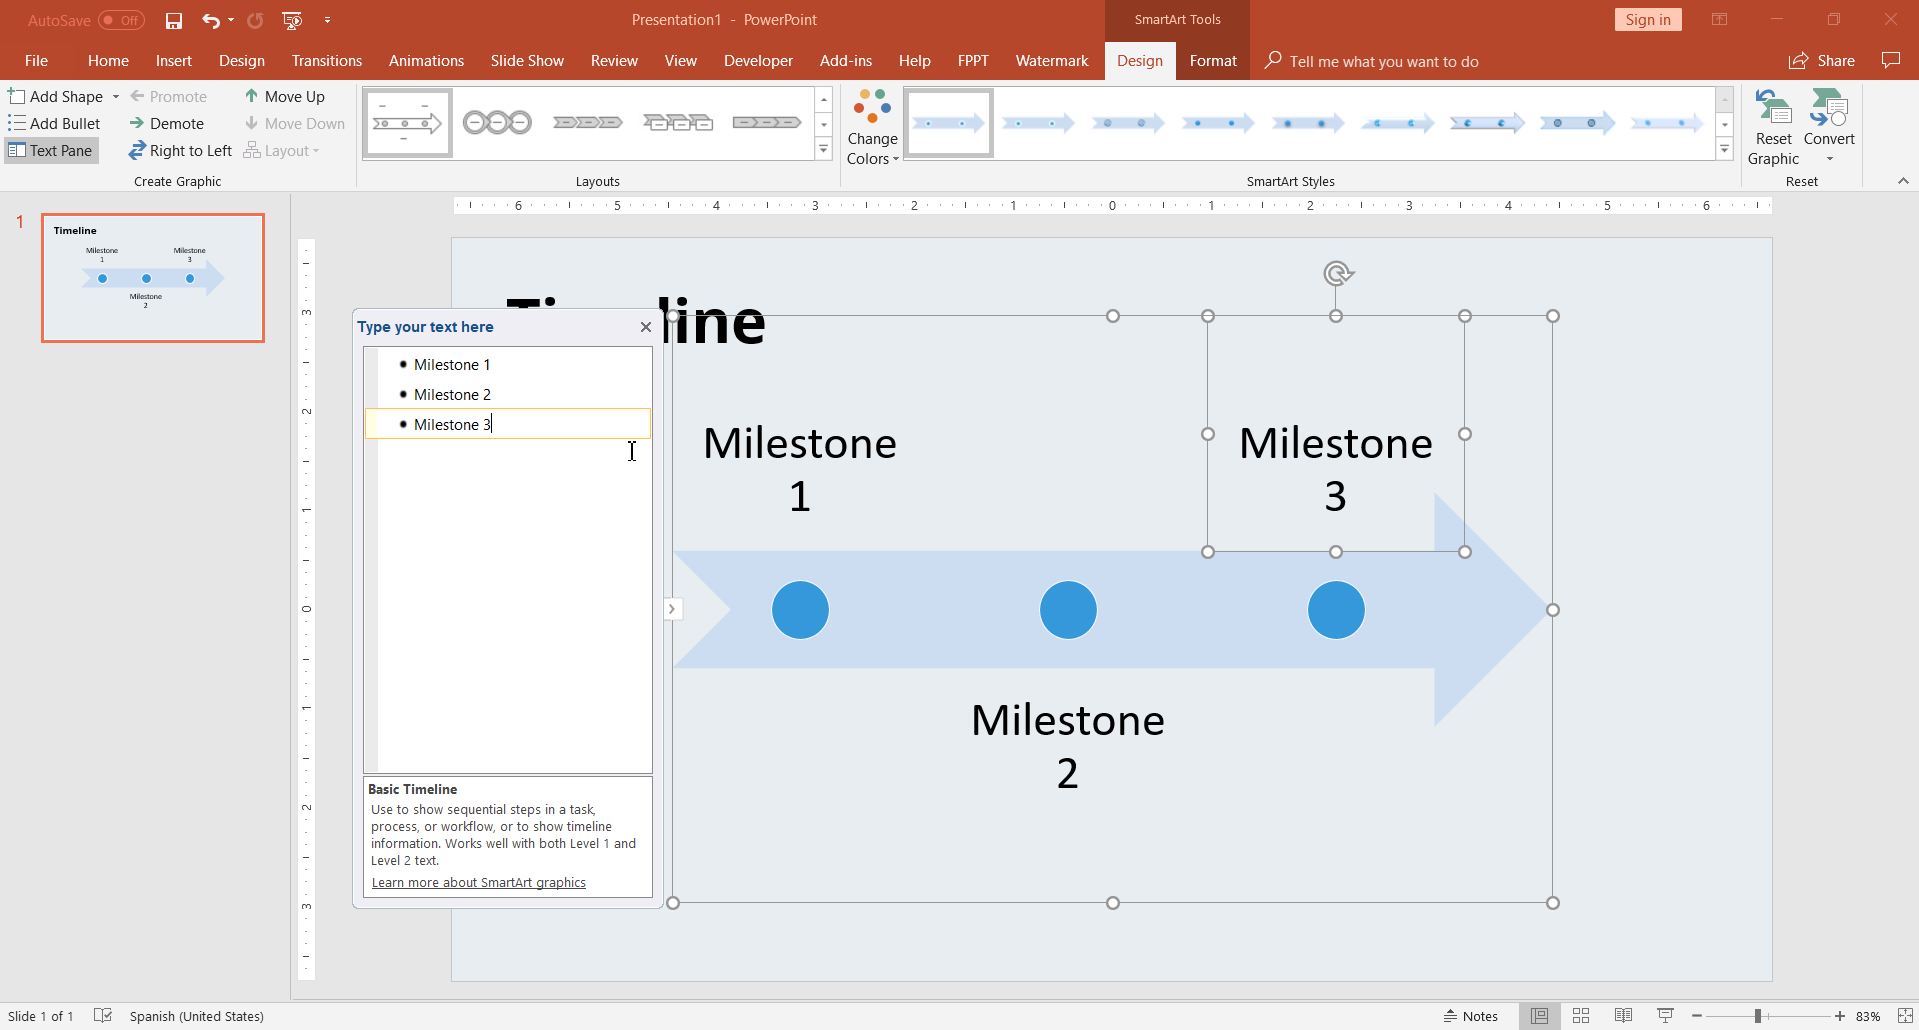
Create a timeline in PowerPoint
Use a SmartArt graphic to create a timeline showing target dates for an assignment or project.

Create a timeline
On the Insert tab, click SmartArt .

In the Choose a SmartArt Graphic gallery, click Process , and then double-click a timeline layout.
Tip: There are two timeline SmartArt graphics: Basic timeline and Circle Accent Timeline , but you can also use almost any process-related SmartArt graphic.

Click [Text] , and then type or paste your text in the SmartArt graphic.
Note: You can also open the Text Pane and type your text there. If you do not see the Text Pane , on the SmartArt Tools Design tab, click Text Pane .
Add more dates to your timeline
Click a shape in the timeline.

On the SmartArt Design tab, do one of the following:
To add an earlier date, click Add Shape , and then click Add Shape Before .
To add a later date, click Add Shape , and then click Add Shape After .

In the new date box, type the date that you want.
Move a date in your timeline
On the timeline, click the date you want to move.

To move a date sooner than the selected date, click Move Up .
To move a date later than the selected date, click Move Down .

Change to a different timeline layout
Click the SmartArt graphic timeline.

Note: To view only the timeline and process-related layouts, at the bottom of the layouts list, click More Layouts , and then click Process .
Pick a timeline or process-related SmartArt graphic, like the following:
To show progression in a timeline, select Accent Process .
To create a timeline with pictures or photos, click Continuous Picture List . The circular shapes are designed to contain pictures.
Change the colors of your timeline
On the SmartArt Design tab, select Change Colors .

Note: If you don't see the SmartArt Tools Design tab, make sure you’ve selected the timeline.
Click the color combination that you want.
Tip: Place your pointer over any combination to see a preview of how the colors look in your timeline.
Apply a SmartArt style
A SmartArt style applies a combination of effects, such as line style, bevel, or 3-D perspective, in one click, to give your timeline a professionally polished look.
Click the timeline.
On the SmartArt Design tab, click the style you want.

Create a timeline in Visio
Import and export timeline data between Visio and Project
Create a timeline in Project
Get Microsoft timeline templates

On the SmartArt Tools Design tab, do one of the following:

To show progression in a timeline, click Accent Process .
On the SmartArt Tools Design tab, click Change Colors .

On the SmartArt Tools Design tab, click the style you want.

Create a timeline
On the Insert tab, click Smart Art .

Pick a timeline layout from the gallery that appears, such as this Basic Timeline in the List section.

On the slide, a text editor opens next to the graphic so you can easily add words to the graphic.
In the text editor, enter the dates and descriptions, and then press Enter.

Optionally, you can make a sub-item in the bulleted list by clicking the bullet with the text you want to use for a sub-item, and on the Smart Art tab, clicking Demote .

Change the color or style of a timeline
You can change the color or style of the timeline graphic. You can also choose a different graphic layout entirely.
Select the timeline.
Select the SmartArt tab of the Ribbon, and then select either Change Colors or Styles to see a menu of available options for the timeline graphic. Click the style or color you want to select it.

You can also try changing the layout by opening the layout gallery to the left of Change Colors . Some of the options in the List and Process sections of the gallery are suitable for timelines.
Resize the timeline
You can change the size of the graphic so it fits better on your slide.
Point at one of the corner sizing handles until you see the two-headed arrow, and then click and drag to resize the timeline.

Create a SmartArt graphic

Need more help?
Want more options.
Explore subscription benefits, browse training courses, learn how to secure your device, and more.

Microsoft 365 subscription benefits

Microsoft 365 training

Microsoft security

Accessibility center
Communities help you ask and answer questions, give feedback, and hear from experts with rich knowledge.

Ask the Microsoft Community

Microsoft Tech Community

Windows Insiders
Microsoft 365 Insiders
Was this information helpful?
Thank you for your feedback.
Home Blog PowerPoint Tutorials The Essential Guide to Making Timelines in PowerPoint and Google Slides
The Essential Guide to Making Timelines in PowerPoint and Google Slides

Timelines are used for a variety of purposes by people across different professions. You might be a project manager looking to create a timeline to understand the outputs and outcomes of your project or a teacher looking to teach your students about all major happenings leading up to a historical event. Timelines are a good way to visualize past, present and future events, to forecast outcomes and to learn from the past.
What is a Timeline?
History of timelines, why timelines are important in presentations, different timeline styles, ingredients of a successful timeline, how to create a timeline in powerpoint, how to create a timeline in google slides, other creative timeline designs (infographics & examples), examples of best timeline templates for presentations, what makes the perfect timeline.
A timeline can be your snapshot into the past and a window into the expected future by analyzing the what, why, where, when and how, leading up to the things that are most important to you. In this guide we shall tell you all that you need to know about timelines and how to create them.
A timeline is essentially a visual representation marking all major events over a period of time. A timeline marks specific milestones, achievements, or expected results tied to a specific topic. What a timeline is used for depends on a number of factors. For example, your timeline can be a graphical representation of past events, a forecast of future results or expected outcomes, or even a mix of past, present and future activities, events and outcomes.
Most timelines use time as a scale. The majority of timelines are linear in scale, while some timelines use a logarithmic scale. Timelines can be created in a number of ways such as with text based labels, numbers, graphs, photos and in the form of animations.
Timelines are most commonly used for educational purposes, in research and project management. However, this is not an exhaustive list. Other than use for business and academic purposes, timelines have been applied to learn about the spread of pandemics, chronology of the universe, and to understand scientific processes.
Timelines have been used for centuries to chronicle events. Timelines have been an effective tool in recording history and learning from the past to determine the effect of past events on the present and the future. Man has chronicled events and written memoirs to record history since time immemorial. These were perhaps methods similar to create a timeline of important aspects of history. However, not all such records contained specific dates. Moreover, recording history was not necessarily done in the form of short timeline visualizations as we often see in the form of modern timelines.
Perhaps the earliest examples of timelines are historical records that were maintained by scribes and historians on the instructions of kings. In fact, scribes performed many tasks that modern timelines serve including; recording the amount of crops harvested, forecasting demand and supply, as well as keeping accounts for ordering supplies. This is somewhat similar to what most project managers do. They plan, anticipate and ensure the implementation of project goals and outcomes in line with set timelines. For this purpose, they use historical and present data, as well as forecasting models. They align their teams in line with the set timeline and offer course correction, as needed. For this purpose, a visually appealing historical timeline template can be a time-saver for educators and historians who need to prepare their presentations.
Modern timelines that we see today can be assumed to have origins as old as recorded history. In fact, this recorded era which roughly spans to 3500 BC has some form of timeline related aspect, as one can trace back events chronologically across multiple civilizations; be it Mesopotamia & Sumerians, or the Roman, Greek, Arab, Chinese, South Asian and other civilizations.

Timelines serve as an essential way of simplifying content within presentations and making it easier to grasp for an audience. Instead of explaining about a concept, project or expected outcome by going back and forth; it can be much easier to simply use a timeline to show the entire layout in chronological order. This ties all aspects of the topic with a thread like symbolism which makes it easier to explain, plan, brainstorm and visualize ideas.
Business presentations, for instance, often require explaining lengthy and cumbersome concepts and ideas in a small time span. Whether you’re pitching your idea before a potential investor, need to explain the forecasts for a project, wish to reveal details about current progress or need to elaborate upon past events; a timeline can make your job so much easier. They can essentially help answer the why, what, when, how and where in the form of a simple visualization.

There are a number of timelines styles that can be applied when making a timeline. The way you construct a timeline is actually quite subjective. It can be hard to put all timeline styles in a box considering the various tools that have now made it possible to construct timelines in so many different ways. Below is a breakdown of some of the timeline styles that you can apply when making timelines.
Horizontal Timelines
A horizontal timeline can be useful for showing progress. Such a timeline can be good for representing events chronologically. Horizontal timelines are one of the most common type of timelines and are great for project management, depicting historical events and forecasting.

Vertical Timelines
A vertical timeline template can be useful for constructing graphs and representing research data. Such a timeline can also be created using an axis to discuss variables affecting an outcome. Needless to say, vertical timelines can also be used for project management, forecasting and representing events chronologically.
Non-Linear Timelines
These can come in radial, spiral or arbitrary forms. These are often represented in the form of chains and interconnected shapes (e.g. arrows) or snake like lines. These timelines might not have a set horizontal or vertical sequence, as they represent interconnected pieces. Such timelines can be useful for depicting processes and discussing multiple variables and for longer event sequences.
Animated or Interactive Timelines: Such a timeline can be made in a number of ways. You can bring together aspects of horizontal, vertical, and non-linear timelines. This is because the ability to create a timeline by bringing together different variables affecting it can result in endless possibilities. Zooming UIs like the one used in Prezis and HTML5 based web apps, and powerful platforms like Microsoft SandDance running with Power BI can help you affect the timeline by selecting multiple variables. Such timelines can remain in flux as you apply data to visualize your content.
The new Morph transition and 3D features in recent versions of PowerPoint open a range of new possibilities to develop animated and really impressive timelines in PowerPoint.

From Tables to Graphical Timelines in PowerPoint
The tabular data were user for years. You can present your data using tables by labeling different bits of the information by date. Tables can be however more complicated and lengthy. From an audience viewpoint, tables could not help to visualize the timeline milestones easily vs. a visually appealing timeline design. If you intend to present your information before an audience, a graphical timeline can be usually easier to present than a table.

Your timeline needs to be fashioned in a manner that makes it easy enough for your audience to understand the various interconnected sections. Here are a few tips for making a timeline that can help you get your message across to an audience.
- Avoid Messy Timelines: Your timeline should be easy to understand and the various parts of your timeline should not be so intertwined that it becomes impossible to make head or tail out of it.
- Ensure Accuracy: There is no use making a visually appealing timeline if your data is wrong. Make sure that the information given in your timeline is accurate and not misrepresented. Even a single mistake in a timeline can disrupt the entire sequence.
- Account for Scalability: You must account for scalability in your timeline. Be it the design of the timeline or the process or forecast shown within it; you must ensure that the timeline can be edited to accommodate changes. This is because there might be a number of ideas, issues or instructions that might be discussed during your presentation or meeting, which might significantly alter the timeline once its presented.
- Goals & Outcomes: Most timelines come with goals and outcomes. If your timeline requires these, make sure that the goals and outcomes are defined properly. You will require emphasizing upon key milestones, and accounting for their expected outputs and outcomes.
- Descriptive Text & Labels: It is always important to ensure your timelines are properly labeled. If necessary, also add descriptive text, especially for milestones, goals and outcomes. This will help you neatly conclude your timeline.
Now that we learned the basics of a timeline, you may be wondering: how to make a timeline? There are a number of ways you can create timeline for your presentations or documents. One of the most common ways of making a timeline slide is in PowerPoint or Google Slides. Other online tools and specific timeline web apps can also be used. Let’s take a look at how you can quickly create professional looking timelines.
Creating a Timeline in Microsoft PowerPoint
How to make a timeline in PowerPoint? Below are 3 easy steps for making a timeline in PowerPoint using SmartArt Graphics. This is probably the easiest method for making a timeline in PowerPoint.
3 Easy Steps for Making a Timeline in PowerPoint using SmartArt
Step 1. Insert a SmartArt Graphic: Go to Insert -> SmartArt and pick a SmartArt Graphic. For making timelines, you might want to use Process based graphics. These can be easier to use for depicting a timeline like sequence. Some of the graphics in this section are specifically meant for timelines, such as the Basic Timeline graphic which depicts an arrow.
However, you can pick and choose a graphic according to need. For example, some of the graphics might not give you enough margin to add a lot of text or doing so might make the graphic confusing. Hence, pick a SmartArt Graphic that you think will be best to accommodate your content, like the Basic Timeline option. This way, you can add a timeline to your PowerPoint slide.
Step 2. Add text to your SmartArt: In the next step, add text to label your timeline and if necessary, to add a description describing each step of the timeline. For some timelines, a simple label might be enough, as you might need to keep the graphical elements minimum to describe each step during your presentation verbally.
Step 3. Design your timeline: You can design your timeline by using SmartArt Tools, and picking the various color schemes given within PowerPoint or changing the shape colors. You can always switch the SmartArt Graphic using SmartArt Tools and try your hands at different graphic types to make interesting timelines. In the following example we have adjusted the fill options to a custom gradient color.

3 Easy Steps for Making a Timeline in PowerPoint using Shapes
Another easy method for making timelines in PowerPoint is by using the built-in PowerPoint shapes. You can use various shapes for designing your timeline, however, a very common shape is the Arrow shape.
- Step 1. Insert shapes: In the first step, insert a shape via Insert -> Shapes. For the purpose of this tutorial, we will use the Right Arrow shape. This is because an arrow can be quite useful for pointing towards a specific direction on the slide; making it ideal for linear timelines. You can insert multiple shapes to construct your timeline, such as a few arrows pointing towards the right.
- Step 2. Add text-boxes: You can insert text-boxes to explain each step of the shape. These text-boxes can be added both within shapes and next to them. The former can help label the shapes with dates and other relevant information, whereas, the latter can be handy for adding a description for what each shape implies.
- Step 3. Design your shapes: You can recolor, resize and reorder the shapes according to your specific timeline requirements in order to make it stand out and to highlight different parts of it by color coding it.

This method can be used either to create a basic timeline or an advanced timeline.
Google Slides has had an impressive growth in recent years and positioned itself as one of the preferred tools when creating business slide decks and presentations for education. As in PowerPoint, Google Slides offers a wide range of tools to create timeline slides are one of the diagrams that can be created in Google Slides presentations.
How to build a timeline in Google Slides? You can create timeline templates in Google Slides by either using shapes, by using the same procedure as PowerPoint (by inserting shapes via Insert -> Shapes in Google Slides), or opt for a much easier method that can help you cut down the time needed for making timelines in Google Slides.
- Step 1. Insert a timeline diagram: You can insert timeline diagrams in Google Slides via Insert -> Diagrams. There are a number of diagram types listed in this section, make sure you pick Timeline diagrams from the right pane.
- Step 2. Pick a timeline diagram template: You can choose from the various timeline diagrams given in this section. Pick the one that you think might be best suited for your timeline requirements.
- Step 3. Customize timeline diagram: Once you have picked a timeline diagram, you can customize it. You can right-click on the diagram to add animations or choose Format Options to edit the various parameters of the diagram.
The Format Options menu takes you to a pane where you can edit the size, position, shadow and reflection of the diagram, as well as to rotate it.
An infographic is a visual image used to represent information or data. A well-designed infographic can help to simplify a complicated data structure or message into a captivating experience. Used correctly, timeline infographics can be one of the most effective strategies in digital marketing to convey a message to an audience. Infographic timelines can also be used in social media or other mediums. An effective infographic should be visually engaging and be prepared to target a specific audience.
As many other visual elements used in infographics, timelines are part of infographic design. They can help to portray history, achievements or describe how a business have evolved over the years. There are many creative timeline infographic designs and layouts. Here is just an example of a simple but creative infographic design:

This great timeline created by Anna Vital (Adioma Founder and Information Designer) is a clear example of timeline design that helps to describe how Yahoo started. It’s simple, clear and descriptive.
A timeline template for PowerPoint or Google Slides can help to save a lot of valuable hours. Here is a list of some of the timeline templates for PowerPoint and Google Slides that you can find in our catalog. All timelines are 100% editable and ready to be used in your presentations.
1. Circular Timeline Infographic Template for PowerPoint

The Circular Timeline Infographic Template for PowerPoint is an interactive way to create a circular timeline infographic design. It seeks to represent different important milestones through a circular design, accompanied by graphic assets and icons that will allow you to communicate in a better way to your audience.
Use This Template
2. Segmented Plan Timeline Template Design for PowerPoint

The Segmented Plan Timeline Template Design for PowerPoint is a presentation template widely used for planning and launching a new product to the market. Thanks to its graphic resources, it is straightforward to understand. In this slide, you will be able to show each of the plans of expectation, launch, and maintenance of the product, and at the same time, you can communicate to your audience how long will be the duration of each stage.
3. Curved Year Timeline PowerPoint Template

The Curved Year Timeline PowerPoint Template is a one-pager that helps toward planning and setting goals for the following years simply and concisely. This curved year timeline design helps managers, executives and project planners to communicate where you are today and where you want to be in 5 years.
4. Mountain Timeline Concept Template for PowerPoint

The Mountain Timeline Concept Template for PowerPoint is a presentation that seeks to represent the path of growth in a company or project. It includes 6 slides that will allow you to explain and add information in each of the stages in this roadmap. This PowerPoint timleine template is widely used to communicate the desired roadmap for the next 4 or 5 years.
5. One Pager Vertical Timeline Slide Template

The One Pager Vertical Timeline Slide Template is a clear and concise way to represent a Timeline. Thanks to its minimalist design, it is possible to add relevant information for each of the following stages. This presentation is useful for the education field since it allows to represent events and their respective descriptions to generate a better understanding.
6. Multi-Stage Timeline PowerPoint Template

The Multi-Stage Timeline PowerPoint Template is another One Pager that seeks to represent a timeline accompanied by different Stages. Thanks to its attractive design and its two versions, white and blue, you will be able to present a project roadmap accompanied by different relevant stages and explanatory comments.
7. Free Timeline Template for PowerPoint

8. Swimlane Timeline Templates

9. Table Timeline Template for PowerPoint

10. Curved Roadmap with Poles Milestones PowerPoint Timeline

11. 30 60 90 Days Plan Timeline Template

12. 4-Column Overlapped Sections Roadmap PowerPoint Timeline

There are a number of methods for generating timelines using PowerPoint, Google Slides, Web applications and a range of other tools. However, you should opt for the method that seems most suitable. For example, you might like a web application that can make a good timeline, however, if the venue at which you are to present the timeline has no stable internet connection, you might run into trouble. Similarly, you might want to animate your shapes in a PowerPoint timeline, however, it must be duly noted that this might make your slides heavy and if you are using legacy hardware, your presentation might lag. It is always a good idea to play your timeline before the presentation day and make sure everything is in place.
There are a number of flexible presentation templates that can make your life easier. These can be freely used with multiple platforms such as PowerPoint and Google Slides, providing you with both online and offline functionality to offer you more flexibility as a presenter. You can check out some of these templates from the list given below.

Like this article? Please share
Chronological, Deadline, Evolution, Future, History, Infographic, Life, Project Planning, Schedule, Timeline, Timescale, Timetable Filed under PowerPoint Tutorials
Related Articles

Filed under Business • April 24th, 2024
How to Create and Present a Project Timeline
Building a project timeline is an essential aspect of project management. Stay tuned to our detailed guide with examples and templates.

Filed under PowerPoint Tutorials • November 8th, 2023
How To Present an Action Plan
An Action Plan is a sequence of steps that must be performed for a strategy to succeed. Learn how to present your Action plan to an Executive Audience.

Filed under Business • September 15th, 2023
How to Conduct a SWOT Analysis (Examples + Templates)
Bring value to your business and to potential customers by learning how to conduct a SWOT analysis. Detailed guide with examples + suggested templates.
Leave a Reply
How-To Geek
How to create a timeline in microsoft powerpoint.
If you want to visually display a sequence of events in your PowerPoint presentation, add a timeline. Here's how.
One of PowerPoint’s charms is the ability to visually represent information by using its large library of available graphics, such as charts and graphs. If you want to create a timeline, well, Microsoft has just the thing. Here’s how it’s done.
Open your PowerPoint presentation and navigate to the slide in which you would like to add a timeline. Once there, navigate to the “Insert” tab and select “SmartArt” from the “Illustrations” group.
The “Choose a SmartArt Graphic” window will appear. Here, select “Process” from the left-hand pane.
A library of several different process-focused SmartArt graphics will appear. You can choose the style you like best for your timeline. In this example, we’ll use the “Basic Timeline” option.
Once selected, information about the SmartArt option will be displayed in the right-hand pane. When you’re ready to insert the SmartArt, select the “OK" button.
Related: How to Create Star Wars Scrolling Text in PowerPoint
The timeline will now appear on the slide, along with a window where you will type the respective text for the timeline.
The text entered in the box will automatically reflect on the actual timeline.
By default, this timeline will have three bullets for you to fill out. To add more, place your cursor at the end of the last item on the list in the text window, press “Enter,” and then type the desired text. Repeat this step as many times as necessary.
The size of the text and the placement of the bullets on the timeline will adjust automatically.
When you’re finished adding text, select the “X” button at the top right of the text window.
If you need to adjust the colors of the timeline to better align with the presentation, select the timeline and then click “Change Colors” in the “SmartArt Styles” group of the “SmartArt Design” tab.
A menu will appear, displaying a large library of different color schemes for the timeline. In this example, we’ll use “Gradient Loop” from the “Accent 6” group.
Once selected, the change will take place on your timeline.
And, of course, you can adjust the bullets and the text in the timeline by clicking and dragging each item.
Finally, if you ever need to add or remove a bullet from (or edit text in) the timeline, you can bring back the text edit window by selecting the timeline and then clicking the "Left Arrow" icon found on the left side of the graphic box.
Related: How to Build a PowerPoint Organizational Chart With Excel Data
- PRO Courses Guides New Tech Help Pro Expert Videos About wikiHow Pro Upgrade Sign In
- EDIT Edit this Article
- EXPLORE Tech Help Pro About Us Random Article Quizzes Request a New Article Community Dashboard This Or That Game Popular Categories Arts and Entertainment Artwork Books Movies Computers and Electronics Computers Phone Skills Technology Hacks Health Men's Health Mental Health Women's Health Relationships Dating Love Relationship Issues Hobbies and Crafts Crafts Drawing Games Education & Communication Communication Skills Personal Development Studying Personal Care and Style Fashion Hair Care Personal Hygiene Youth Personal Care School Stuff Dating All Categories Arts and Entertainment Finance and Business Home and Garden Relationship Quizzes Cars & Other Vehicles Food and Entertaining Personal Care and Style Sports and Fitness Computers and Electronics Health Pets and Animals Travel Education & Communication Hobbies and Crafts Philosophy and Religion Work World Family Life Holidays and Traditions Relationships Youth
- Browse Articles
- Learn Something New
- Quizzes Hot
- This Or That Game
- Train Your Brain
- Explore More
- Support wikiHow
- About wikiHow
- Log in / Sign up
- Computers and Electronics
- Microsoft Office
10 Easy Steps to Make a Timeline in Microsoft PowerPoint
Last Updated: May 22, 2023 Fact Checked
This article was co-authored by wikiHow staff writer, Rain Kengly . Rain Kengly is a wikiHow Technology Writer. As a storytelling enthusiast with a penchant for technology, they hope to create long-lasting connections with readers from all around the globe. Rain graduated from San Francisco State University with a BA in Cinema. This article has been fact-checked, ensuring the accuracy of any cited facts and confirming the authority of its sources. This article has been viewed 6,073 times. Learn more...
Do you want to create a timeline to showcase your data in Microsoft PowerPoint? Luckily, PowerPoint has plenty of timeline templates you can choose from with the "SmartArt" tool. You'll just need to pick a style, insert your data, and customize your timeline. This wikiHow will show you how to insert a free timeline in Microsoft PowerPoint using the SmartArt tool on your Windows or Mac computer.
Things You Should Know
- Go to "Insert" → "SmartArt" → "Process" → select a timeline layout → "OK". Click [Text] to add your data.
- To add more data slots, click your timeline, then click "Add Shape".
- To change the color, click your timeline, then click "Change Colors".

- Horizontal timelines work best with up to 8 points with short descriptions.
- Vertical timelines work best for timelines with fewer points and more text.
- Free-flowing timelines are appropriate if you have lots of points and a horizontal timeline won’t give you the space you need.

- Adding a colorful timeline can help you make a great presentation .
- You must have a subscription to Microsoft 365 to use the desktop version of PowerPoint.
- If you don't have the PowerPoint app on your computer, you can use PowerPoint on the web to create your timeline. [2] X Trustworthy Source Microsoft Support Technical support and product information from Microsoft. Go to source

- A new window will open.
- On Mac, a drop-down menu will open.

- On Mac, this will be underneath List in the drop-down menu.

- You'll be able to customize the color and size later.
- The timeline will be added to your slide. Make sure it's selected before proceeding to the next step.

- Click the [Text] field to enter a date or milestone for your timeline.
- Repeat this for all data.

- Click the newly added bullet points in the Text Pane to input your additional data.

- Select from the default palettes to change the theme.
- Click the drop-down menu for Color and select a color.

- To move the entire timeline, click and hold any section of the sizing box. Drag the timeline to where you want it.
- Timelines can also be created in Microsoft Excel or Microsoft Word .
Alternative: Building your PowerPoint Timeline Through Shapes

- To change the look of the circles you can dive back into the Format Shape tab.

Expert Q&A
You might also like.

- ↑ https://support.microsoft.com/en-us/office/create-a-timeline-in-powerpoint-for-the-web-d1bd35a0-bfa7-428b-ba3c-c8f5b6050791
- ↑ https://support.microsoft.com/en-us/office/how-certain-features-behave-in-web-based-powerpoint-a931f0c8-1305-4428-8f7c-9cfa00ef28c5
About This Article

- Send fan mail to authors
Is this article up to date?

Featured Articles

Trending Articles

Watch Articles

- Terms of Use
- Privacy Policy
- Do Not Sell or Share My Info
- Not Selling Info
wikiHow Tech Help:
Tech troubles got you down? We've got the tips you need
How to Create a Timeline in PowerPoint: A Step-by-Step Guide
Creating a timeline in PowerPoint is a breeze once you get the hang of it. It’s all about choosing the right template, adding your milestones, and customizing the design to fit your presentation. Here’s how you do it: Open PowerPoint, go to the Insert tab, select SmartArt, choose a timeline design, add your content, and tweak the design. Voila, you have a timeline that’s ready to impress your audience!
Step by Step Tutorial: Creating a Timeline in PowerPoint
Creating a timeline in PowerPoint is a fantastic way to visually represent a sequence of events. It can help your audience grasp the flow of a project, the history of a company, or the steps in a process. We’re about to walk through the steps to make your very own timeline.
Step 1: Open PowerPoint and Choose a Slide Layout
Select a slide layout that suits your timeline.
When you open PowerPoint, you’ll want to choose a blank slide or one that’s relatively plain. This gives you a clean canvas to work with.
Step 2: Insert SmartArt
Go to the Insert tab and click on SmartArt.
In the Insert tab, you’ll find a variety of options, but for timelines, SmartArt is your go-to. It’s a versatile tool that offers a range of graphics perfect for timelines.
Step 3: Choose a Timeline Design
Select a timeline layout from the Process category.
Once you click on SmartArt, a dialog box will pop up with different categories. Under the Process category, you’ll find timeline designs. Pick one that suits your content.
Step 4: Add Your Content
Type your milestones and dates into the SmartArt graphic.
After selecting your design, you can start adding your milestones and dates directly into the placeholders. This is where you personalize the timeline to match your needs.
Step 5: Customize the Design
Adjust the colors, fonts, and size of your timeline.
Don’t be afraid to get creative here. You can change the colors to match your brand or presentation theme, adjust the font for readability, and resize the graphic to fit your slide.
After you complete these steps, you’ll have a timeline that’s both informative and visually appealing, ready to be a standout feature in your presentation.
Tips for Creating a Timeline in PowerPoint
- Keep it simple. Don’t overcrowd your timeline with too much information.
- Use contrasting colors for different milestones to make them easily distinguishable.
- Align your timeline horizontally or vertically based on your slide layout and preference.
- Use icons or images to represent different points on the timeline for a more engaging look.
- Preview your timeline in Slide Show mode to make sure it’s clear and legible from a distance.
Frequently Asked Questions
How do i add more milestones to my timeline.
Click on your SmartArt graphic and use the “Add Shape” feature to insert additional milestones.
Can I animate my timeline in PowerPoint?
Yes, you can apply custom animations to your timeline elements to make them appear in sequence or all at once.
What if the SmartArt templates don’t fit my needs?
You can create a timeline from scratch using shapes and text boxes or look for downloadable timeline templates online that are compatible with PowerPoint.
How can I share my PowerPoint timeline?
You can save your presentation as a PDF, image, or video file, or present it live using PowerPoint’s presentation mode.
Is it possible to edit a timeline after I’ve created it?
Absolutely, just click on the timeline and make your changes. You can edit text, move shapes, or adjust the design as needed.
- Open PowerPoint and select a suitable slide layout.
- Insert SmartArt from the Insert tab.
- Choose a timeline design from the Process category.
- Add your milestones and dates to the graphic.
- Customize the design to your liking.
Crafting a timeline in PowerPoint is not just about getting your facts in order; it’s about telling a story that captivates your audience. Whether you’re mapping out the next big project, showcasing company milestones, or highlighting historical events, a well-constructed timeline can make your message resonate. Remember, a timeline is more than just dates and events; it’s a visual journey that can influence how your audience perceives the information. So, take the time to choose the right design, color scheme, and layout that best illustrates your narrative. And who knows, your PowerPoint timeline might just be the thing that sticks with your viewers long after the presentation is over. Now go ahead, give it a try, and watch your timeline come to life!

Matthew Burleigh has been writing tech tutorials since 2008. His writing has appeared on dozens of different websites and been read over 50 million times.
After receiving his Bachelor’s and Master’s degrees in Computer Science he spent several years working in IT management for small businesses. However, he now works full time writing content online and creating websites.
His main writing topics include iPhones, Microsoft Office, Google Apps, Android, and Photoshop, but he has also written about many other tech topics as well.
Read his full bio here.
Share this:
Join our free newsletter.
Featured guides and deals
You may opt out at any time. Read our Privacy Policy
Related posts:
- Can I Create a Timeline in Powerpoint?
- How to Add Page Numbers in Powerpoint 2010
- How to Set Time for Slides in Powerpoint
- How to Save Powerpoint as PDF with Notes
- How to Delete a Slide in Powerpoint 2010
- How to Loop a Slideshow on Powerpoint 2013
- How to Unhide a Slide in Powerpoint 2013
- How to Make a Timeline on Google Docs: A Step-by-Step Guide
- How to Rotate a Slide in PowerPoint: A Step-by-Step Guide
- How to Make a Powerpoint Slide Vertical in Powerpoint 2013
- How to End Powerpoint on Last Slide in Powerpoint 2010
- How to Create a PowerPoint Presentation Step by Step: 2024 Guide
- How to Hide a Slide in Powerpoint 2010
- How to Change Hyperlink Color in Powerpoint 2010 (An Easy 5 Step Guide)
- How to Add a New Slide to PowerPoint: A Step-by-Step Guide
- How to Insert Slide Number PowerPoint: The Ultimate 2024 Guide
- How to Insert Slides from Another Presentation in Powerpoint 2010
- How to Embed a Word Document Into PowerPoint 2000: A Step-by-Step Guide
- How to Insert a Pyramid in Microsoft Excel 2010
- How to Drag Slides From One PowerPoint to Another: A Step-by-Step Guide
- Is Hulu Worth It?
- iPad Pro vs. Surface Pro: What's the Difference?
How to Create a Timeline in PowerPoint
Use a template or copy it from another app
:max_bytes(150000):strip_icc():format(webp)/acp_casual_headshot-5b59662146e0fb002561f951.jpg "create timeline presentation")
- Villanova University
What to Know
- Import: Export the timeline from another program into a graphical format (JPG, GIF, or PNG). Insert the timeline graphic into PowerPoint.
- SmartArt: Select Insert > SmartArt . Choose a layout. Use text panes to create the timeline. Change colors or styles or reorder elements.
- Template: Use a PowerPoint template to create a timeline. Move and copy template objects to create new steps or milestones.
There are several ways to insert a PowerPoint timeline into your presentation. You can use copy and paste, SmartArt, a template, or an add-in. We show you how to do all four using PowerPoint 2019, 2016, 2013; PowerPoint for Microsoft 365; Powerpoint for Mac; or PowerPoint Online.
How to Paste a Timeline From Another Program Into PowerPoint
A straightforward way to get a timeline into your PowerPoint presentation file is to create it in another program, copy it, and paste it into PowerPoint. Just export the timeline from a program like Microsoft Project or Excel into a graphical format such as JPG, GIF, or PNG, then insert the timeline graphic into PowerPoint like you would insert pictures or clipart. It's also possible to link the timeline in a way similar to adding Excel data to Word , which updates automatically when you make changes.
How to Make a Timeline in PowerPoint With SmartArt
PowerPoint also offers a built-in function, called SmartArt, which makes adding timelines a breeze. SmartArt objects are configurable graphics that you set up in a point-and-click fashion.
To use a SmartArt graphic for a timeline:
Go to Insert .
Select SmartArt .
In the dialog box that appears, browse for the SmartArt graphic type that best suits your need.
Items in the Process category are good options. For example, choose Basic Timeline or Vertical Chevron List to get started on your timeline.
Select OK to insert the SmartArt into your presentation.
The SmartArt graphic appears on the slide along with a text pane where you'll edit the text. Add text to the objects by editing the bullets in the text pane. It works just like a regular list, press Tab and Shift + Tab to make an indent and outdent or press Enter to add a new bullet point.
Continue to decorate your SmartArt by changing the colors, choosing a different style, and reordering elements.
PowerPoint Online doesn't contain as many SmartArt graphics formats as the desktop version of PowerPoint. The ones mentioned in this article are available.
How to Make a Timeline in PowerPoint With a Template
There are pre-configured PowerPoint templates that allow you to quickly piece together a timeline.
The PPTX file pictured above is available from the Microsoft Office Template Gallery . Move and copy the existing objects on these timeline templates to create new phases of the timeline, or new milestones and annotations. This method is a bit more hands-on, but it allows you to get the exact results you want.
Templates in PPTX format are compatible with all versions of PowerPoint.
How to Create a Timeline in PowerPoint With an Add-In
Another approach is to use a PowerPoint Add-in specifically built for creating timelines. Office Timeline is an excellent choice if you're looking to add project timelines (e.g., Gantt Charts), and it's available in a free version.
You'll need a few minutes to get up and running with the following steps:
Download the Free Edition of the app from the Office Timeline website.
Double-click the .EXE file to start the installation.
Once the installation is complete, PowerPoint starts automatically, shows a quick introduction wizard, and provides a sample file.
Once installed, a new Office Timeline Free tab is added to Powerpoint. This tab contains tools to create new timelines, select the style of timeline to be inserted, and enter or import the data on which the timeline is based.
The Office Timeline Add-In is only available for Windows versions of PowerPoint. However, there's also Pincello , a web-based tool that outputs timelines in PowerPoint format.
Armed with the above options, you're now prepared to create any type of timeline you want in PowerPoint.
Get the Latest Tech News Delivered Every Day
- How to Use Copilot in Powerpoint
- How to Draw Freehand in PowerPoint
- How to Create a Microsoft Sway Presentation
- How to Create a Timeline in Excel
- How to Make a Timeline in Word
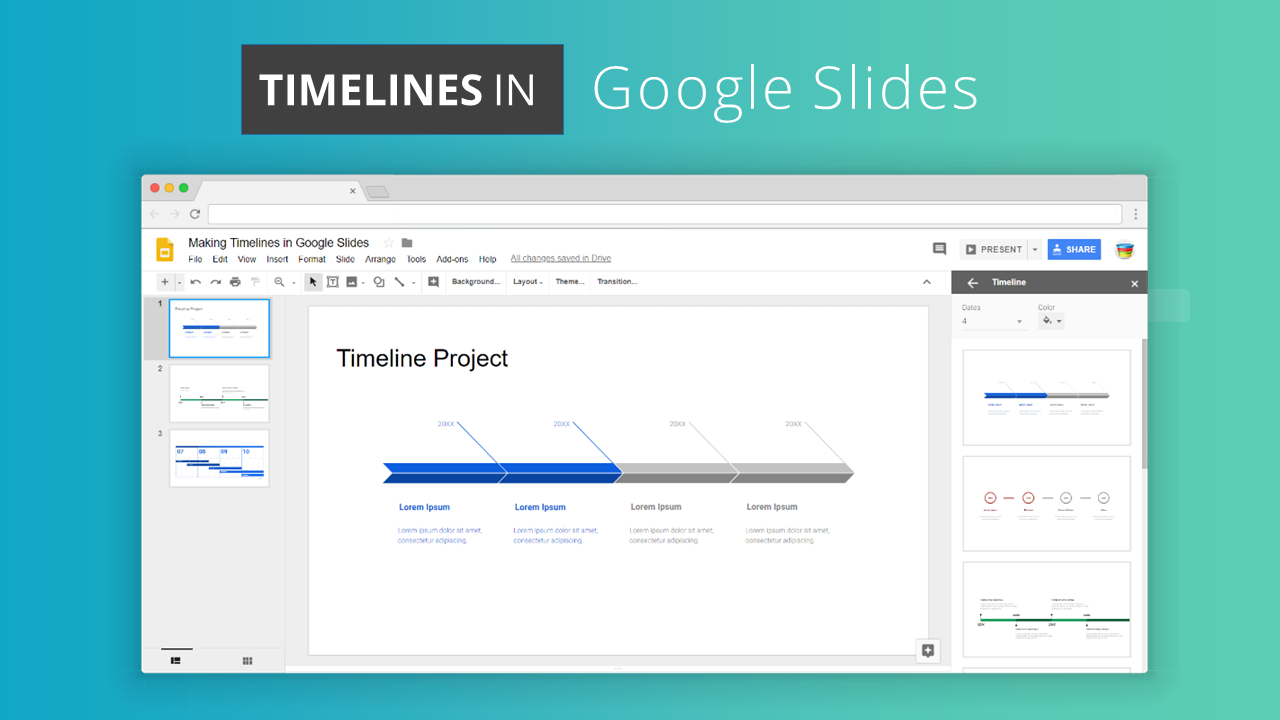
- How to Make a Timeline on Google Slides
- Best Free Family Feud PowerPoint Templates
- How to Create a Microsoft Word Flowchart
- What Is a GIF?
- 10 Free PowerPoint Game Templates
- The 8 Best Slideshow Apps of 2024
- How to Copy a PowerPoint Design Template to Another Presentation
- How to Make a Word Cloud in PowerPoint
- Create a Default Presentation Template in PowerPoint
- Create Family Trees Using PowerPoint Organization Chart
- How to Insert PDF Files Into PowerPoint Presentations
Got any suggestions?
We want to hear from you! Send us a message and help improve Slidesgo
Top searches
Trending searches

teacher appreciation
11 templates

17 templates

el salvador
32 templates

summer vacation
19 templates

27 templates
Timeline Infographics
Free google slides theme, powerpoint template, and canva presentation template.
Timeline infographics are simply great if you need to create a list of events, steps or processes in chronological order or if you want to mark some milestones! Never miss a key action, a date or a deadline again! They are very visual, clear to follow and logical.
What will you find in these slides? We have added a lot of different timelines: curved, straight, resembling a road, hand-drawn, formal… You choose! Their designs are varied, so you can select your own one depending on the purpose: school, business, marketing… As usual, blue, yellow and red predominate- In addition, you will also find icons that you can relate to your timeline.
Features of these infographics
- Infographic templates with plenty of timelines
- 100% editable and easy to modify
- 30 different infographics to boost your presentations
- Include icons and Flaticon’s extension for further customization
- Designed to be used in Google Slides, Canva, and Microsoft PowerPoint and Keynote
- 16:9 widescreen format suitable for all types of screens
- Include information about how to edit and customize your infographics
How can I use the infographics?
Am I free to use the templates?
How to attribute the infographics?
Attribution required If you are a free user, you must attribute Slidesgo by keeping the slide where the credits appear. How to attribute?
Related posts on our blog.

How to Add, Duplicate, Move, Delete or Hide Slides in Google Slides

How to Change Layouts in PowerPoint

How to Change the Slide Size in Google Slides
Related presentations.

Premium template
Unlock this template and gain unlimited access

Customizable project timeline and roadmap templates
Plotting your course isn't just clarifying, it can be captivating too. build your next project timeline or roadmap using designer-developed, customizable templates. no matter what kind of project you're planning or managing, there's a timeline template that'll keep you on track..

Show your plan at a glance with timeline templates
Don't waste any time—start your next project plan or production roadmap with a timeline template. Timelines are a great way to visually organize your thoughts, plotting each step that you plan to execute. Making planners and trackers into timelines is a snap when working with templates. You can also use timeline templates to show how far a project has come along, every milestone accounted for. Small businesses can find timelines helpful for pitching new business during presentations as well as planning new products. And adding a timeline to a wedding save the date or an invitation is a great way to let guests know everything they can look forward to during your celebration. Timelines aren't just for project planning. Resumes are themselves a kind of timeline, and there are some fantastic graphic resume layouts that incorporate easy-to-read timelines that make your work history stand out.

An official website of the United States government
Here’s how you know
The .gov means it’s official. Federal government websites often end in .gov or .mil. Before sharing sensitive information, make sure you’re on a federal government site.
The site is secure. The https:// ensures that you are connecting to the official website and that any information you provide is encrypted and transmitted securely.
Take action
- Report an antitrust violation
- File adjudicative documents
- Find banned debt collectors
- View competition guidance
- Competition Matters Blog
New HSR thresholds and filing fees for 2024
View all Competition Matters Blog posts
We work to advance government policies that protect consumers and promote competition.
View Policy
Search or browse the Legal Library
Find legal resources and guidance to understand your business responsibilities and comply with the law.
Browse legal resources
- Find policy statements
- Submit a public comment

Vision and Priorities
Memo from Chair Lina M. Khan to commission staff and commissioners regarding the vision and priorities for the FTC.
Technology Blog
Consumer facing applications: a quote book from the tech summit on ai.
View all Technology Blog posts
Advice and Guidance
Learn more about your rights as a consumer and how to spot and avoid scams. Find the resources you need to understand how consumer protection law impacts your business.
- Report fraud
- Report identity theft
- Register for Do Not Call
- Sign up for consumer alerts
- Get Business Blog updates
- Get your free credit report
- Find refund cases
- Order bulk publications
- Consumer Advice
- Shopping and Donating
- Credit, Loans, and Debt
- Jobs and Making Money
- Unwanted Calls, Emails, and Texts
- Identity Theft and Online Security
- Business Guidance
- Advertising and Marketing
- Credit and Finance
- Privacy and Security
- By Industry
- For Small Businesses
- Browse Business Guidance Resources
- Business Blog
Servicemembers: Your tool for financial readiness
Visit militaryconsumer.gov
Get consumer protection basics, plain and simple
Visit consumer.gov
Learn how the FTC protects free enterprise and consumers
Visit Competition Counts
Looking for competition guidance?
- Competition Guidance
News and Events
Latest news, ftc order bans former pioneer ceo from exxon board seat in exxon-pioneer deal.
View News and Events
Upcoming Event
Older adults and fraud: what you need to know.
View more Events
Sign up for the latest news
Follow us on social media
--> --> --> --> -->

Playing it Safe: Explore the FTC's Top Video Game Cases
Learn about the FTC's notable video game cases and what our agency is doing to keep the public safe.
Latest Data Visualization

FTC Refunds to Consumers
Explore refund statistics including where refunds were sent and the dollar amounts refunded with this visualization.
About the FTC
Our mission is protecting the public from deceptive or unfair business practices and from unfair methods of competition through law enforcement, advocacy, research, and education.
Learn more about the FTC

Meet the Chair
Lina M. Khan was sworn in as Chair of the Federal Trade Commission on June 15, 2021.
Chair Lina M. Khan
Looking for legal documents or records? Search the Legal Library instead.
- Cases and Proceedings
- Premerger Notification Program
- Merger Review
- Anticompetitive Practices
- Competition and Consumer Protection Guidance Documents
- Warning Letters
- Consumer Sentinel Network
- Criminal Liaison Unit
- FTC Refund Programs
- Notices of Penalty Offenses
- Advocacy and Research
- Advisory Opinions
- Cooperation Agreements
- Federal Register Notices
- Public Comments
- Policy Statements
- International
- Office of Technology Blog
- Military Consumer
- Consumer.gov
- Bulk Publications
- Data and Visualizations
- Stay Connected
- Commissioners and Staff
- Bureaus and Offices
- Budget and Strategy
- Office of Inspector General
- Careers at the FTC
Fact Sheet on FTC’s Proposed Final Noncompete Rule
- Competition
- Office of Policy Planning
- Bureau of Competition
The following outline provides a high-level overview of the FTC’s proposed final rule :
- Specifically, the final rule provides that it is an unfair method of competition—and therefore a violation of Section 5 of the FTC Act—for employers to enter into noncompetes with workers after the effective date.
- Fewer than 1% of workers are estimated to be senior executives under the final rule.
- Specifically, the final rule defines the term “senior executive” to refer to workers earning more than $151,164 annually who are in a “policy-making position.”
- Reduced health care costs: $74-$194 billion in reduced spending on physician services over the next decade.
- New business formation: 2.7% increase in the rate of new firm formation, resulting in over 8,500 additional new businesses created each year.
- This reflects an estimated increase of about 3,000 to 5,000 new patents in the first year noncompetes are banned, rising to about 30,000-53,000 in the tenth year.
- This represents an estimated increase of 11-19% annually over a ten-year period.
- The average worker’s earnings will rise an estimated extra $524 per year.
The Federal Trade Commission develops policy initiatives on issues that affect competition, consumers, and the U.S. economy. The FTC will never demand money, make threats, tell you to transfer money, or promise you a prize. Follow the FTC on social media , read consumer alerts and the business blog , and sign up to get the latest FTC news and alerts .
Press Release Reference
Contact information, media contact.
Victoria Graham Office of Public Affairs 415-848-5121
IMAGES
VIDEO
COMMENTS
How to manually make a timeline in PowerPoint 1. Create a basic timeline graphic. If you prefer to manually build a PowerPoint timeline, you will need to use PowerPoint's SmartArt tools to create a basic visual and then adjust that graphic to make it look better for presentations. Here are the exact steps: Create a new presentation or open an ...
Create a timeline. On the Insert tab, click SmartArt. In the Choose a SmartArt Graphic gallery, click Process, and then double-click a timeline layout. Tip: There are two timeline SmartArt graphics: Basic timeline and Circle Accent Timeline, but you can also use almost any process-related SmartArt graphic. Click [Text], and then type or paste ...
2. Use PowerPoint's SmartArt to create your Timeline in seconds. Once your information is organized, PowerPoint's SmartArt will work its magic. Select the text box as follows: Ensure you are on the "Home" tab and look for the "Convert to SmartArt" button. Insert the timeline design you prefer (it can be changed later).
Creating a timeline in Google Slides using pre-defined diagram designs. Step 1. Insert a timeline diagram: You can insert timeline diagrams in Google Slides via Insert -> Diagrams. There are a number of diagram types listed in this section, make sure you pick Timeline diagrams from the right pane. Step 2.
Here's how it's done. Open your PowerPoint presentation and navigate to the slide in which you would like to add a timeline. Once there, navigate to the "Insert" tab and select "SmartArt" from the "Illustrations" group. The "Choose a SmartArt Graphic" window will appear. Here, select "Process" from the left-hand pane.
Resize the timeline. Select the timeline. You'll see the sizing handles appear in a box around the timeline. Click one corner of the timeline and drag it outwards to make it bigger. Alternatively, drag it inwards to make it smaller. To move the entire timeline, click and hold any section of the sizing box. Drag the timeline to where you want it.
Learn four methods to create a PowerPoint Timeline. There are three-click-FAST timelines, time scale timelines, elegant timelines, and sophisticated professi...
Open your PowerPoint presentation. Select or create the slide you want to insert the timeline to. In Drawing, select Shapes → Lines. Here, you'll see different options including Line arrow, Arc, and Connectors. Select the option Line in Lines. Click and drag the cursor to draw a simple line. Pro tip: Hold down Shift while dragging to create ...
Summary. Open PowerPoint and select a suitable slide layout. Insert SmartArt from the Insert tab. Choose a timeline design from the Process category. Add your milestones and dates to the graphic. Customize the design to your liking.
Creating text boxes. In the toolbar, select Text box. This is the final step of our tutorial on creating a timeline in Google Slides. Click and drag out the area you want the text to be in. Type your title in this text box. We'll use a title and a description in each text box to provide a short explanation of the milestone.
Below are 11 types of timelines used in presentations. 1. Chronological timeline - Shows events or milestones in the order of occurrence. It shows the progression of events over time. Customize this template and make it your own! Edit and Download. 2. Linear timeline - A chronological representation of events.
Insert the timeline graphic into PowerPoint. SmartArt: Select Insert > SmartArt. Choose a layout. Use text panes to create the timeline. Change colors or styles or reorder elements. Template: Use a PowerPoint template to create a timeline. Move and copy template objects to create new steps or milestones.
Free Online Timeline Maker: Look Professional With A Few Clicks. Create Your Timeline It's free and easy to use. Professional templates and powerful features for advanced visualization. Create timelines for project management, company history and more. Lines, shapes, icons and other design elements to decorate your timeline.
Here are some steps you can follow when creating a timeline in PowerPoint: 1. Launch timeline template options. The first step when making a timeline on Microsoft PowerPoint is to create a template. To do this, start by launching the PowerPoint app and clicking the "Insert" tab on the top bar, which prompts a set of options.
This free timeline PowerPoint template will help you convey all your project milestones and upcoming events. It's playful design and illustrations will make for an outstanding presentation. It includes 8 different types of timelines, including one for cyclical processes and a Gantt chart.
Free Google Slides theme, PowerPoint template, and Canva presentation template. Timeline infographics are simply great if you need to create a list of events, steps or processes in chronological order or if you want to mark some milestones! Never miss a key action, a date or a deadline again!
Click "Create now" on your preferred video slideshow and start editing. Reorder the Scenes. The timetable inside each editor is equipped with drag-and-drop features, so no editing skills are needed. Press + button at the end of the timeline or click the space between video holders to add new scenes.
Our simple timeline maker lets you have the time of your life while designing. It's intuitive and easy to use for beginners and experienced designers. You can brand it to your liking and collaborate with your peers using our drag-and-drop editing tools. Publish your timeline infographic to present it for everyone to see.
Customizable project timeline and roadmap templates. Plotting your course isn't just clarifying, it can be captivating too. Build your next project timeline or roadmap using designer-developed, customizable templates. No matter what kind of project you're planning or managing, there's a timeline template that'll keep you on track. Category. Color.
How to Create a Presentation with AI: A Step-by-Step Guide. With AI presentation tools, creating a compelling presentation is within reach. This step-by-step guide will equip you to transform your ideas into a stunning presentation, all with the help of AI. 1. Choose Your AI Presentation Tool
The following outline provides a high-level overview of the FTC's proposed final rule:. The final rule bans new noncompetes with all workers, including senior executives after the effective date.